January 11, 2012

Making a Valentine Heart Wreath with Deco Mesh

Making Valentine Heart Wreath Deco Mesh Idea

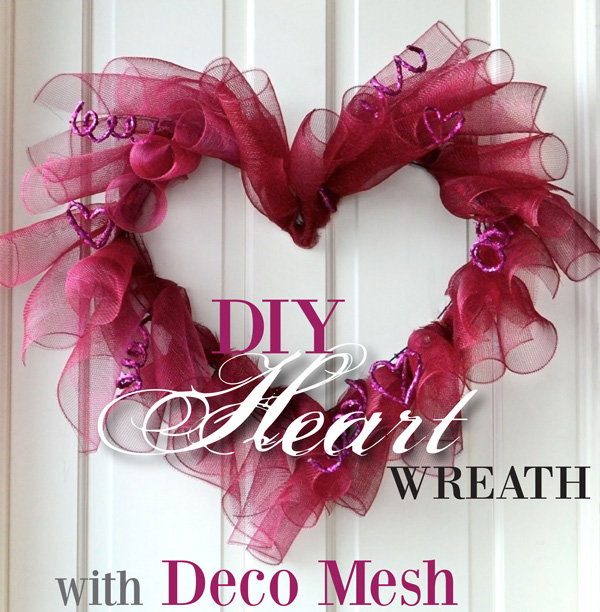
Meet your sweet heart at the front door with this cute heart wreath! Celebrate Valentine's day by creating this deco mesh heart shaped wreath made with a new technique using the deco mesh curls. These deco mesh curls are very easy to fall for! You will see how easy it is to make in this step-by-step DIY tutorial.
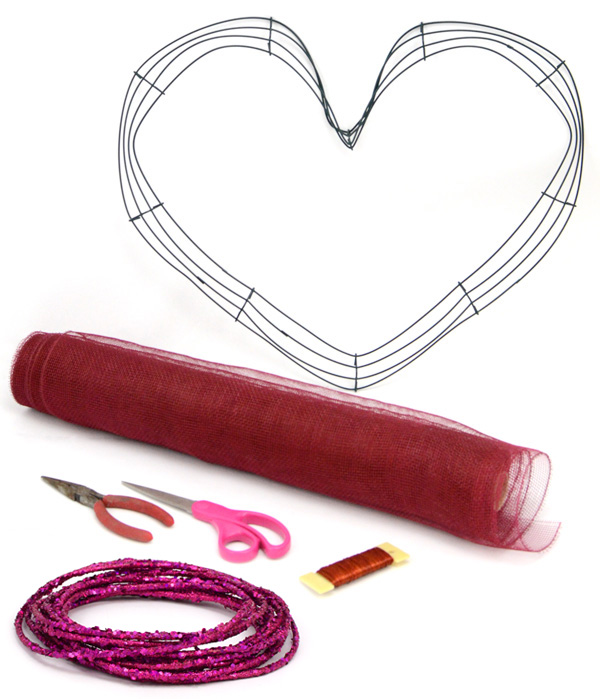
SUPPLIES:
Scissors
Pliers/Wire Cutters

All of the supplies you need can be found at Mardi Gras Outlet.com.

STEP 1: Bend the Wreath Form
Take the 20-inch round box wire wreath form and bend into a heart shape. This step takes some elbow grease, so use a strong person if there is one around.

An alternative is to use 2 wire coat hangers. Bend both into a heart shape, and then wrap them together with craft wire. This makes it sturdier and wider so that your deco mesh curls will stay put.
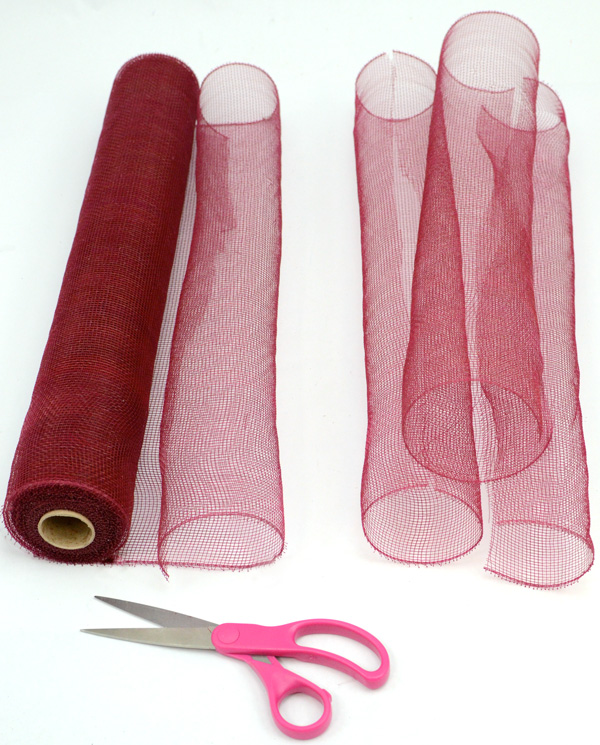
STEP 2: Cut the Deco Mesh
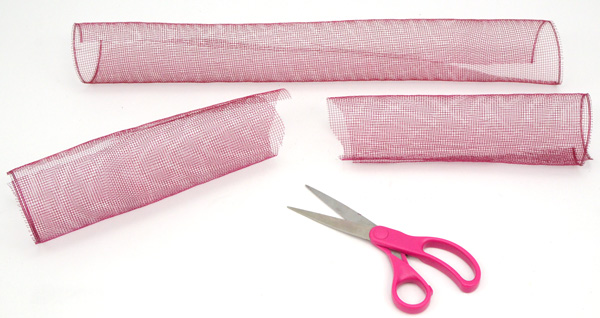
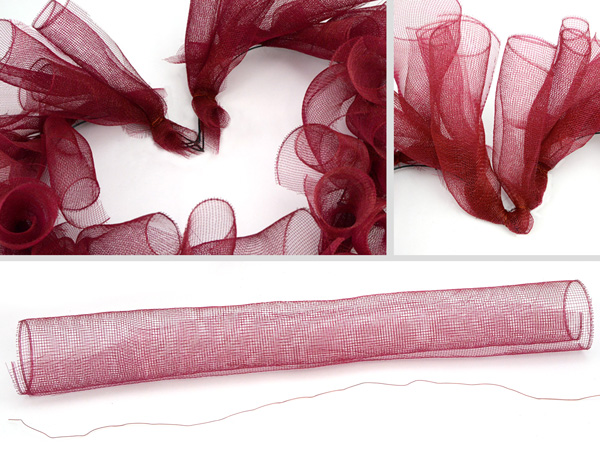
Make the curls by cutting pieces of deco mesh that are about 9-inches wide. Deco mesh curls naturally, so an easy way to measure is to let it curl for 1 loop, and then trim (see above photograph). You need about 20 pieces, which uses up most of the roll.
STEP 3: Cut in Half
Cut all of the curls in half except for 1 piece.
STEP 4: Cut Wire
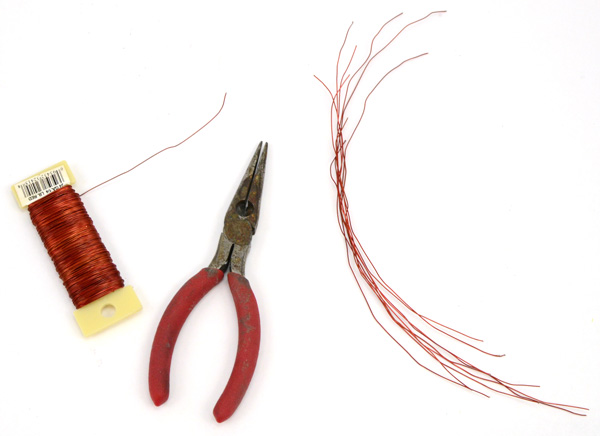
Cut around 20 pieces of red craft wire. They should each be about 10 to 12 inches long.
STEP 5: Tie Curls
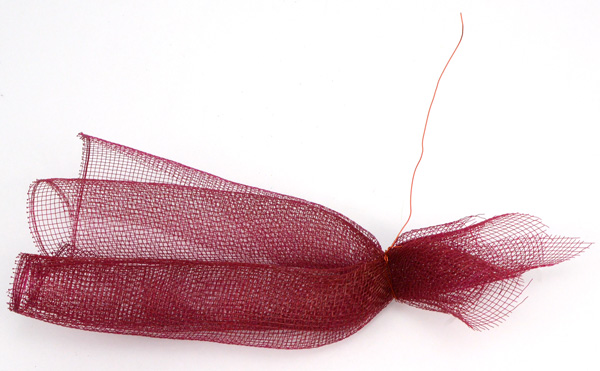
Roll a curl tightly, and hold together in one hand with a second tight curl. Use a piece of craft wire to secure them together at the cut end. Leave a few inches of extra wire hanging out.

For a more even-looking wreath, make sure the pair of curls are close together and pointing in the same direction. Notice that the wire doesn't bunch the curls, but holds the ends together flatly.
STEP 5: Attach to Wreath Form
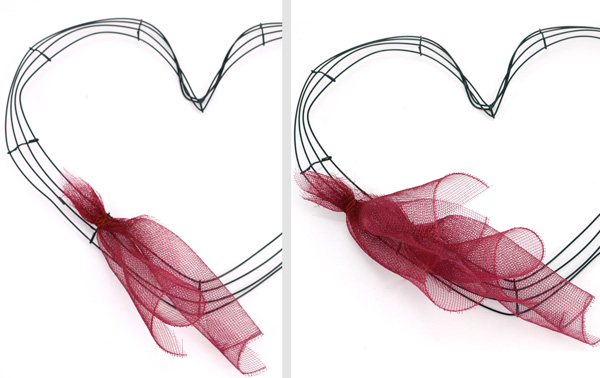
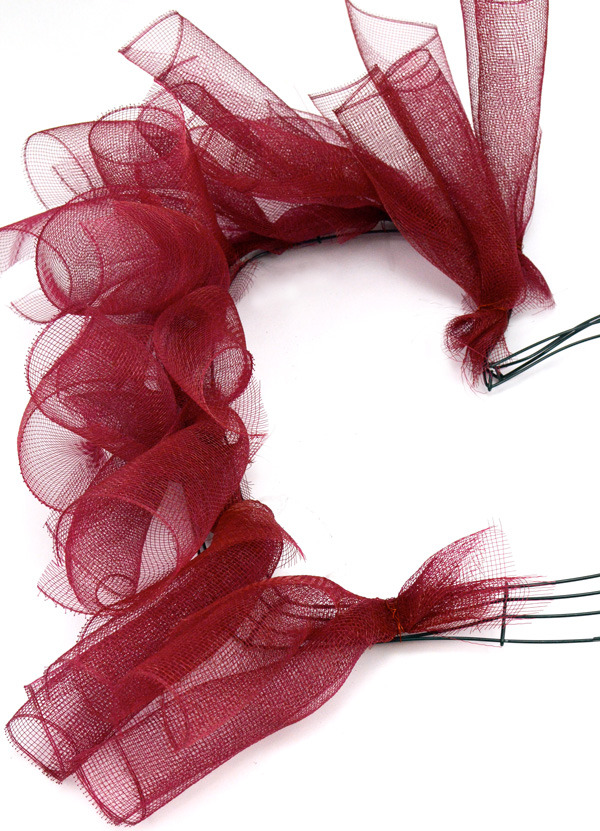
Begin at the bottom left side and secure the curls to the wire wreath form, using the extra loose craft wire. The curls should be pointing down and to the right. Attach a second pair a few inches above the first. The curls should point down and cover where you secured the first pair. 
STEP 6: Fill the Wreath Form
Continue attaching the curls until you reach the top center of the heart. Now fill in the other half by starting at the bottom right in the same way.
STEP 7: Cover the Top Center
Once you have filled in the wreath, you'll probably notice some exposed ends at the top center. Remember the one curl you didn't cut in half? Use that and an extra long piece of craft wire to cover it. Attach by centering the curl and tying it only at the middle to the wreath form.
STEP 8: Add Accents
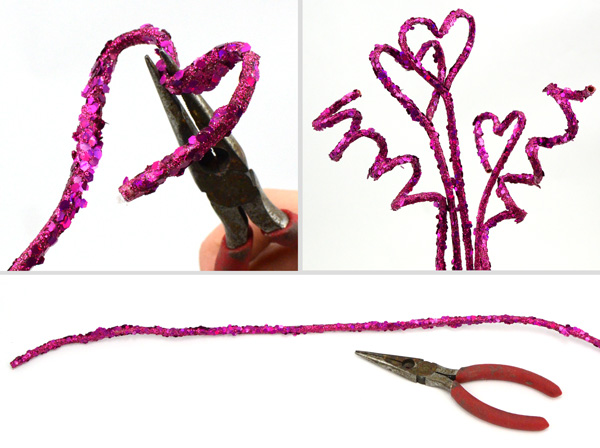
Using wire cutters, cut about 8 pieces of fuchsia glamour rope that are about 10-inches long. Glamour rope is a type of glitter wire that you can bend into shapes. Bend the ends of them into heart shapes and curls with pliers.

Attach to the box wire wreath form by wrapping the other end tightly. Leave space between the glamour rope accents.

You're finished!
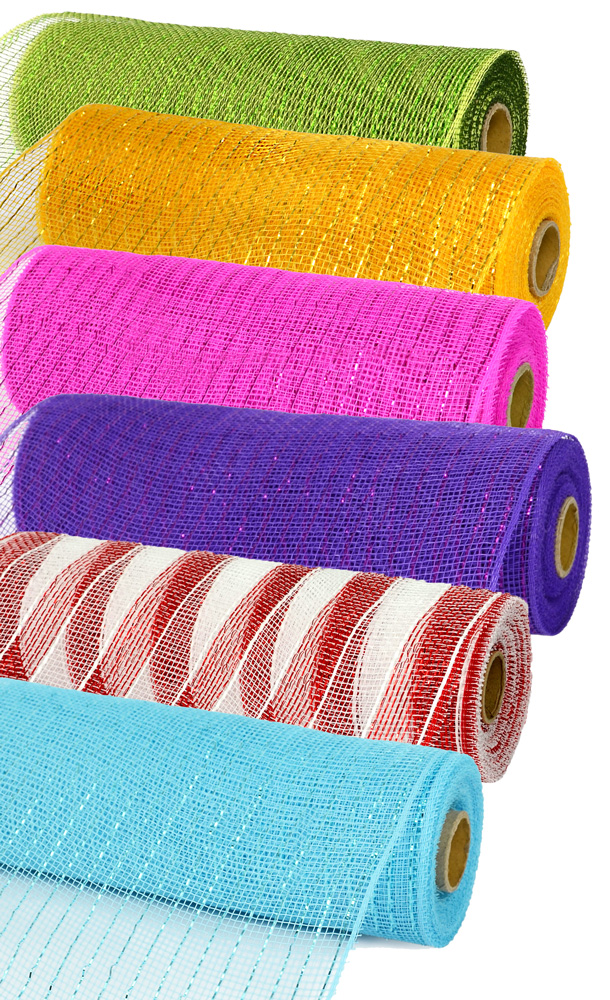
Deco mesh and glamour rope come in many colors and finishes like metallic, wide foil and patterns. We think this style of wreath would look great in not only in burgundy, but also in wide foil red, hot pink, metallic pink or white/red stripes. It depends on your personal preference and what best matches your decor.

We have even more ideas for Valentine's Day Wreaths. CLICK HERE to see our new post.

Happy Crafting & Happy Valentine's Day!
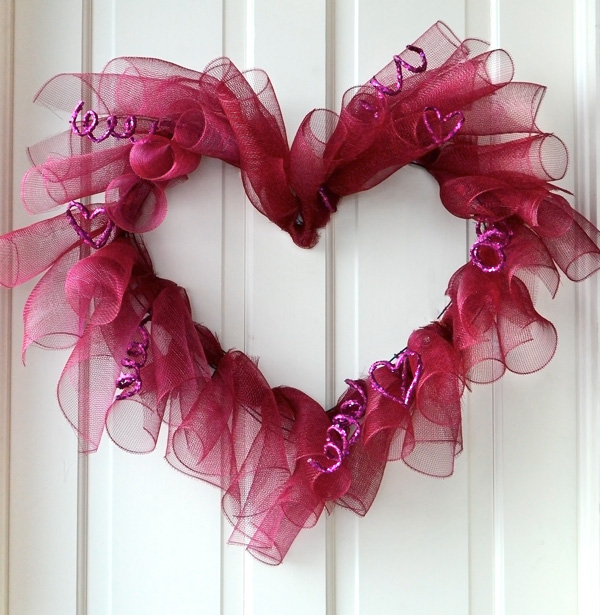
Deco Mesh Valentine's Day Heart Wreath How to Tutorial

*To see more tutorials and ideas on how to craft with deco mesh, click here or click on our "Videos" page above.

January 6, 2012

Carnival Season is Here! Door Decorating Ideas

Epiphany is today which marks the beginning of Carnival season. Epiphany, or 12th night, is the Christian holiday celebrating the day that the three kings bearing gifts visited baby Jesus.

Epiphany ushers in the Mardi Gras season, which lasts until Mardi Gras day, or Fat Tuesday on February 21st this year. Celebrate the arrival of the carnival season by changing wreath and door entryway decorations over from Christmas to Mardi Gras. Below you will find photographs and ideas to inspire you.

Happy Mardi Gras. Let the fun begin!


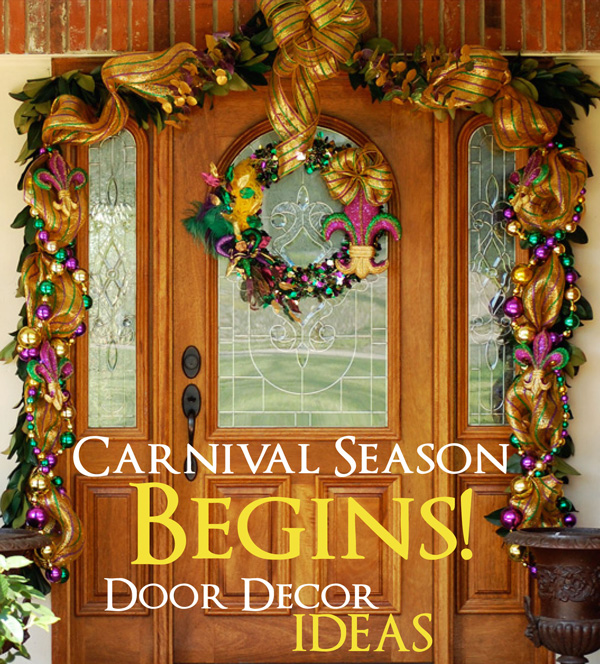
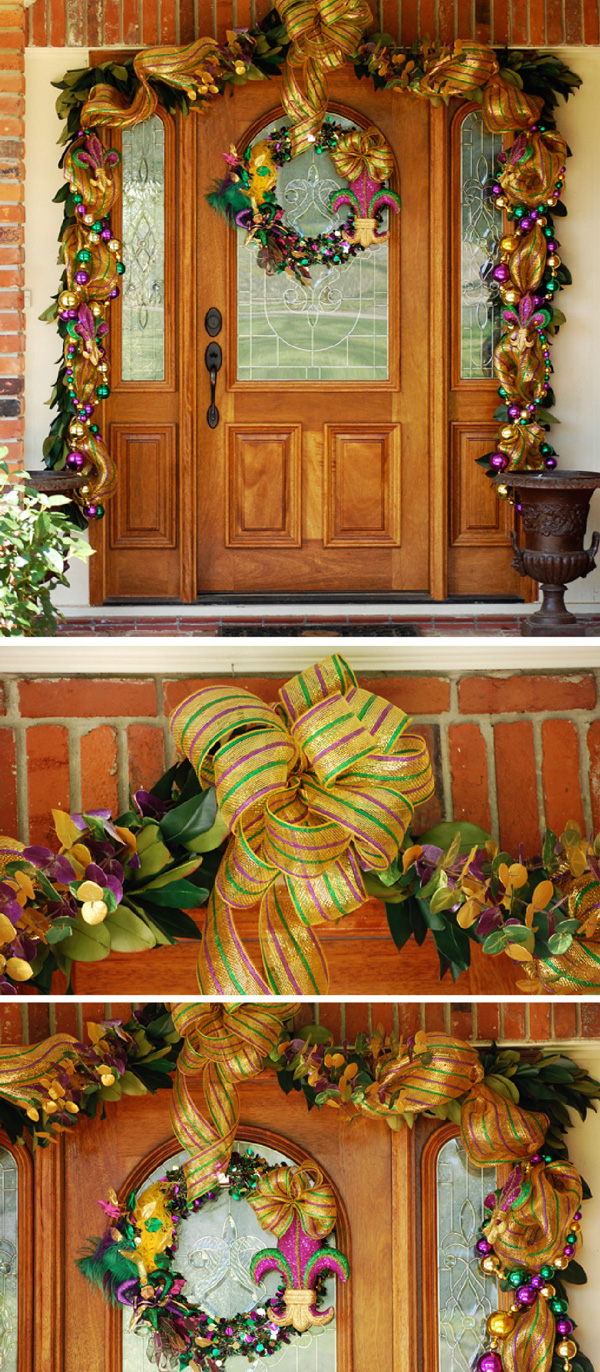
This doorway featured above goes all out with Mardi Gras deco mesh, Mardi gras beads, metallic fleur de lis and a custom wreath. Top it all off with a big bow.


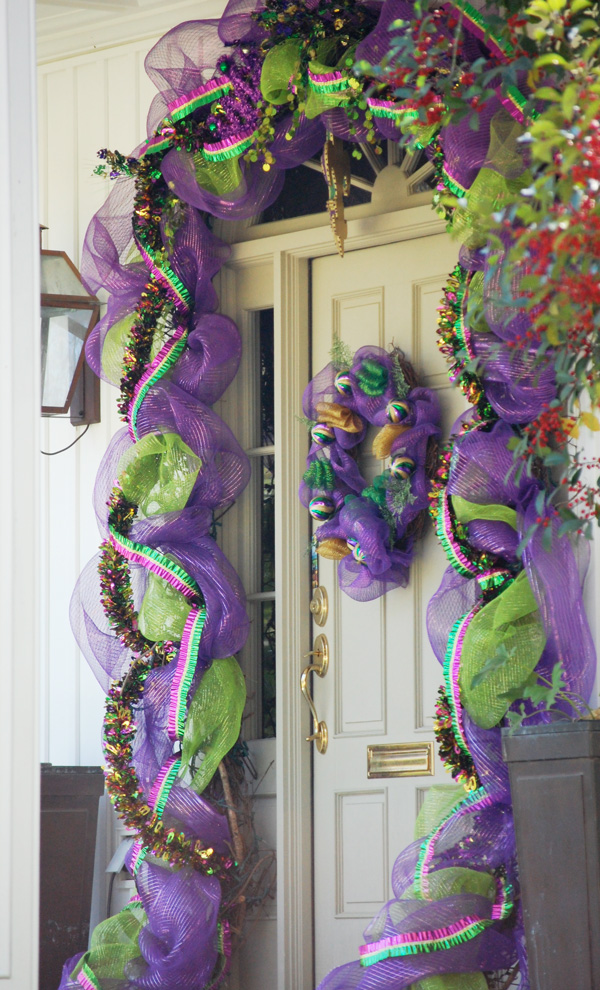
Making your own deco mesh garland and wreath gives you big glitz and glam. This decorating theme wraps the whole door way in fun with purple metallic mesh, lime metallic mesh and a custom Mardi Gras wreath. Work wreath forms make creating a custom wreath very simple. Click here to see a list of our easy video tutorials.

Accent the basic deco mesh garland and wreath with foil ribbon, tinsel garland and fun Mardi Gras swirl ornaments.


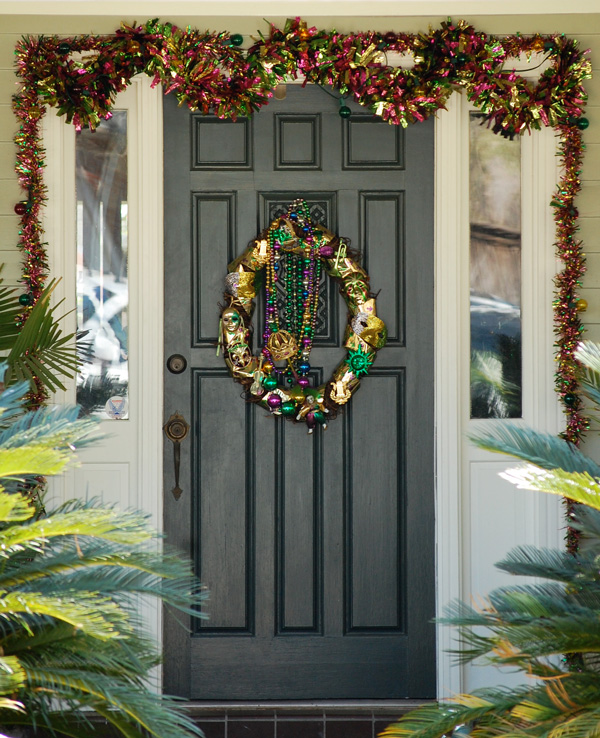
For a simple garland, drape different types of tinsel garland over the door. Adding multiple garlands, one hung straight and the other swooped, creates more visual interest.


The Traditional symbols of Mardi Gras include fleur de lis, masks, beads, crowns, jesters, feathers and anything glitzy. Any basic wreath can be accented with Mardi Gras items to turn a plain wreath into a carnival wreath. Above a plain grapevine wreath was accented with beads, masks and ribbon.


Use one of these Mardi Gras symbols to add a simple accent to your door. This pair of doors uses simple metallic fleur de lis accents instead of a wreath.

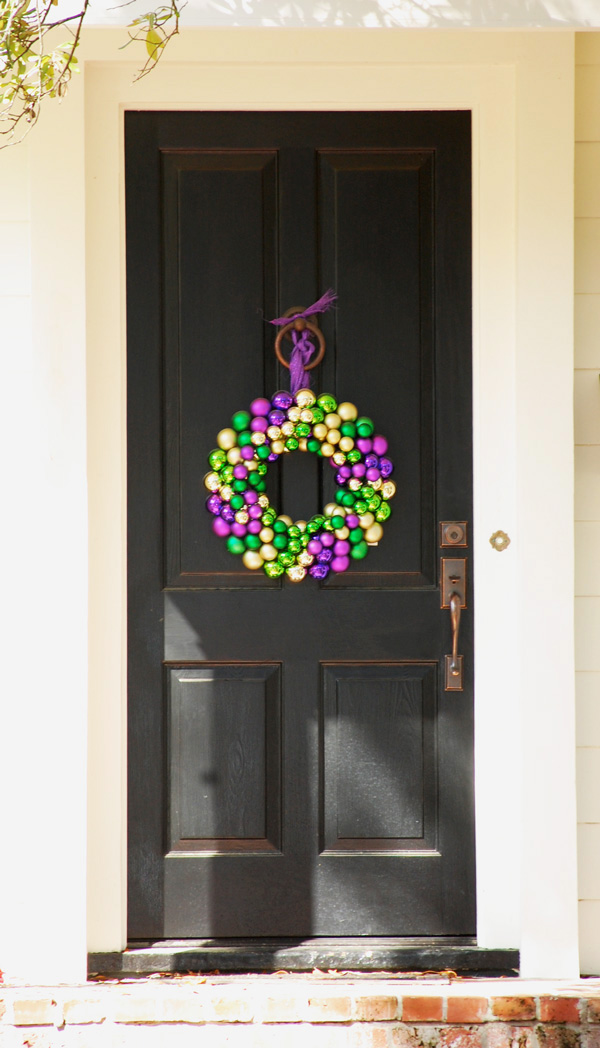
Not feeling crafty? This metallic Mardi Gras ball ornament wreath  looks crafty but is available already assembled for you. Easy and festive, this ball ornament wreath looks great on this darker-colored door.


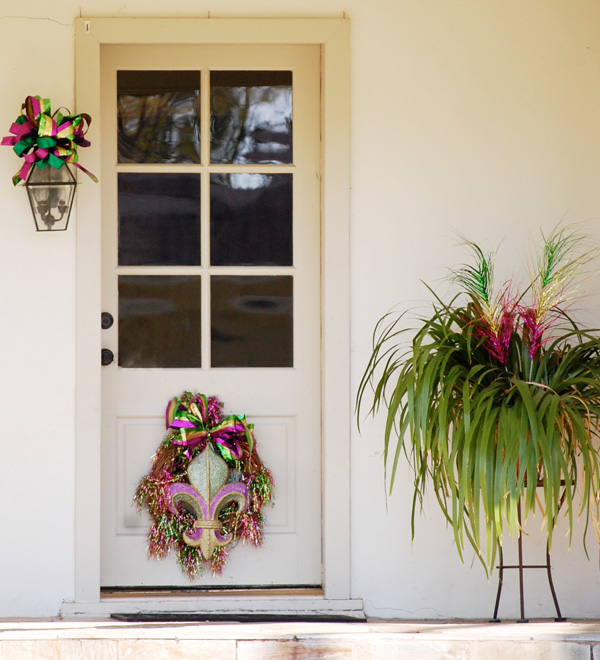
Coordinate your wreath with accents on the porch and and even your greenery. This home not only decorated the door with a wreath hung low to keep the window clear, but also added a touch of sparkle to the porch light and planter. The metallic Mardi Gras bow on the light is a fun accent. Custom bows are easy to create. See our tutorials for details. Adding festive metallic floral picks into the planter creates a third point of interest around the door.

Here are some links to the supplies used on this porch:
Glitter fleur de lis ornaments, bows and feathery floral sprays work well together for this entryway.

Keep a look out for more Mardi Gras decorating ideas now that Carnival season is here. Laissez les bon temps rouler!

*Supply list for the leading photo:
Mardi Gras Stripe Deco Mesh
Mardi Gras Stripe 4" Ribbon
Glitter Fleur de Lis
Jumbo Mardi Gras Beads
Jester Ornament
Tinsel Wreath
Feathers


December 27, 2011

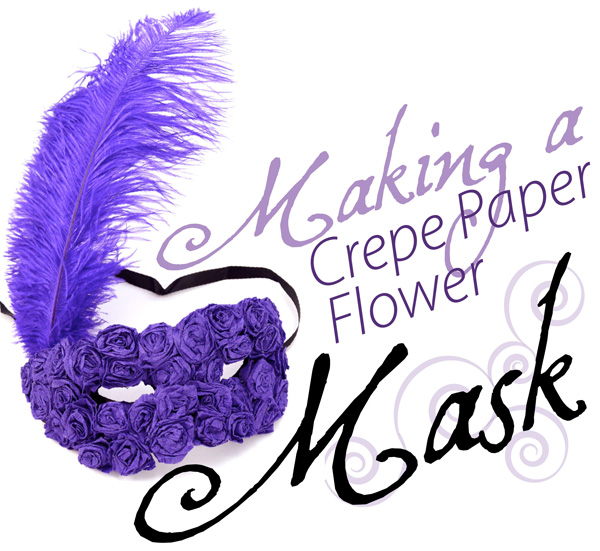
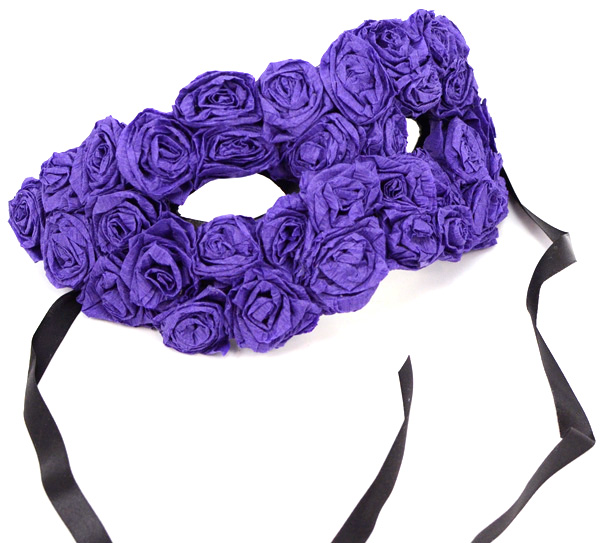
Masquerade Mask with Crepe Paper Flowers- Tutorial

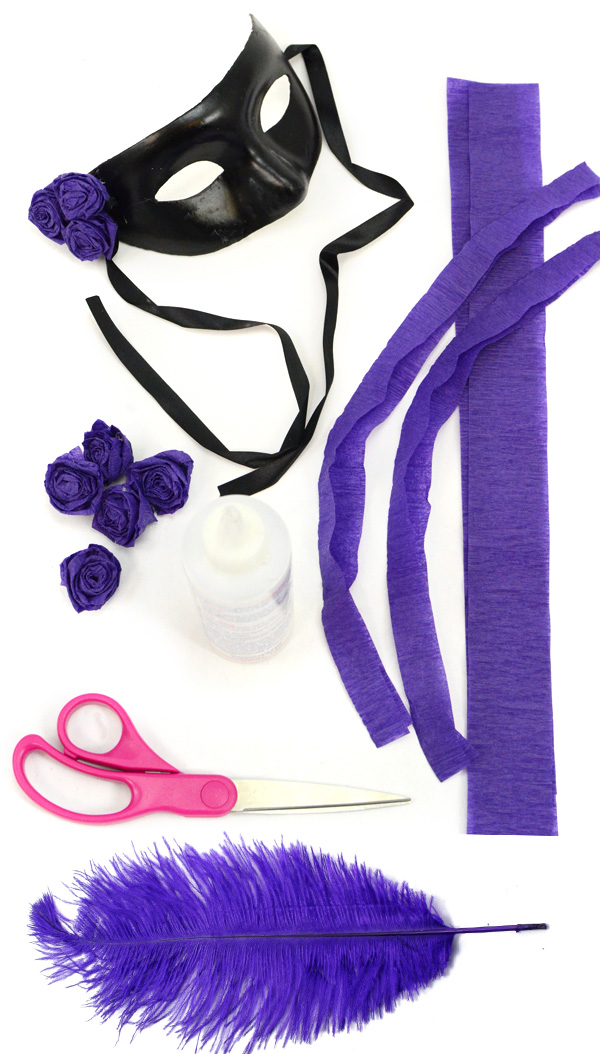
Disguise your eyes behind a beautiful royal purple mask for Mardi Gras or a New Years party. This tutorial shows you how to decorate a basic mask with handmade crepe paper flowers. Decorating your own mask is an easy way to customize a mask for an event and to get in some craft time for those craftaholics out there.
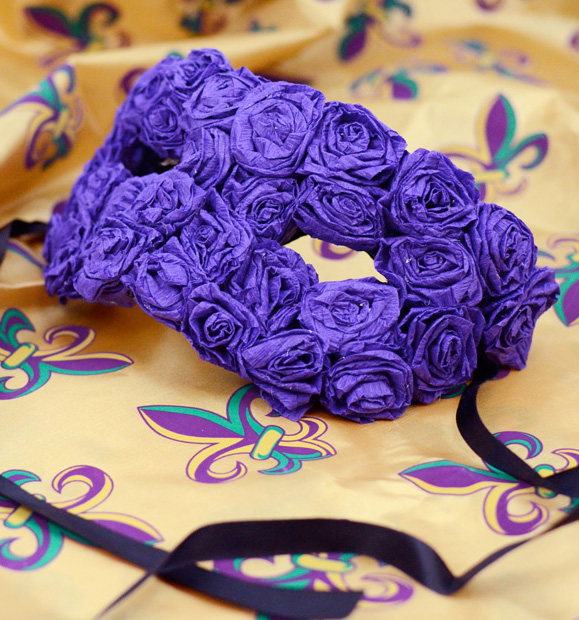
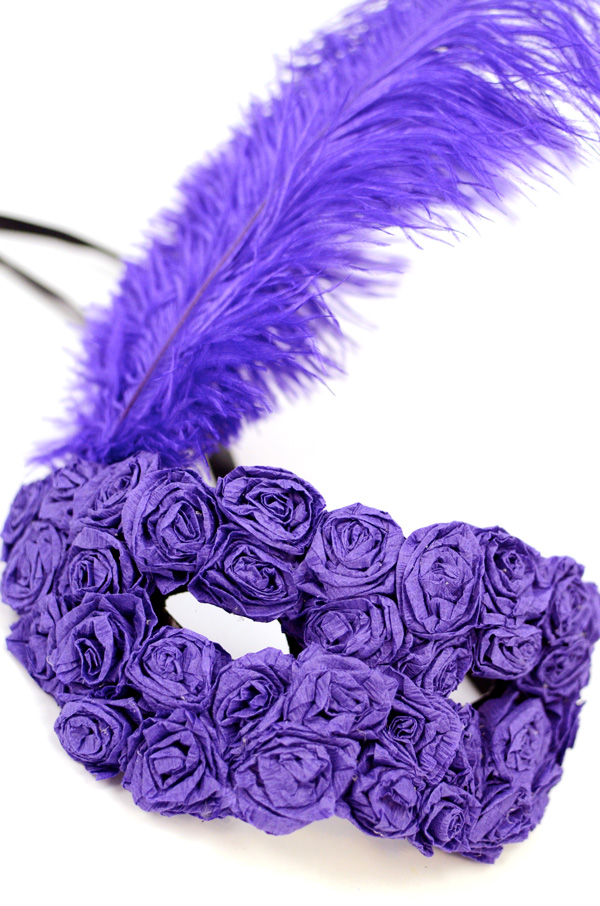
We decided to embellish a basic paper mache mask with purple crepe paper rosettes for an elegant and ornate mask, at a budget-friendly price. Purple ostrich feathers are an optional addition. 


For this mask, you need
Glue (Hot Glue Gun, Craft Glue or Skillet Glue
Scissors 

Optional: (2) Purple Ostrich Feathers

These supplies are available at MardiGrasOutlet.com.

STEP 1
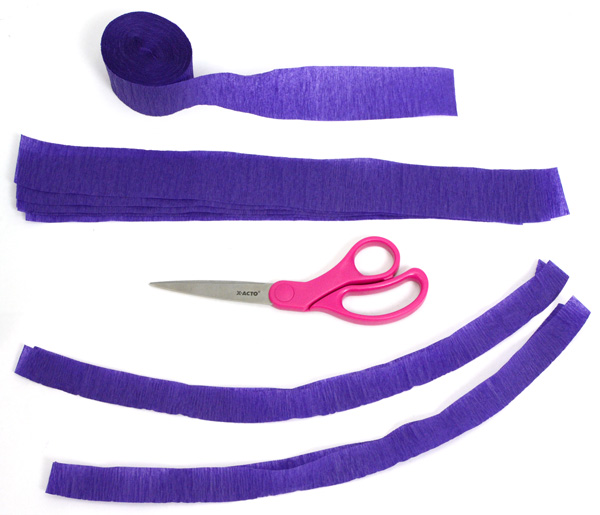
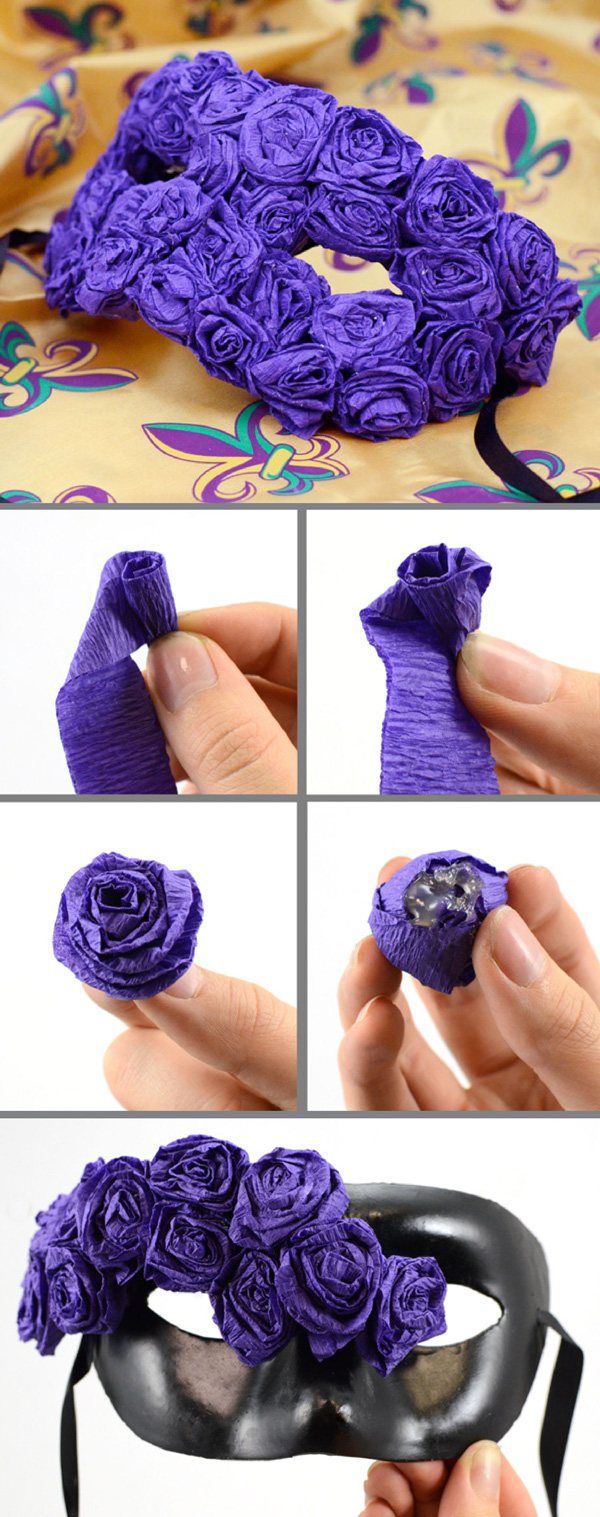
Cut about 25 strips of the crepe streamer that range from 10" to 15" long. Don't worry about making each length exact; it is actually easier later on to have rosettes that are smaller and bigger in size. Fold each strip in half lengthwise.

STEP 2
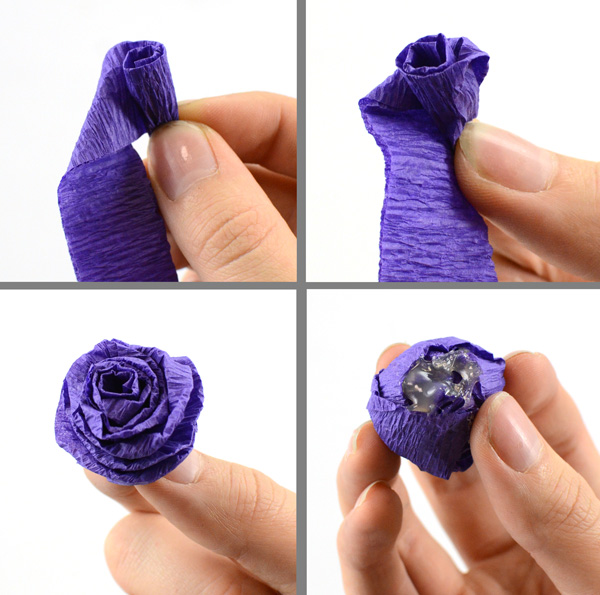
To form a paper flower, start rolling a paper strip at one end, pinching the folded side as shown. As you continue rolling, twist the crepe paper every few turns. Also, add a dab of glue as you are rolling to keep the rosette together. When you have finished twisting, cover the bottom with glue. You need about 25 to cover the mask.

STEP 3
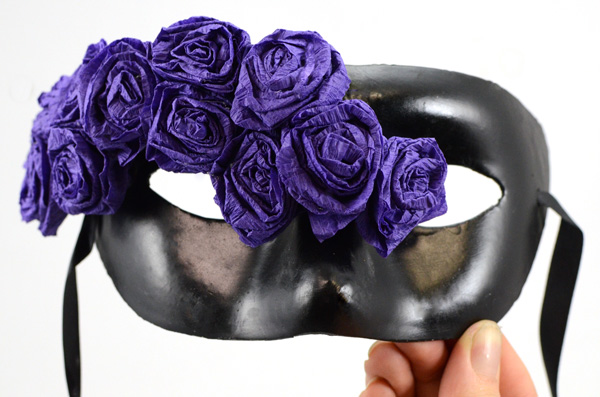
Now you can glue the rosettes to the mask. This basic paper mache mask comes painted black, so that the mask base doesn't show through the edges. If you have a white mask, apply dark purple or black acrylic paint. 

To cover the mask, start at one corner and work your way across the mask. Apply glue to the bottom of each rosette. Pick and choose the smaller or larger rosettes so that they fit together snugly.
OPTIONAL
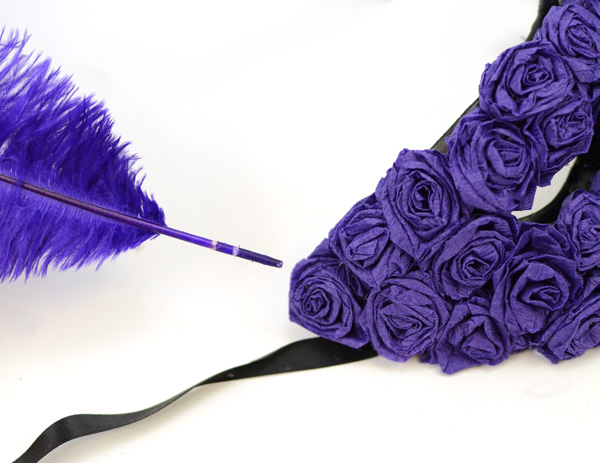
Glue and poke two purple ostrich feather through and around the rosettes at the corner. The feathers should lean up and to the right.
You're finished! You can also try this in different crepe paper colors; just make sure the feathers coordinate with the mask.

This mask can also be used for table decor, centerpieces and other decorations.

Enjoy!

December 22, 2011

Gateau de Sirop, a perfect Louisiana Christmas Dessert

Gateau de Sirop
Photograph by Brian Finke via Bon Appetit

Sweetened with sugar cane syrup, Gateau de Sirop is the perfect Louisiana Christmas dessert. This classic Cajun cake is sweetened with Steen's sugar cane syrup. Steen's syrup is an original pure food product, produced the same way today as the original, created in 1910 with 100% cane syrup and no preservatives or additives. This simple deep caramel sweetener adds a unique Cajun flavor to Gateau de Sirop.

We hope you have a sweet Christmas filled with delicious goodies like this one!

Gâteau de Sirop

10 Servings
Reprinted from Bon Appetit

Ingredients

  • 1/2 cup (1 stick) unsalted butter, room temperature, plus more for pan
  • 2 1/4 cup sall-purpose flour, plus more for pan
  • 2 1/4 teaspoons baking soda
  • 1 teaspoon kosher salt
  • 1 teaspoon ground cinnamon
  • 3/4 teaspoon cloves
  • 1/2 teaspoon ground nutmeg
  • 1/2 teaspoon ground allspice
  • 1/2 cup sugar
  • 1/4 cup sour cream
  • 1/2 cup Steen's cane syrup
  • 2 large eggs
  • 1 tablespoon grated peeled ginger
  • 1/2 cupwarm buttermilk
  • 1 tablespoon powdered sugar
  • Special equipment:

    An 11”-diameter tart pan with a removable bottom

Preparation

  • Preheat oven to 350°. Butter and flour pan; set on a rimmed baking sheet. Whisk 2 1/4 cups flour and next 6 ingredients in a medium bowl. Using an electric mixer, beat 1/2 cup butter and sugar until fluffy, about 3 minutes. Add sour cream; beat to blend. Add cane syrup and 1/2 cup hot water; beat until smooth. Beat in eggs one at a time; blend well between additions. Add ginger. Beat in dry ingredients in 3 additions on low speed. Add buttermilk; beat just to blend. Pour into pan; smooth top.

  • Bake until tester inserted into center of cake comes out clean, about 30 minutes. Let cool completely. Dust with powdered sugar before serving.

December 16, 2011

Cloisonne Louisiana Ornaments for Christmas


 Decorating your home and Christmas tree are all part of the holiday fun!

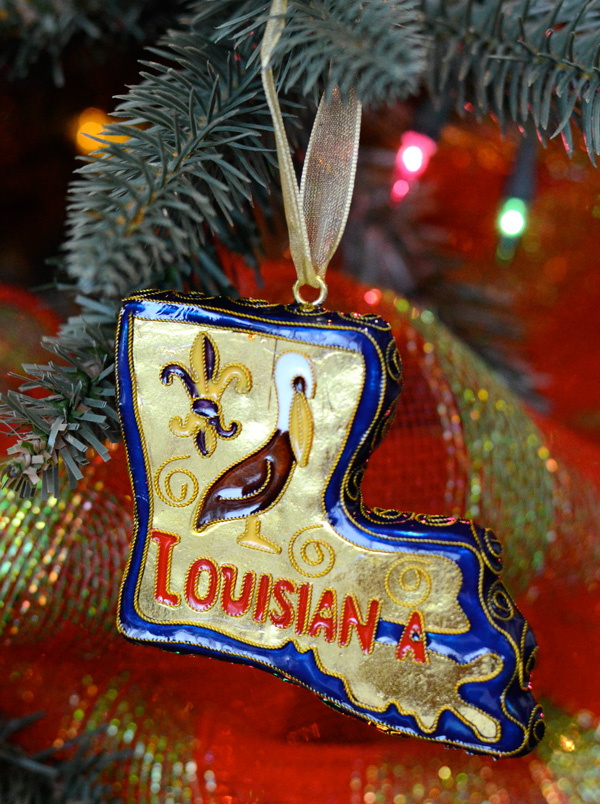
However, plain Christmas ornaments just aren't personalized enough for our Louisiana and Cajun loving tastes. So, we have found festive and collectable cloisonne ornaments with a Louisiana theme for our tree. Cloisonne ornaments are great gift ideas if you are looking for something special and unique.

They aren't just for the Christmas tree, but make great keepsakes as well. These beautifully detailed Louisiana, Baton Rouge and New Orleans ornaments are genuine handmade cloisonne.


Cloisonne is a process that allows for bright colors and intricate designs, making them very collectable. Copper is formed for the main shape, and a design is formed by copper filaments that create small compartments (cloisons). These are filled with several layers of enamel that are then fired in a kiln. When this is done, the ornament is polished down until the cloisons are exposed. As a last step, the exposed edges of copper are electroplated with 24 karat gold for extra sparkle.

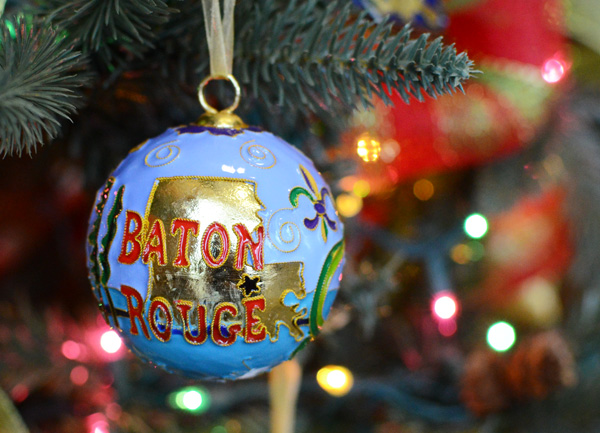
We love this round ball ornament featuring Baton Rouge, Louisiana! It has fleur de lis, pelicans, crawfish and cypress trees all the way around on a blue background.


This New Orleans ornament has colorful river boats, St. Louis Cathedral, crawfish, and Bourbon street signs. Perfect for those who love NOLA!

All of these ornaments and even more designs are available at Mardi Gras Outlet.com.

December 13, 2011

Ideas using Deco Mesh: A Video


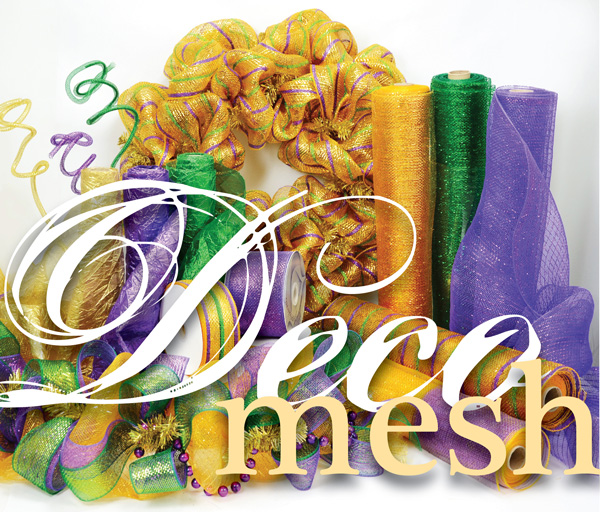
Poly Deco Mesh is our latest obsession, and this informational video gives you an array of ideas for deco mesh wreaths, garlands and much more. Don't know what deco mesh is? You will learn what styles it comes in, its qualities and see a huge range of examples of this decorative material in use.

From wreaths and garlands to gift wrap and bows, deco mesh can be used in so many ways. The possibilities are endless! Click here to view all of our previous blog post tutorials on deco mesh.

Deco Mesh is a type of soft plastic netting or fabric that comes in rolls and ribbons. It is waterproof and durable enough for the outdoors. Mesh also holds a nice full shape without wired edges, and goes well with work wreath forms. 

We have also featured detailed video tutorials on how to use deco mesh to make bowswreaths,  wall treesgarland, wine bottle packaging and even to decorate a Christmas tree for the holidays.


Here is the informational deco mesh video:


Want more ideas?
To view our complete list of video tutorials, see the Mardi Gras Outlet Channel on Youtube.

Or check out our Pinterest page for lots of inspiring photos of projects using deco mesh. Below is a sample of what you will find.


For a complete selection of poly deco mesh products, shop at Mardi Gras Outlet.com.


Happy crafting. We hope you create the perfect Holiday for your family!


December 10, 2011

Gift Wrap Ideas with Decorative Wire: Monograms & Stars


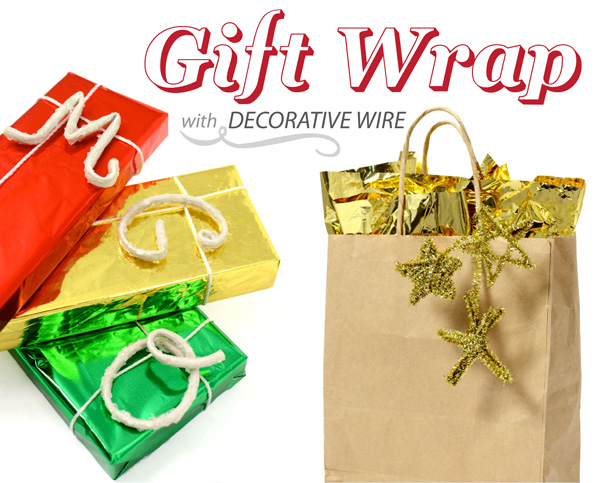
Decorative wire monograms and tinsel shapes are a fun way to transform Christmas and holiday gift wrapping from plain to festive. If you are looking for a creative way to wrap your gifts without a traditional bow, these wire accents are a good option. In this tutorial, you will learn the simple steps for transforming pipe cleaners and wired rope into star shapes and monogram letters, perfect for decorating presents.
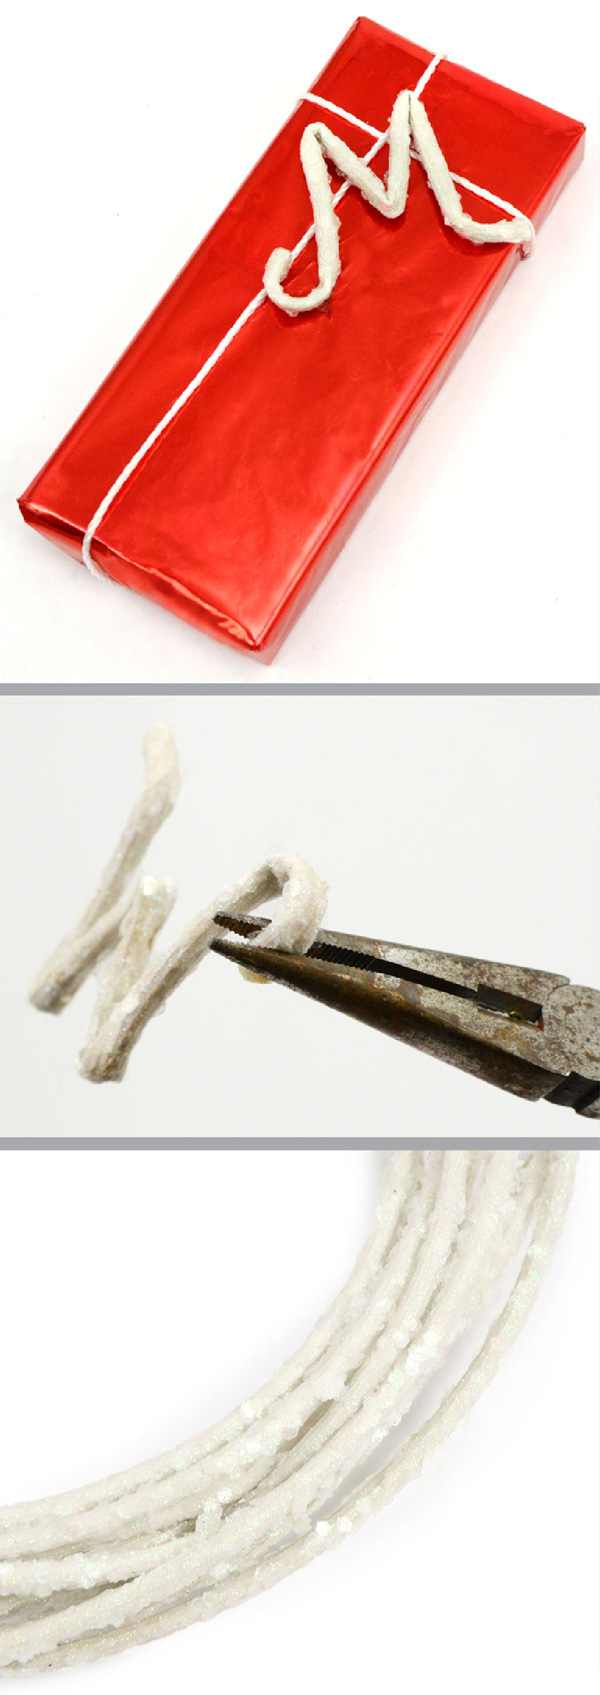
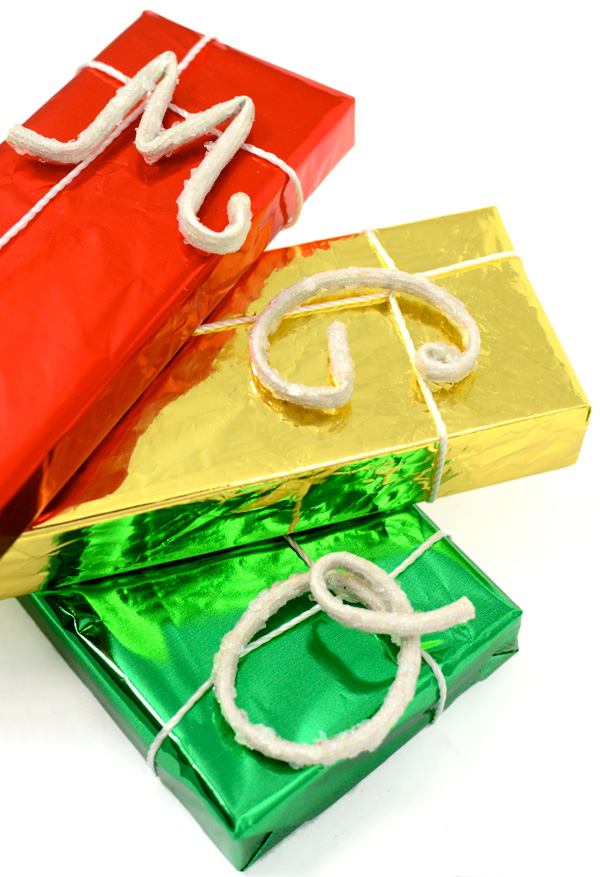
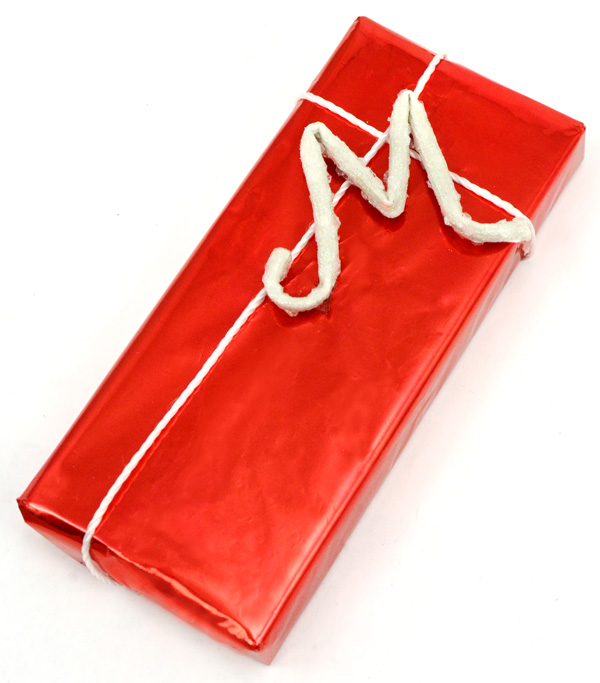
In the south, we love monograms.  We have found a new place to put our favorite letters- on a gift. Here is how to create this monogrammed gift:

Monogram Gift Wrap Supplies: 
Metallic Tissue or solid colored gift wrap
Wired Glamour Rope (a bendable glittered wire that comes in assorted colors)
White string or ribbon
Pliers/wire cutters                                                                                       

First, wrap the present in metallic tissue or solid colored wrapping paper. Tie string or ribbon around the present as shown. 

To make the letter, cut a short length (about 5 in.) of glamour rope with wire cutters. Glamour rope is a type of  glittered decorative rope that has a wire at the center so it can be shaped and curled. You can find more information on glamour rope, here

With needle nose pliers, bend the glamour rope into the shape of  the letter you want. Curl the ends of the letter to make the shape more whimsical. Look to your favorite fonts for inspiration on the shape of the letter.


Option: colored Aluminum wire will work well for forming letters as well.


Attach the wire monogram letter to the gift with a glue dot or by tying into the ribbon wrapped around the present.

These festive monogram letters make fun gift tags for your presents.


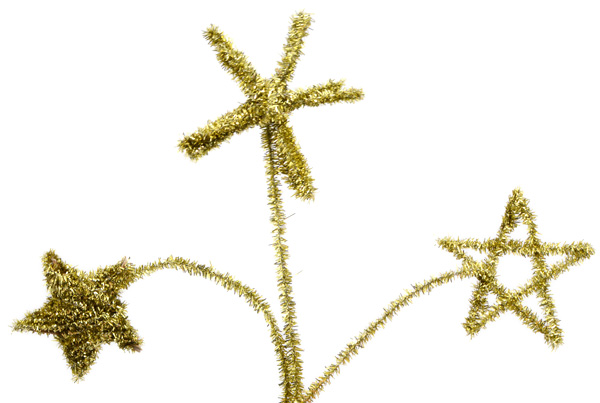
Metallic tinsel pipe cleaners are perfect for creating fun shapes like these three different stars. But don't limit yourself to the stars. This idea will work for any simple shape you like. Here is how to create these shapes:

Star Burst Gift Bag Supplies: 
Scrap cardboard
Gift Bag and Metallic Gold Tissue
Scissors & Pencil 

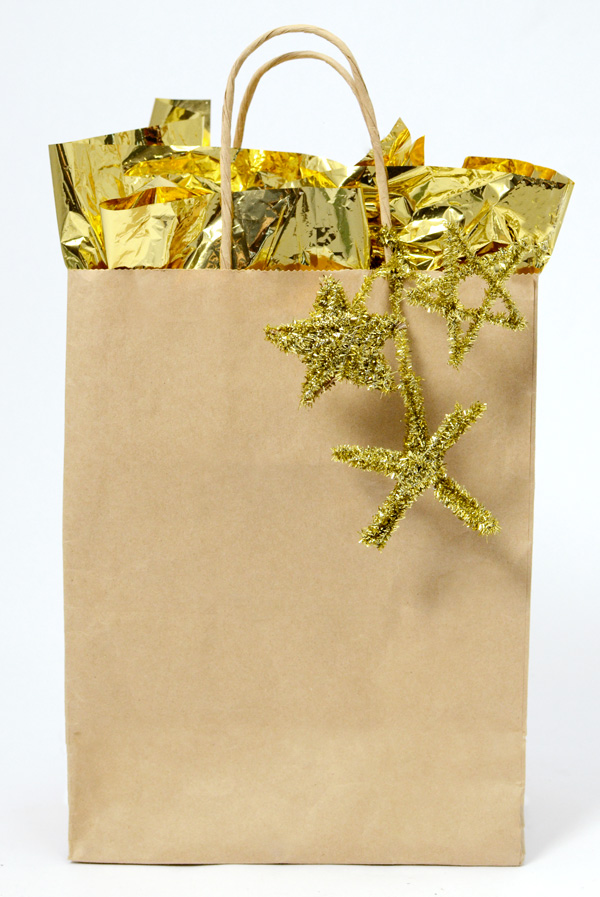
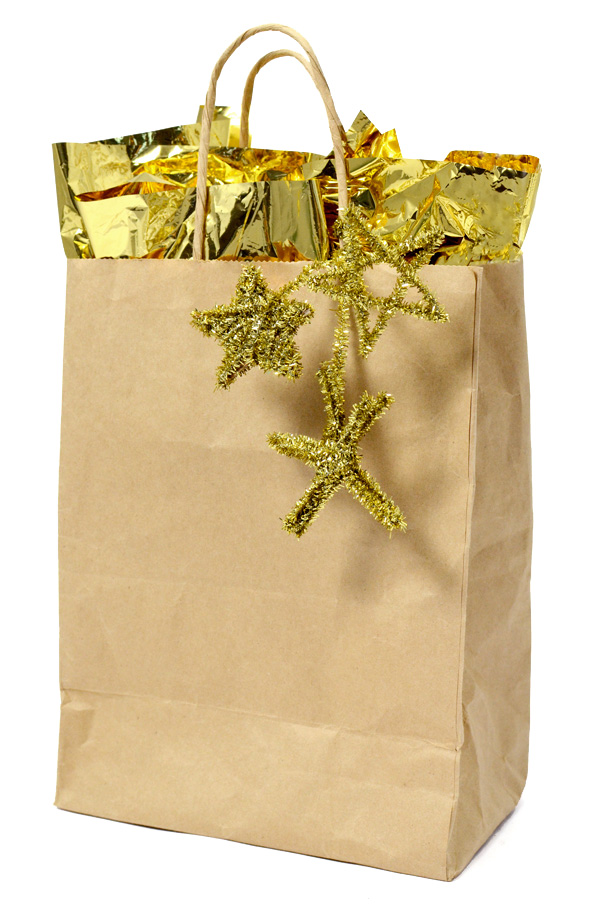
A glitzy star accents are a great way to spice up a plain brown gift bag. 
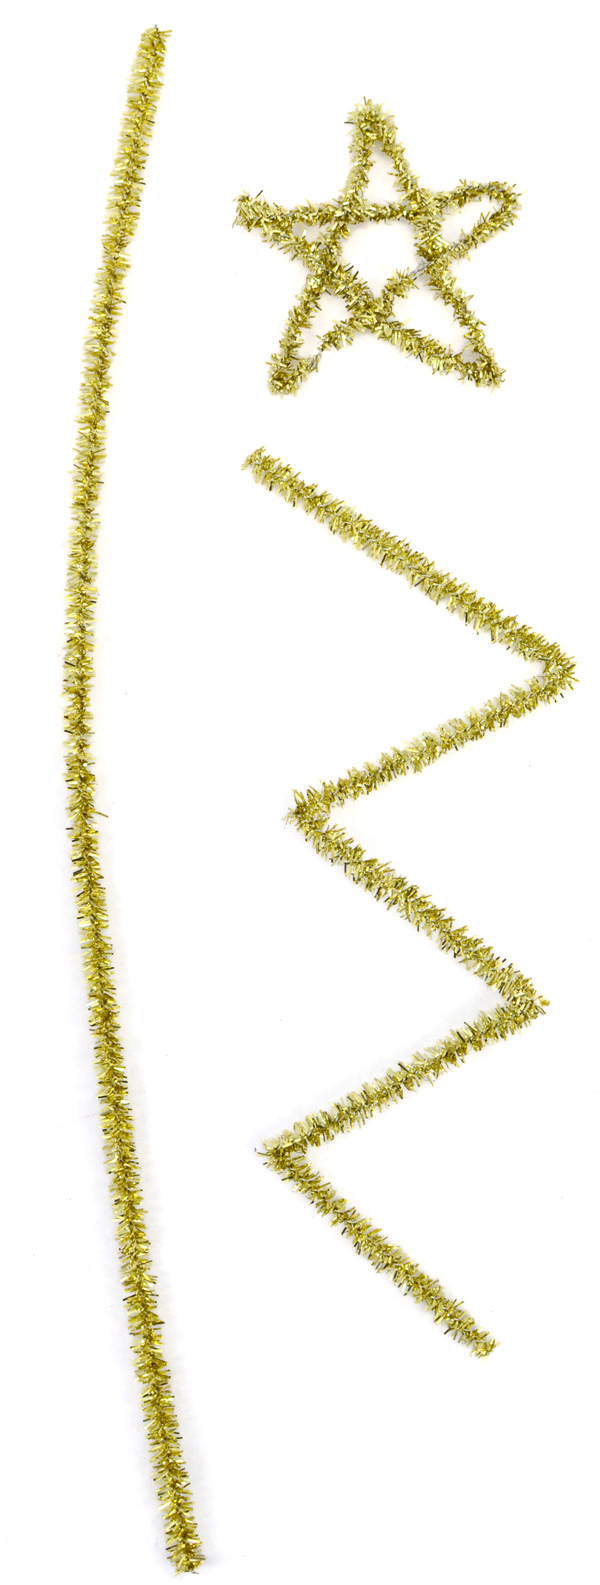
To make this open five-pointed star, fold a pipe cleaner four times. This way there are 5 lengths between the folds. Using each bent corner as the star tips, fold the pipe cleaner into a star shape. Twist the two ends to hold the star together. 
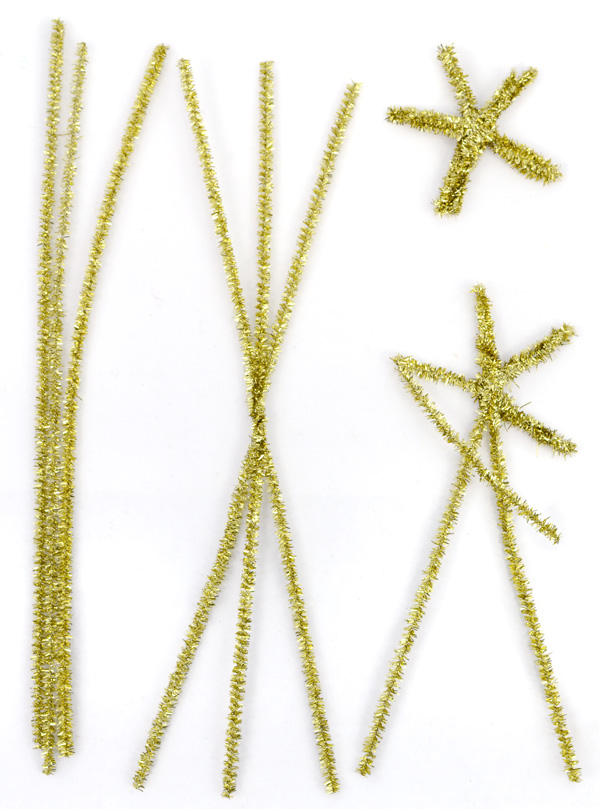
To make this second star, start with three pipe cleaners. Twist at the middle to hold them together. Bend each length into thirds, so that it goes over the center and back around to the point. Twist the end a little at each point. For five points, twist one length around another point.

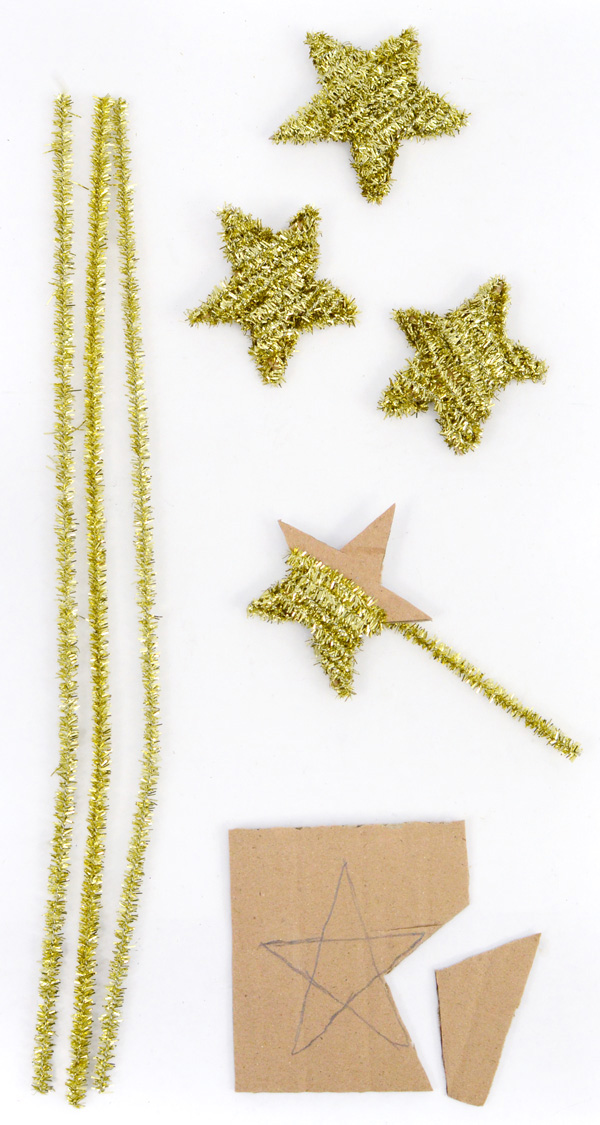
For this solid star, you will need some scrap cardboard. Draw a star on the cardboard and cut out the shape. Now, wrap the star with pipe cleaners. We used about three pipe cleaners for each star. Make sure you cover all of the cardboard by wrapping around each tip. Leave ends tucked in at the back. With this technique, you can cut out any shape you want from the cardboard, so be creative and experiment!

Now you can attach each tinsel star to its own pipe cleaner.

Finally, attach the group to one of the gift bag handles.

Enjoy and Merry Christmas 
from Mardi Gras Outlet!


LinkWithin

Related Posts with Thumbnails