Showing posts with label Mardi Gras decorations. Show all posts

February 12, 2013

Celebrate Mardi Gras Today with a Free Printable Pennant Banner

Free Printable, Mardi Gras Garland, Pennant, Banner, Mardi Gras Decorations

Happy Mardi Gras! Today around the world, people are celebrating- one last day of revelry before lent begins. This printable Mardi Gras pennant banners is an inexpensive way to decorate for your celebration.  With this free printable, you can make as many as you want!
Free Printable, Mardi Gras Garland, Pennant, Banner, Mardi Gras Decorations

DOWNLOAD PENNANT BANNER


STEP 1: Download and Print
Click above to download the free printable Mardi Gras Pennant Banner. You will need a PDF reader to open this file.(Click HERE for a free PDF reader from Adobe) 

Print out all 4 pages of the banners, using your desktop home printer or bring the file to a copy or print center. You can print them using regular copy paper or card-stock paper.


Free Printable, Mardi Gras Garland, Pennant, Banner, Mardi Gras Decorations
STEP 2: Cut-out Pennants
Once you have printed out all four pages, use scissors or an X-acto knife and ruler to cut out each individual flag.

Free Printable, Mardi Gras Garland, Pennant, Banner, Mardi Gras Decorations
STEP 3: Fold
With each flag cut out from the pages, start folding the top section. Fold it back behind the front of the flag across the top at the white line, as shown above. Use the sides of the pennant as a guide for straight edges.

Free Printable, Mardi Gras Garland, Pennant, Banner, Mardi Gras Decorations
STEP 4
Place the fold around a long piece of string, and then tape or glue the flap down to secure. Continue attaching all of the flags. We used two different strings, but use one long string if you need to. You could also use ribbon or Mardi Gras Beads to create a pennant banner that is more like a garland.

Free Printable, Mardi Gras Garland, Pennant, Banner, Mardi Gras Decorations


Our finished banner took under 10 minutes to cut out and string together.

Free Printable, Mardi Gras Garland, Pennant, Banner, Mardi Gras Decorations

The finished banner-garland across a doorway.


We love the pennant banner on a garland or staircase!  A step-by-step tutorial on how to make this Deco Mesh garland is available HERE.

We hope you have a happy Mardi Gras!


February 3, 2013

Mardi Gras Table Decorations-3 Simple Napkin Ring Ideas

mardi gras table decorations ideas tablescape confetti centerpieces napkin ring place setting diy

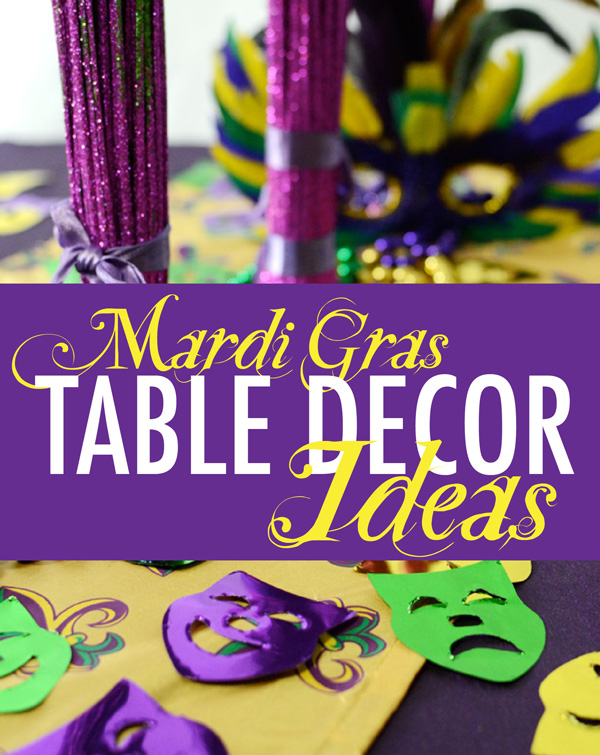
Let the good times roll at your next seated dinner with a festive Mardi Gras carnival theme. Creating a Mardi Gras tablescape is easy. Start with the traditional Mardi Gras colors of purple, green and gold. Add in inexpensive Mardi Gras beads and masks. Here are a few ideas for easy Mardi Gras inspired napkin rings and table decorations for fun Mardi Gras ambiance. 


Comedy and Tragedy Mask Napkin Ring
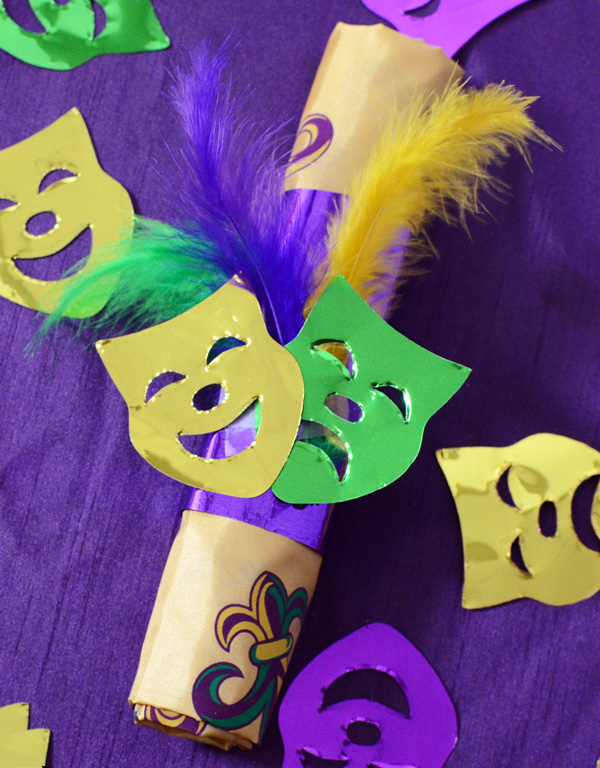
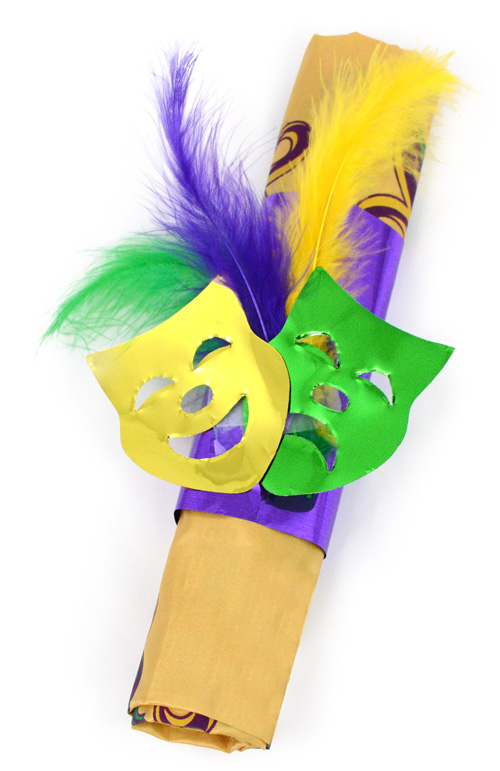
Over sized metallic comedy and tragedy mask confetti and feathers transforms into simple Mardi Gras napkin rings.

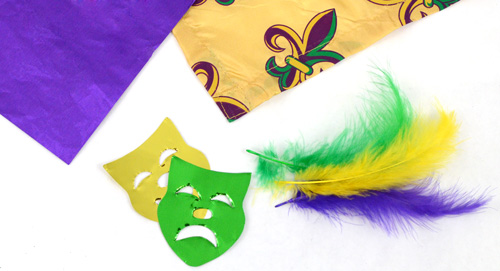
Supplies:

Comedy/Tragedy Mask confetti
Purple Mylar sheets
Craft feathers


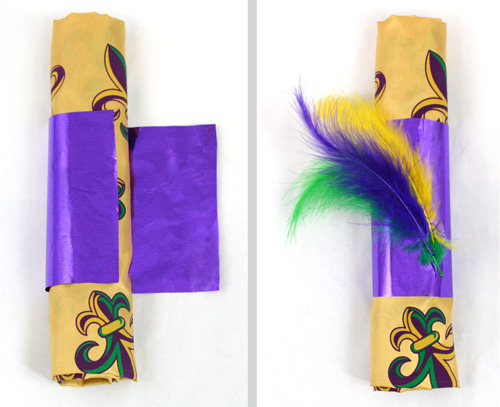
Fold the napkin in half. Roll the napkin into a cylinder. You can roll the cutlery up in the napkin as well. This works very well for a buffet style dinner so guests have less to carry.

The purple mylar comes in large (tissue paper sized) sheets. Cut the purple mylar sheet into small strips and wrap around the napkin. Use glue or tape to secure. Add three craft feathers in the traditional Mardi Gras colors of purple, green and gold.
Lastly glue on each piece of comedy and a tragedy mask confetti. Your fun Mardi Gras mask napkin ring is complete.


Metallic Wire Crown Napkin Ring
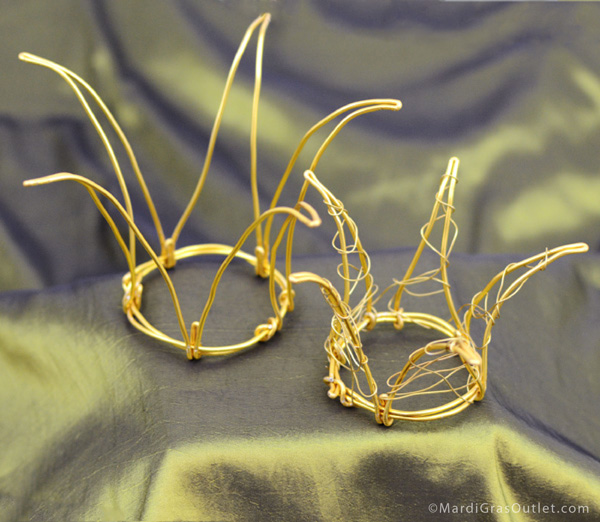
Metallic gold craft wire transforms into dainty crown napkin rings.

Click HERE to see our tutorial blog on creating these tiny whimsical wire crowns out of aluminum craft wire. 


Simple green paper plates and green paper napkins rolled up look refined with the regal crown napkin ring.

Mardi Gras Beads Napkin Ring
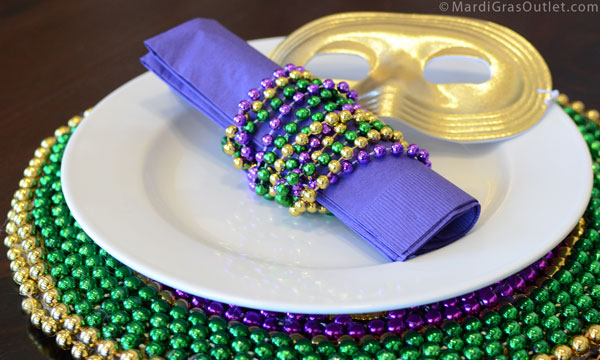
The simplest way to add Mardi Gras bling to your table and create an easy napkin ring is to use Mardi Gras beads. Shown here with our custom Mardi Gras bead charger. Click here for the charger tutorial.


Paper purple napkins are rolled and wrapped in metallic purple, green and gold Mardi Gras beads for a simple, but festive place setting. The gold mask not only looks nice on the plate, but also is a great party favor.


DECORATING THE TABLE
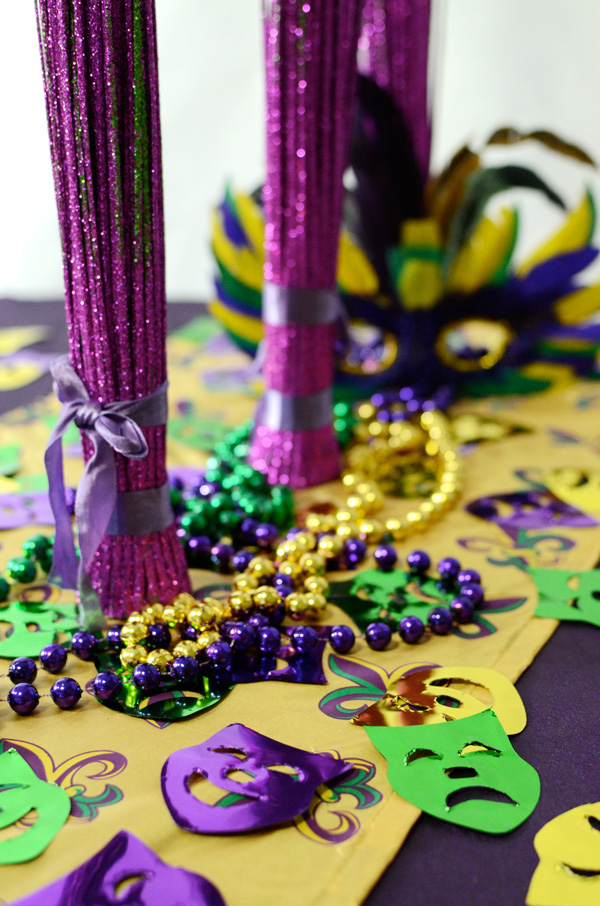
Repeat the same details (Mardi Gras beads, confetti and mask) along the center of the table.

DIRECTIONS for the Table Decorations

mardi gras table decorations tablescape ideas confetti party
Supply list for table decorations (Click on the product name to see the product supply source)


January 23, 2013

DIY: Beaded Mardi Gras Charger Plate

Charger Plate, DIY, Mardi Gras Beads, Bead Upcycle, Mardi Gras Decorations, Tablescape, Mardi Gras Bead Craft
Every perfect Mardi Gras Tablescape comes down to its finishing touches.  Make yours personal by recycling last years Mardi Gras Beads and creating charger plates for tableware!  Create a charger with patterns, initials, or designs with beads from your favorite krewe, for your favorite crew!  Your friends and family will notice these place settings at your next gathering.

Typical chargers are 10"-14" in diameter.  Our finished charger is 14" in diameter which will accommodate most sizes of table ware.

Charger Plate, DIY, Mardi Gras Beads, Bead Upcycle, Mardi Gras Decorations, Tablescape, Mardi Gras Bead Craft


SUPPLIES

To purchase  products from www.mardigrasoutlet.com, click on the individual product link below


The charger plate can be created in any color combination, and its a great opportunity to upcycle your last years Mardi Gras Beads. If you aren't re-using beads, there are many different color and size options available, (click HERE).

Cost/Time
The cost of making a single charger is under $5 including the cost of hot glue sticks and new beads.  If you are upcycling your old Mardi Gras Beads, that brings the total cost even lower.  We used about 5 four inch glue sticks and 10 strands of beads.  One charger took under 1 hour to make, and a set of 4 would take about 3 hours.

Step 1- Create a Base
Cut three round disks of cardboard or foam core.  The smallest should be approximately 8" across, the 2 larger should both be 13" across.  Cut the center out of the third disk, so that you have a 1.5" wide ring, (the outside diameter will measure 13", and the inside diameter will measure 10).  Use proper safety when using a utility knife, cutting away from your body and hands.  Next, glue the three pieces together.


Charger Plate, DIY, Mardi Gras Beads, Bead Upcycle, Mardi Gras Decorations, Tablescape, Mardi Gras Bead Craft
Step 2- Glue the Base
Glue the base to one side. On the opposite side hot glue the rim to the top of the charger's surface, pressing firmly.Use caution with the glue gun and avoid its metal surfaces.

Step 3- Painting the Surface
This step is optional.   We chose gold to continue with our Mardi Gras theme!


Charger Plate, DIY, Mardi Gras Beads, Bead Upcycle, Mardi Gras Decorations, Tablescape, Mardi Gras Bead Craft
If you are creating any type of pattern, it may help to trace it on before gluing.  Then cut your beads so that they are a long string.


Charger Plate, DIY, Mardi Gras Beads, Bead Upcycle, Mardi Gras Decorations, Tablescape, Mardi Gras Bead Craft
Step 4- Glue the Beads
There are many variations to choose from when attaching your beads.  You can choose circular patterns, a solid color, or make it monogrammed!  If you choosing a patterned type of design, the bigger you make your charger, the easier gluing the beads will be.  


Charger Plate, DIY, Mardi Gras Beads, Bead Upcycle, Mardi Gras Decorations, Tablescape, Mardi Gras Bead Craft
Cut your beads whenever necessary.  


Charger Plate, DIY, Mardi Gras Beads, Bead Upcycle, Mardi Gras Decorations, Tablescape, Mardi Gras Bead Craft
Once you've filled in the inner area with beads, move outwards to the rim.

Charger Plate, DIY, Mardi Gras Beads, Bead Upcycle, Mardi Gras Decorations, Tablescape, Mardi Gras Bead Craft
Step 5- Glue from the center outwards
Consider adding medallions or doubloons as a way to display parade mementos.

Charger Plate, DIY, Mardi Gras Beads, Bead Upcycle, Mardi Gras Decorations, Tablescape, Mardi Gras Bead Craft
Step 6- Add beads to the rim
Continue working from the center outwards, and cover the rim of the charger.

Charger Plate, DIY, Mardi Gras Beads, Bead Upcycle, Mardi Gras Decorations, Tablescape, Mardi Gras Bead Craft
Step 7- Cover the edges
Glue a final strand around the outside edge and top surface in order to hide the edges of the cardboard.

Charger Plate, DIY, Mardi Gras Beads, Bead Upcycle, Mardi Gras Decorations, Tablescape, Mardi Gras Bead Craft

Charger Plate, DIY, Mardi Gras Beads, Bead Upcycle, Mardi Gras Decorations, Tablescape, Mardi Gras Bead Craft

Happy Mardi Gras. Laissez Le Bon Temps Rouler! 


January 14, 2013

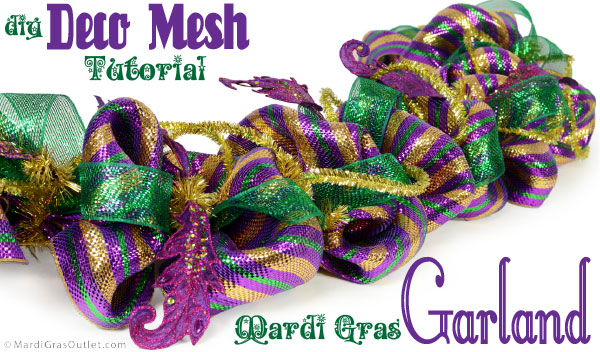
Mardi Gras Garland Tutorial: Deco Mesh Work Garland Form


Mardi Gras Garland made with Deco Mesh and Work Garland Form: A tutorial


Bigger is better when it comes to Mardi Gras decorations! Create elaborate one-of-a-kind decorative garland with a work garland form and deco mesh. In a few simple steps,you can create a designer Mardi Gras garland of your own.  We used the traditional colors of Mardi Gras (Fat Tuesday)  which are purple, green, and gold, representing justice, faith, and power- respectively. This style deco mesh garland can be created in any color,  for any theme. The work garland comes in a large variety of colors and styles (click here for options) and there are hundreds of different styles and patterns of decorative mesh (click here for options).

Mardi Gras garland complete with ribbon and deco mesh

What is a work garland form? A work garland form is the basic form used to make a decorative garland. The 9 foot long weather resistant wire base has 44 pre attached wire ties that you use to attach deco mesh, ribbon, ornaments and accessories onto the form.  These wire ties come in various finishes.   The standard tinsel ties resembles traditional wired faux garland. Use this version when you want the form color to show in your design. This is the version used in this tutorial. The new thin pencil tinsel ties are slim and easy to hide in the garland.  There is also a twig works wire form that resembles natural twining vine for a more natural look.

Where do you use a  decorative garland?  Decorate a mantle, down a staircase banister, over doorways, across a mirror or on a mailbox.  The work garland forms and deco mesh are both water resistant so they can used indoors or outdoors. No worries about sagging bows, rusted wires or molded ribbon when you use them to decorate outdoors!

Here is the tutorial for creating your own designer decorative Mardi Gras garland.


Mardi Gras Garland Supplies for a Deco Mesh Work Garland Form

SUPPLIES:  To purchase these products from www.mardigrasoutlet.com, click on the individual product link below or click HERE to see a complete supply list.

Optional Accessories


COST/TIME


The cost of the basic garland is around $32.  There will be product left over  (apx 6ft of the 21" wide mesh and 12 ft of ribbon).  This 9 foot garland took under 45 minutes to make.


Step One for a Mardi Gras Deco Mesh Work Garland Form
Fluff out your Work Garland so that all the ties are open.  Next, gather your mesh.  It is important to gather, not bunch, the deco mesh.  Bunching will cause your garland to look less voluminous, and more wrinkled.


Mardi Gras Garland using a gold work garland form
 Place the mesh in between the first set of ties.

Deco Mesh work garland form- twist and attach the mesh
Twist the ties together to attach the mesh to the garland.  Leave the ties outward so that you can attach more layers to the same ties.

Measure about 9" of deco mesh per loop of the Mardi Gras garland

After you have attached the mesh to the first set of ties, gather the mesh, leaving about 9 inches for each poof.  It doesn't have to be exact, but if you pull the mesh out, skipping 1 tie, that's about the length you need to insert into each tinsel tie.  The photo above illustrates length.


Continue down the work garland form with loops of deco mesh in the Mardi Gras stripe pattern.
Continue making poofs until you have reached the end of the garland.  There are 44 ties total, and you will go through almost an entire roll of mesh.

At the end of the tinsel tie garland form, trim the deco mesh.
Trim the deco mesh once you have come the last tie, leaving about 6 inches on the end.


Add  deco mesh ribbon to the form along with the Mardi Gras striped deco mesh.
Add ribbon on top of the Deco Mesh by twisting it into the same tinsel ties.  You can make bows, loops, or simply attach the ribbon in with just a twist!

Mardi Gras Garland with tinsel tie roping added into the tinsel ties.
Add another layer for more color and dimension. Insert the gold Tinsel Roping into tinsel ties.  You can leave loops or make curls, any way you apply it, tinsel roping adds a great finishing touch!

The finished Mardi Gras garland made with a work garland form, deco mesh and tinsel roping.
The finished garland!  Now you can personalize your own by adding ornaments, floral sprays, mardi gras beads, or masks.  Below we have a few additional options.

Add in Mardi Gras sprays for additional accents- Acanthus Leaf Sprays
Mardi Gras Garland with the purple Acanthus Leaf Spray, (available here, or in purple, green, or gold).

Additional Big Metallic Ornaments add more sparkle to this Mardi Gras Work Form Garland.
Mardi Gras Garland with Large Ornaments
These ornaments added the perfect sparkly touch!  The oversize Mardi Gras Balls are available here, and we also have a large selection of Mardi Gras ornaments available here.

Hang your Mardi Gras garland with coordinating ribbon!
Mardi Gras Garland with Ribbons
This glittery Harlequin Fleur de Lis Ribbon (available here)  added another layer of texture.  For more ribbon  styles, click here.

A perfect glittery garland for Carnival season! Happy Crafting!

LinkWithin

Related Posts with Thumbnails