Showing posts with label Wedding. Show all posts

April 18, 2013

DIY Chair Sash Rosettes: A Tutorial


chair bows, DIY, Tutorial, Deco Mesh, Crinkle Sheer, Wedding Chair, Chair Sash, Rosette

Tired of those plain Jane folding chairs?  Sheer fabric sashes tied into rosettes change the look from plain to pretty. This tutorial will show you how to tie your own beautiful chair bow rosettes with ribbon or fabric. Save some money (by not renting expensive chair sashes)  and add a pop of color to coordinate with you party theme!  Chair bows and sashes are perfect for any type of party, but are perfect for weddings, engagement parties, anniversary dinners or even for baby and bridal showers. 

SUPPLIES

This tutorial uses a 24" wide fabric sold on a roll of 10 yards. This fabric is a crinkled sheer poly organza fabric that adds volume to the rosette. A full selection of crinkle sheer colors is available here. This look can be created with a large variety of fabrics or extra wide ribbons.

COST/TIME

A Rosette without tails uses 5-6 feet of crinkle sheer, and a Rosette with tails uses about 8 feet.  Our Crinkle Sheer comes with 30 feet on a roll, which means you can make 4-6 Rosettes with just one roll. This equates to about $3 per chair bow, a bargain in comparison to renting bows and sashes! Your first Rosette will take about 10 minutes to make, but they will go much quicker the more practice you get.

Deco Mesh, Crinkle Sheer, Chair Sash, DIY, Tutorial, Rosettes, Wedding, How to

Start with an undecorated chair.
Begin by centering your chair in front of you.  These rosettes can go on the back of any chair style, which means they don't just have to be for special occasions only. 

Deco Mesh, Crinkle Sheer, Chair Sash, DIY, Tutorial, Rosettes, Wedding, How to

STEP 1- Center the Fabric
Make sure the center of your fabric meets the center area of the FRONT of your chair back.  Pull the length of fabric around to the back and ensure the fabric is tight and stays tight through the duration of tying.  

Deco Mesh, Crinkle Sheer, Chair Sash, DIY, Tutorial, Rosettes, Wedding, How to

STEP 2- Tie a knot
Tie the fabric in a knot at the back of the chair.  The smaller the knot you make, the easier it will be to finish off the Rosette in the end.

Deco Mesh, Crinkle Sheer, Chair Sash, DIY, Tutorial, Rosettes, Wedding, How to

STEP 3- Twist the fabric
Twist the fabric in opposite directions.  The fabric in your right hand should twist in a clockwise direction, and the fabric in your left hand should twist in a counterclockwise direction.  The more tightly and evenly you make your twist now, the more smooth and elegant your Rosette will turn out.  If you prefer a more ruffled looking Rosette, than make twists which are slightly looser and less even.  

 Do not twist the Crinkle Sheer too tightly, you want it to coil at the base of the knot in the next step, not in your hands as you make the twists.

Deco Mesh, Crinkle Sheer, Chair Sash, DIY, Tutorial, Rosettes, Wedding, How to

STEP 4- Twist together
Twist the two lengths of fabric together in the same direction as you will be coiling the Rosette.  We twisted ours to the right and the Rosette will now move in a clockwise pattern.  Make sure the two sections of crinkle sheer are twisted tightly together.

Deco Mesh, Crinkle Sheer, Chair Sash, DIY, Tutorial, Rosettes, Wedding, How to

STEP 5- Make coils
Coil the fabric around itself.  If you coil around the base too tightly, it will look more like a braided bun of hair, so make sure to coil loosely.  

Deco Mesh, Crinkle Sheer, Chair Sash, DIY, Tutorial, Rosettes, Wedding, How to

STEP 6- Knot to secure
Bring the tail of the fabric twists back the original knot of Crinkle Sheer.  Trim any excess fabric to keep it clean and neat.  If your Rosette is loosely coiled or if you are using them for an outdoor event, it may be necessary to secure the Rosette with a safety pin.


chair bows, DIY, Tutorial, Deco Mesh, Crinkle Sheer, Wedding Chair, Chair Sash, Rosette


The Finished Rosette!
If you have made a Rosette without tails, trim the tail so that there is no extra crinkle sheer showing.  If you have made a Rosette with tails, then you can straighten the tails and trim the two sections to an equal length.

Deco Mesh, Crinkle Sheer, Chair Sash, DIY, Tutorial, Rosettes, Wedding, How to
Chair sashes are a nice addition of color to any event or party.  You can even use them for everyday decor on porches or for backyard patio furniture!

For more product info, please visit our website at www.MardiGrasOutlet.com.
Friend us on Facebook at https://www.facebook.com/MardiGrasOutlet.
View more of our great craft and decorating ideas on Pinterest: http://pinterest.com/mardigrasoutlet/.

June 12, 2012

DIY: Personalized Wedding Parasol Tutorial

diy, painted, wedding, parasol, tutorial, paper parasol, umbrella


Personalized Hand Painted Wedding Parasols are a current elegant wedding trend that you can easily make yourself. In New Orleans, it is a tradition for umbrella toting brides to have a second line dance at their reception. Guests and wedding attendants join in the dance waving umbrellas and white handkerchiefs. Recently pretty painted umbrellas have been turning up outside of Louisiana. Laissez les bons temps rouller!
While the hand lettering looks like it would be best left up to a professional artist, the printable template (available below) makes it simple for anyone. Our DIY tutorial will show you how. Bring the Louisiana tradition of a Second Line to your wedding festivities with a pretty painted parasol!


SUPPLIES
(parasol available at www.mardigrasoutlet.com)
Acrylic Craft Paint (we used metallic gold)
Paintbrush (flat angled bristles work best)
Dull Pencil
Scissors
Scotch Tape

We have made a free printable template that reads "Just Married" in a script font to help you out with this project. You will need a PDF Reader in order to download this file. Need one? Click here to download it. This template is sized to fit this 22" parasol perfectly (32" wide when open).

Click below to download the painting template.

There are 6 pages that you need to print out. Regular copy paper and a desktop home printer work fine.  We made the template easy to follow by including a guide on each page that indicates how to line-up the letters.

diy, painted, wedding, parasol, tutorial, paper parasol, umbrella

STEP 1: Cut-out the Template
Once you have printed out all 6 pages, loosely cut around the letters on each page. This just makes it easier to tape the template to the parasol later. The only precise scissor action will be to follow the straight dotted lines.

diy, painted, wedding, parasol, tutorial, paper parasol, umbrella

STEP 2: Tape the Letters Together
Use the dotted lines that divide the words to put each each word together. Simple line up those edges and tape each word together.

diy, painted, wedding, parasol, tutorial, paper parasol, umbrella

STEP 3: Tape to the Back
Flip the parasol up-side down. Place the words face down on the parasol. Tape them to the inside.

diy, painted, wedding, parasol, tutorial, paper parasol, umbrella

Turn the parasol around and make sure the letters look good where you have placed them. You should also be able to see the letters through the paper parasol.

diy, painted, wedding, parasol, tutorial, paper parasol, umbrella

STEP 4: Trace the Letters
Trace the outline of each letter using a dull pencil so that you don't poke through the paper. It also helps to hold behind the paper with your hand as you trace.

diy, painted, wedding, parasol, tutorial, paper parasol, umbrella

STEP 5: Paint the Letters
First, remove the template that is taped to the back. Use a flat, angled soft-bristle brush to fill in the penciled outlines on the front. This is acrylic craft paint in metallic gold, but you can use other colors to coordinate with your wedding.

diy, painted, wedding, parasol, tutorial, paper parasol, umbrella

And that's it! Time to show it off!

diy, painted, wedding, parasol, tutorial, paper parasol, umbrella


diy, painted, wedding, parasol, tutorial, paper parasol, umbrella


January 26, 2012

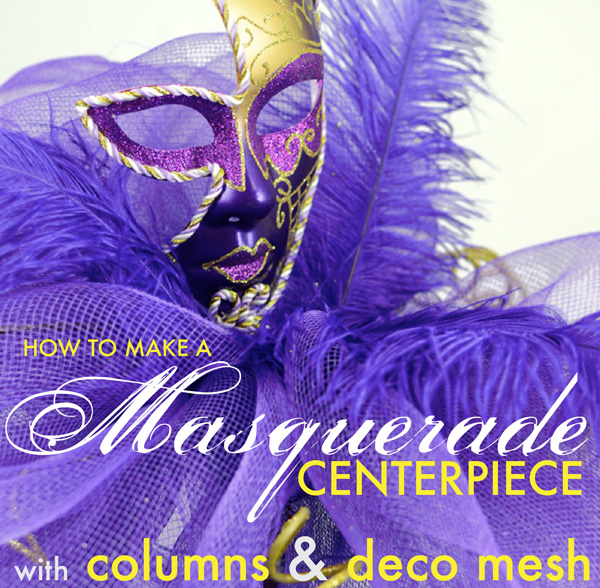
Masquerade Column Deco Mesh Centerpiece: Tutorial


how to make masquerade centerpiece idea deco mesh

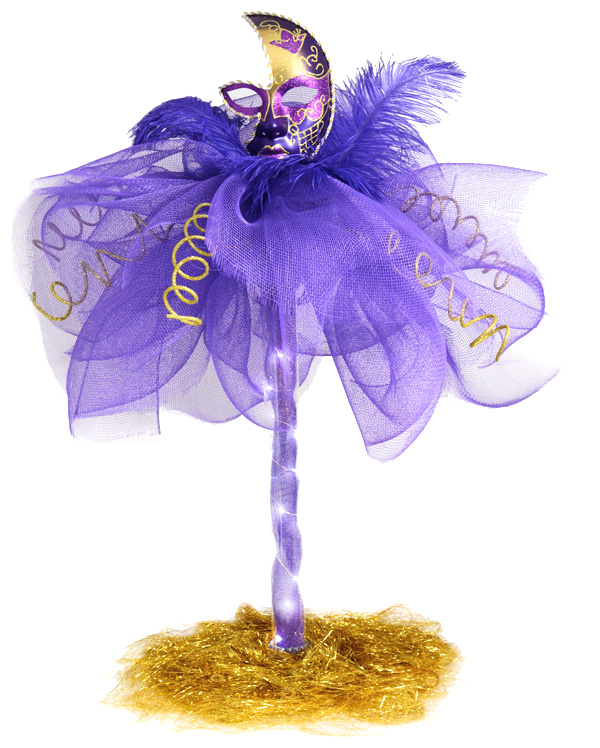
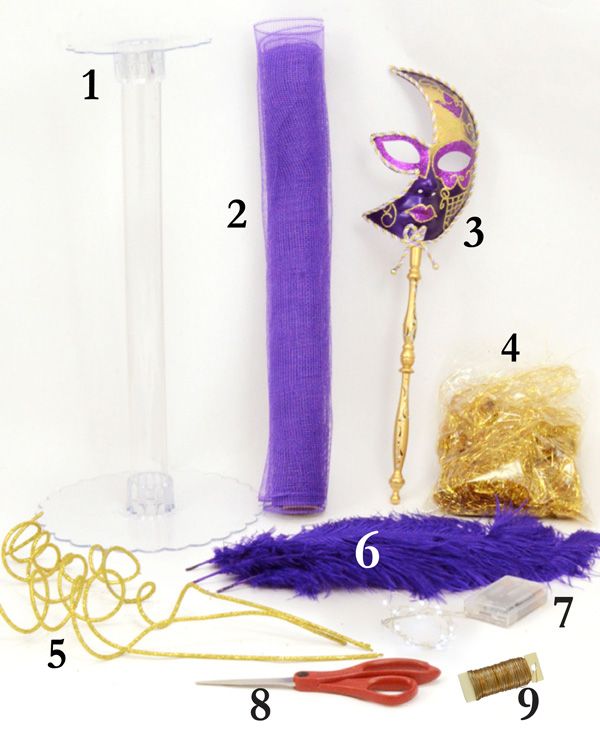
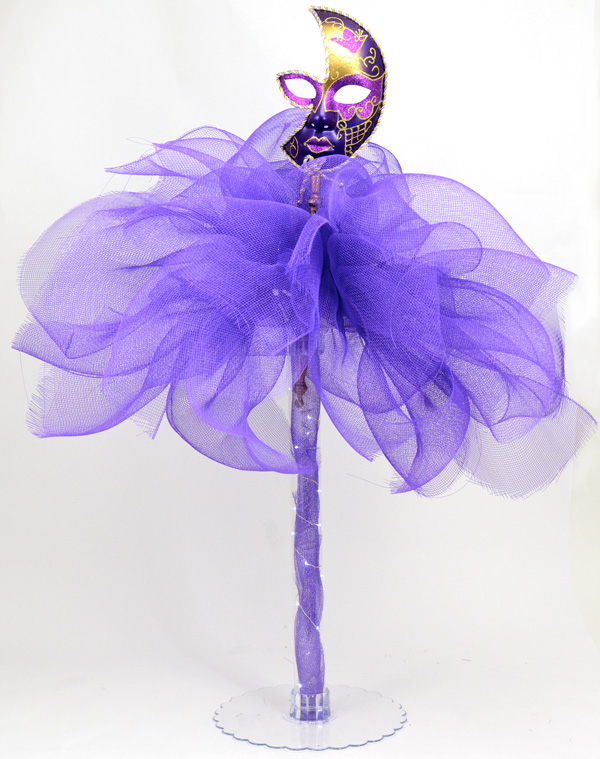
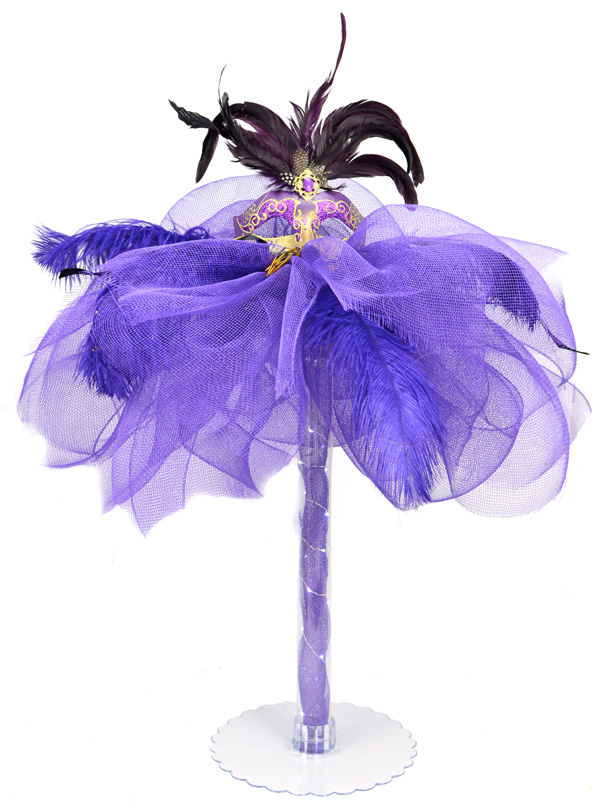
Create an element of mystery, opulence and elegance for your event with the right centerpiece. Versatile clear column and plate pieces combine to create striking table decorations for Masquerade or Mardi Gras themed parties, proms or events. And, making one of these centerpieces takes only a few easy steps and some key ingredients such as a mask, deco mesh puffs, clear column with base and feathers.


The idea for this tall puff centerpiece with mini lights was inspired by a combination of hanging mesh pompoms from our previous blog post, and feather tree centerpieces (click here for our tutorial)that have been floating around the blogosphere. One of the great things about this centerpiece is that it is easy to change the colors and decorative accents to suit your needs for specific occasions. Here's how to make it.
SUPPLIES:
8. Scissors

You can find all of these at MardiGrasOutlet.com.

STEP 1: Assemble the Centerpiece Base
  
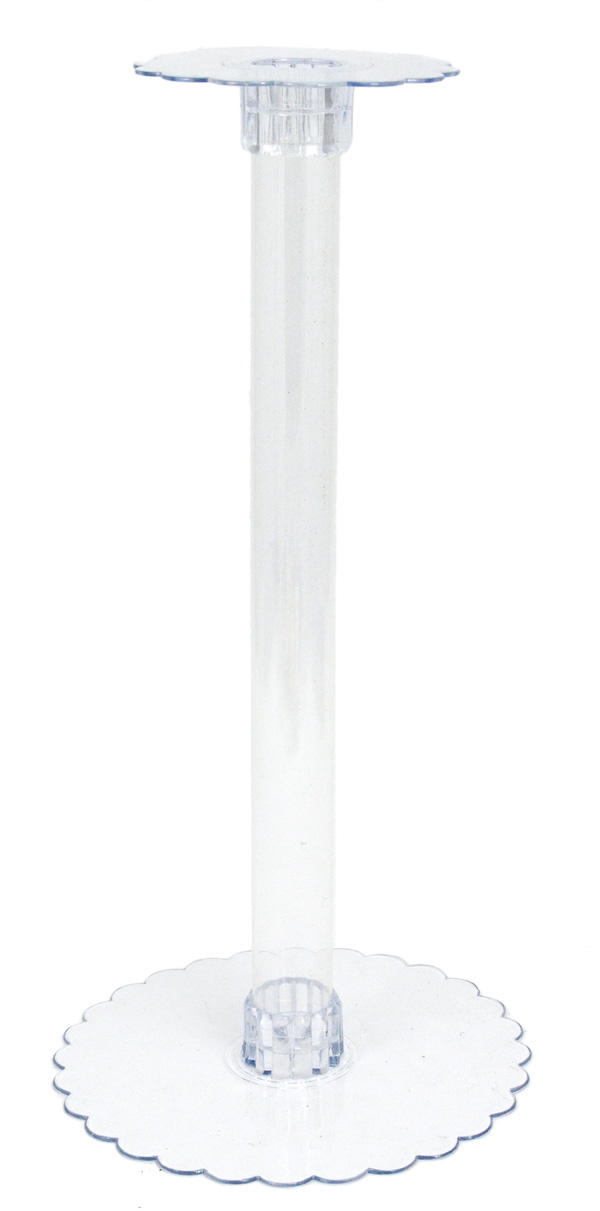
Assemble the clear plastic centerpiece bases. The 10" plate should be at the bottom, into which you should insert the 18" column. Finally, place the 6" plate on top. These are perfect for adding height to make tall centerpieces.                                                

If needed, you can add another column and plate to make it taller, or use the 10" column to make the centerpiece shorter. All of these clear plastic centerpiece parts are interchangeable and fit together many different ways.

STEP 2: Fill the Column
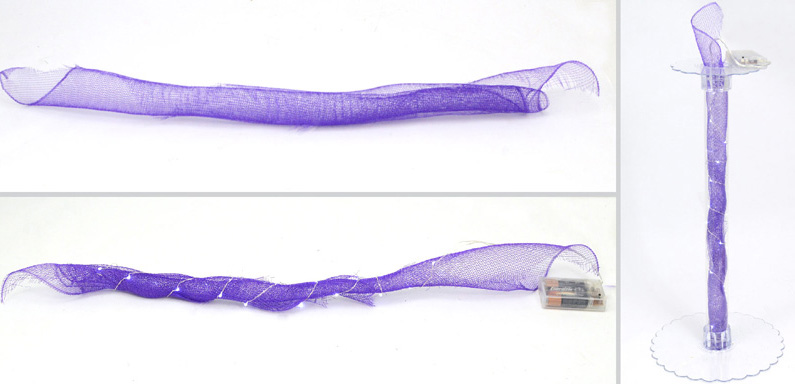
For some sparkle, fill the column with purple deco mesh and mini lights. Cut about a 5 inch wide strip from your 21"x10 yard roll of mesh. Roll it tightly. Now, wrap the wired LED lights around the roll. Insert this into the column, with the battery end last, so that it sits on the top plate. You will need to roll the mesh tightly enough to fit into the column.

STEP 3: Make Deco Mesh Puffs
Make 3 deco poly mesh puffs with the purple mesh roll. The puffs give this centerpiece shape and volume. You can always use more puffs for a bigger and fuller centerpiece. 3 pom poms use up a little more than half a roll of deco mesh. For detailed directions, click here to see the previous blog post. Or, scroll down for a summary.
First, cut 3, 12 inch long pieces of craft wire to eventually tie the puffs together. Cut 3 sections of mesh that are each 2 feet long (3 pieces make 1 puff). Gather up one piece of mesh into one hand, and then layer on the other 2 pieces by first bunching in the middle. Tie it with craft wire in the middle where you have been holding. Make a loop with the wire ends so that it is easy to attach them to the centerpiece. Pull and fluff the puffs out. 
STEP 4: Assemble the Puffs and Mask on Stick
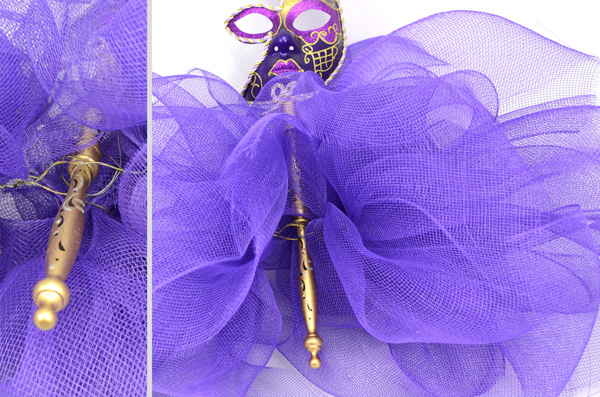
Insert the end of the phantom mask's stick through each of the wire loops to hold the puffs. The puffs should be spread out evenly, like a tutu, so that the centerpiece looks good from all angles. The mask acts as the focal point for this centerpiece.

STEP 5: Insert
Insert the mask's stick into the column as shown in the photo above. Adjust the puffs and mask and take a step back to make sure the centerpiece looks even. 

STEP 6: Create and Add Accents
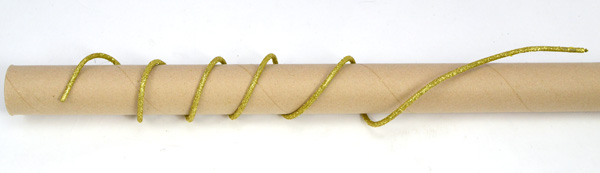
Now you can add new textures and color accents. Insert 3 purple ostrich feathers around the mask into the column. Add about 5 gold glitzy sticks into the column. Glitzy sticks are wired and easy to twist around tubes to make spirals. You can also bend them into any other shape you need. 
Finally, cover the base with gold angel grass shred to complete the look. Another great thing about this centerpiece is that it is easy to move around the accents till you are happy with the arrangement.

MORE DECO MESH CENTERPIECE IDEAS
mask masquerade mardi gras centerpiece DIY ideas
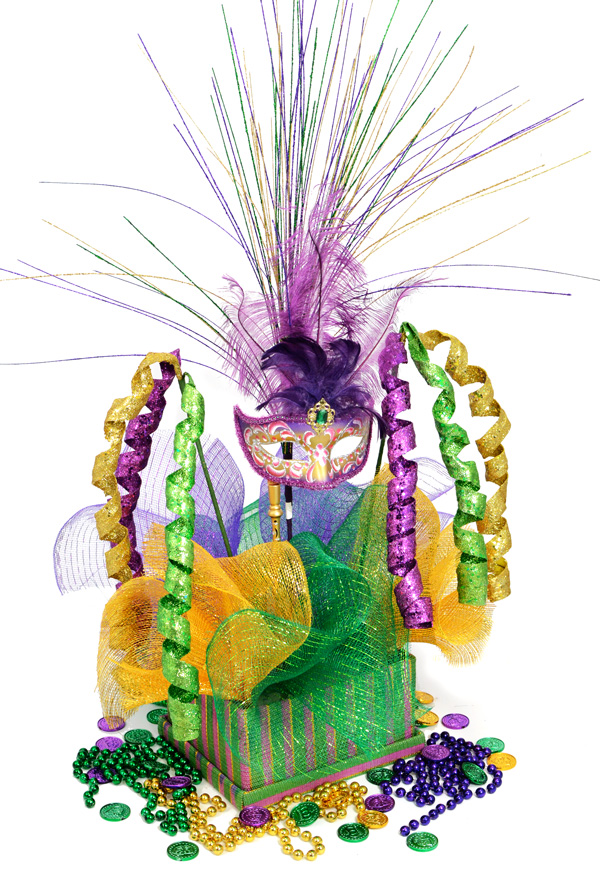
This type of centerpiece is easy to customize. Here is a different version topped with a beaded purple and gold princess mask and with about 5 purple ostrich feather placed throughout the mesh puffs instead of at the top.
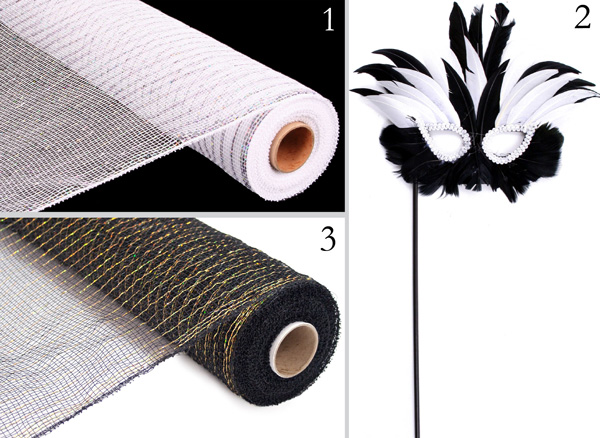
A black & white color scheme would be great for Masquerade party as well. The only difference would be to use both black and white mesh pieces when you are making each puff.

Shown above is: 

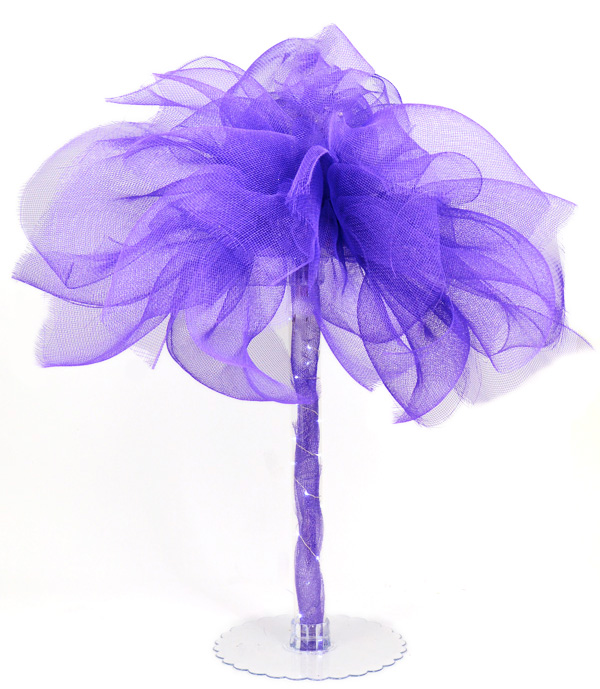
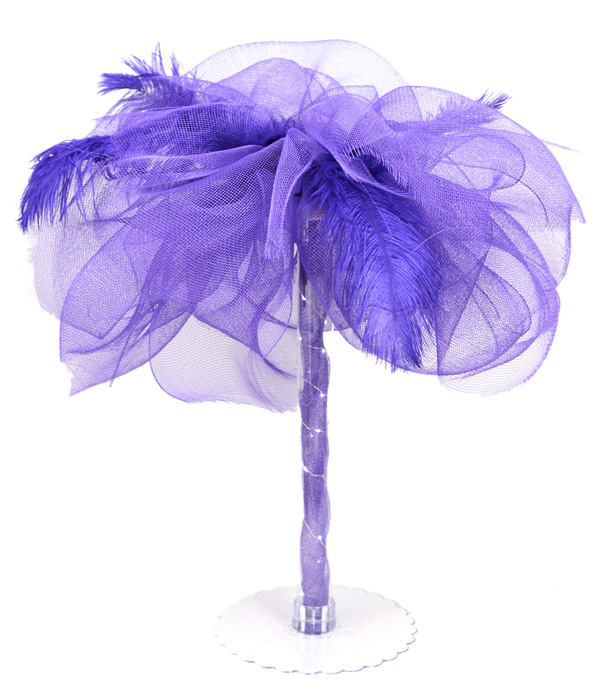
Having a party, birthday, wedding or event that isn't a masquerade? Here is a simplified version with  just the deco mesh puffs and lights, and another with feathers. Since there isn't a stick mask to hold and attach the puffs, simply use a thin wooden dowel or other type of stick. Choose accents and colors to customize for your event.
deco mesh centerpiece centerpieces ideas tutorial how to diy

Deco mesh is a type of soft plastic netting  that holds a full shape very easily, and it comes in a huge range of colors, finishes like metallic, and many patterns. Click here to see a great selection.

Have fun!

January 15, 2012

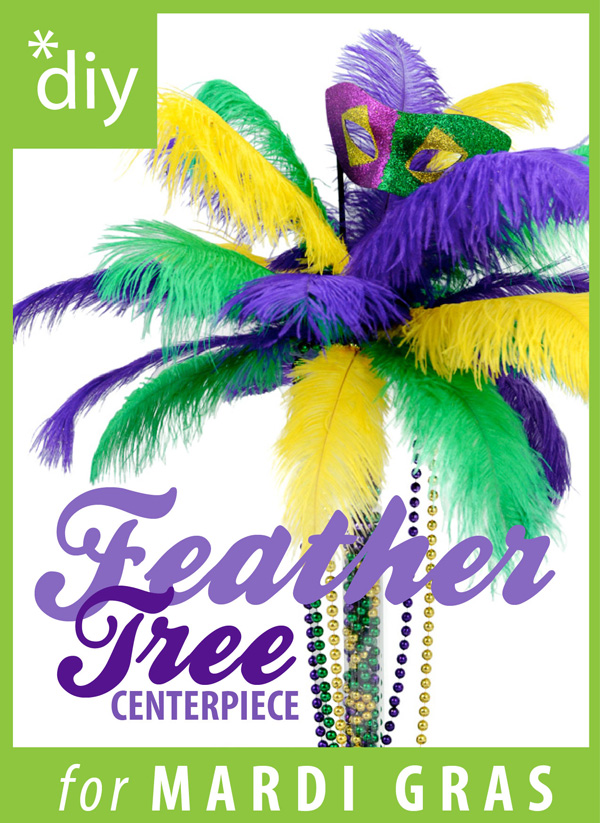
DIY Mardi Gras Feather Tree Centerpiece


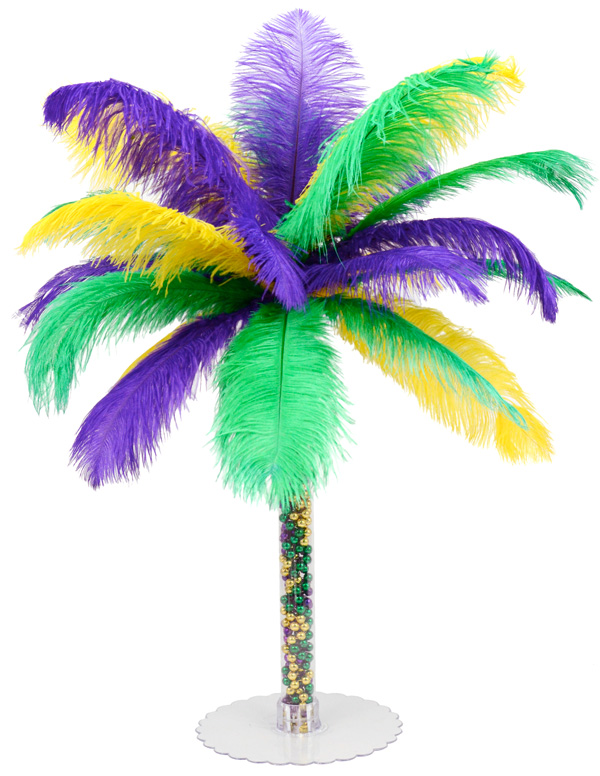
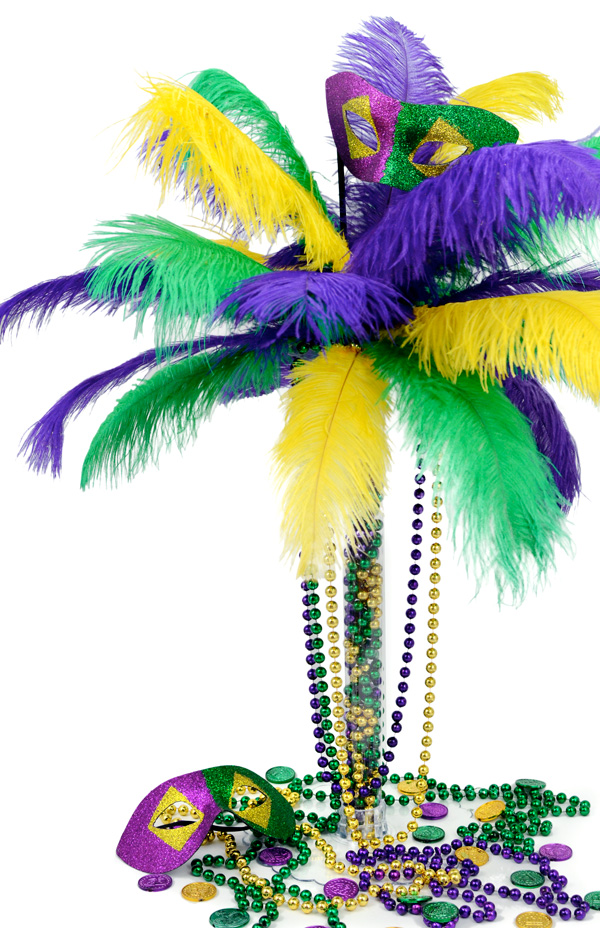
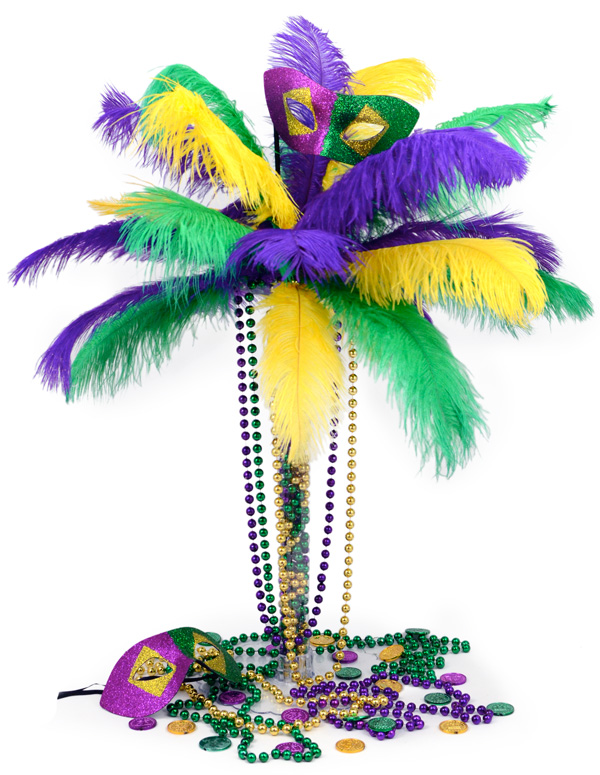
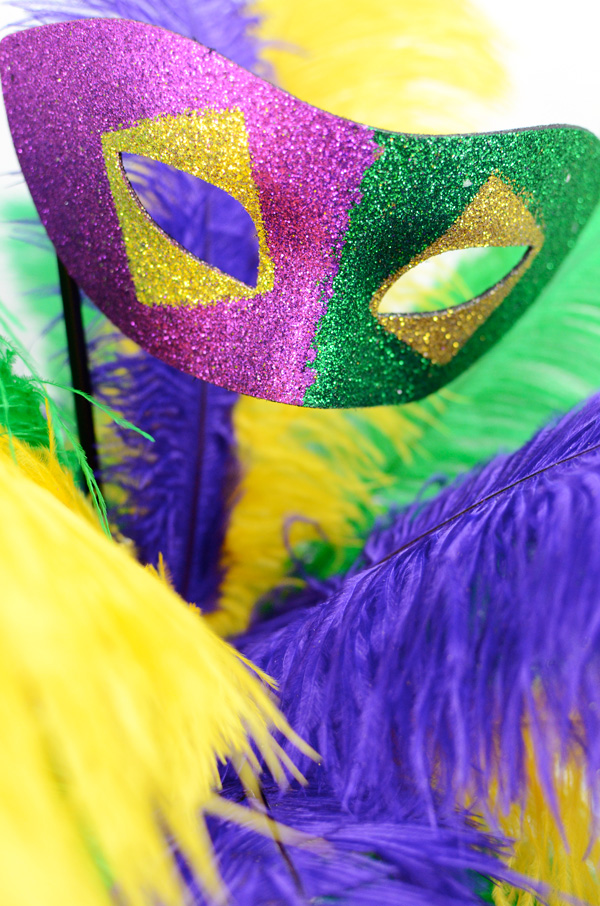
Popular feather trees are a great festive, glitzy centerpiece option for a Mardi Gras party. Add in some glittered harlequin masks and Mardi Gras beads and your Mardi Gras themed centerpiece is complete. Here is a tutorial to show you how surprisingly easy and quick these feather tree centerpieces are to make.
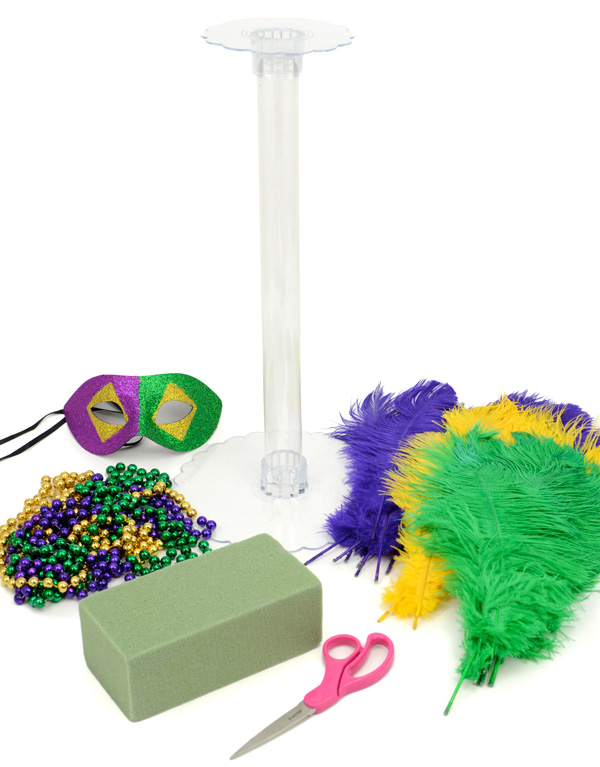
Supplies:
Ostrich Feathers: Purple (2 packs), Green (2 packs) and Yellow (1 pack). 
       These come in packs of 6 feathers that range from 14 to 16 inches long.
Mardi Gras Beads in Purple, Green and Gold (12mm sized beads in 42-inch long strands)
Scissors
Hot Glue
Wooden dowel or balloon stick
STEP 1: Assemble the Centerpiece Base
Put together the clear plastic centerpiece form using a 10-inch plate at the bottom, the 18-inch column, and the 6-inch plate at the top. These pieces (each sold separately) fit together easily with out any glue or adhesive. The centerpiece form is 20-inches tall. The completed centerpiece with feathers will be about 35-inches tall and 26-inches wide.

If you need a different height, all of the clear plastic pieces are interchangeable. For instance, to make this same centerpiece shorter, use the 10-inch tall column. You can also make the centerpiece very tall by adding the 10-inch or 18-inch column to what you see above, and adding a second 6-inch plate at the top. To see the whole selection of plates, columns and bases, click here.

STEP 2: Fill the Column
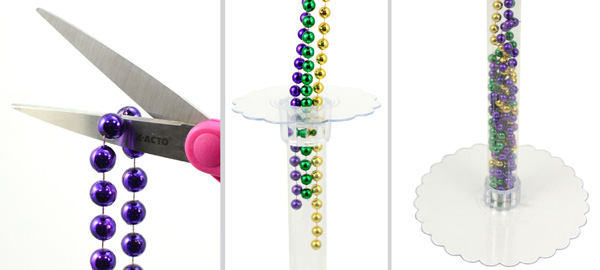
First, place a piece of clear packing tape at the bottom opening of the centerpiece base, so the beads do not fall out if you need to move the centerpiece. Cut one of each color Mardi Gras bead so that it is one long strand. Hold all three strands together and drop into the column. Use another 1/2 strand to fill up the column to the top. 


STEP 3: Insert Floral Foam
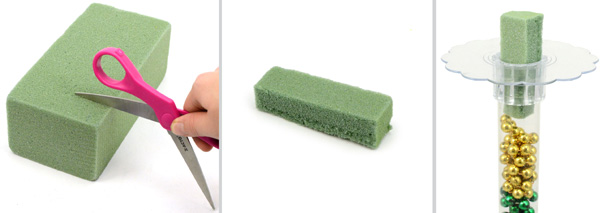
Using scissors or a utility knife, cut out a piece of dry floral foam into a 1 in. x 1 in. 4 in. block. Insert into the top of the centerpiece column so that about half sticks out. The block shouldn't wiggle around,  but be stuck in at the top. Use hot glue to glue in place if necessary. You can also use a bouquet holder.


STEP 4: Attach the Ostrich Feathers
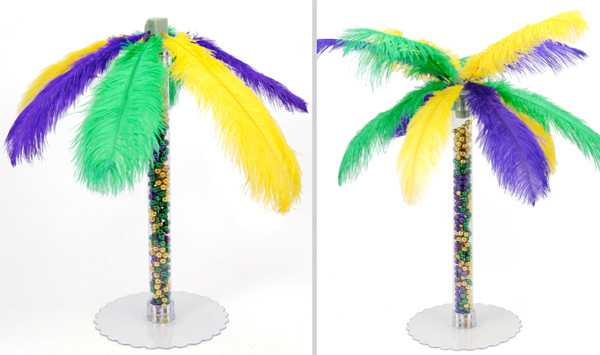
Start at the bottom, and insert the ends of ostrich feathers into the floral foam. Alternate the colors and go all the way around, turning the centerpiece as you go. The feathers should be angled downward at about 45-degrees, as shown in the photo on the left. 

Next, insert the feathers a little higher than 90-degree angle. Again, alternate colors and go all the way around, filling in the empty space.

Finally, insert feathers at the top. Now is the time to move feathers around to fill spaces, and to add extra feathers where needed. Turn your centerpiece all the way around to make sure it looks good from all angles.

STEP 5: Glue a Stick to the Mask
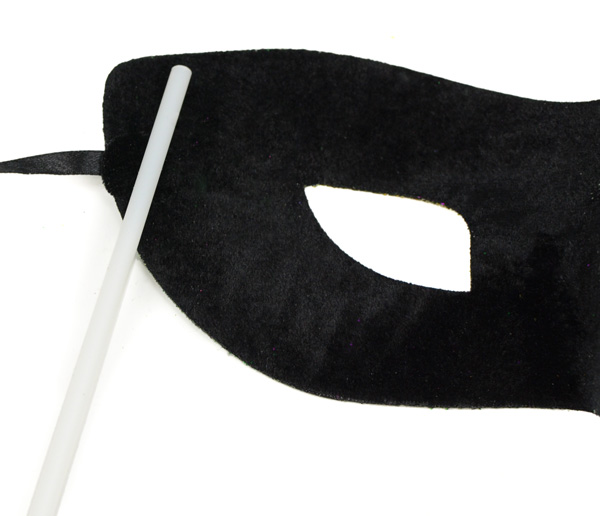
This Diamond Glitter Mardi Gras Mask comes with ribbon ties. Cut these off, and attach a thin wooden dowel or any sturdy, thin stick to the back side of the mask with hot glue.

STEP 6: Add Your Accents
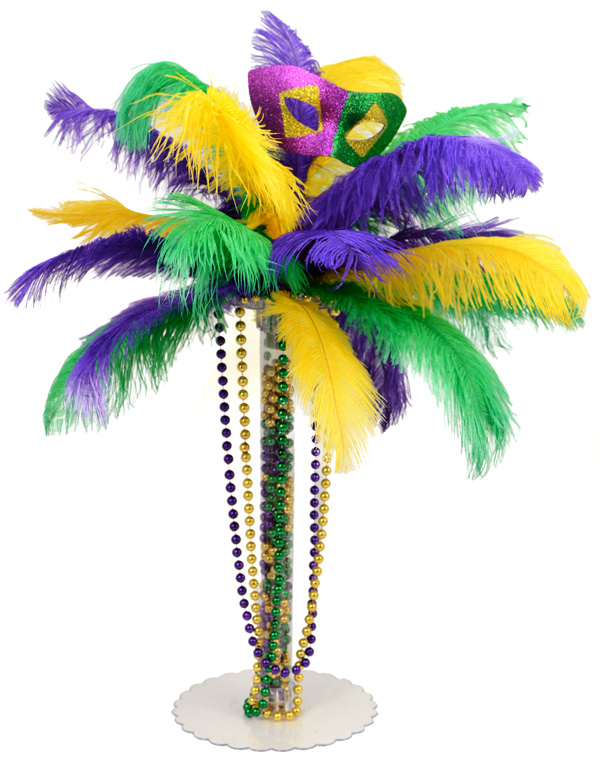
Insert the mask stick into the floral foam and column, near the center. This will be the focal point of the center piece. To add more length and drama to the centerpiece, hang 3 uncut strands of your purple, green and gold Mardi Gras beads from the top centerpiece plate. Secure with some hot glue.
You're finished! 

You can also scatter more beads, the same diamond mask and Mardi Gras coins around the base to add a festive feel to the tablescape. These accents can even act as easy party favors for guests to take home.

Happy Mardi Gras!


Here are even more Mardi Gras centerpiece ideas and tutorials:

LinkWithin

Related Posts with Thumbnails