April 30, 2012

DIY Red Burlap Ribbon Wreath

diy burlap wreath tutorial
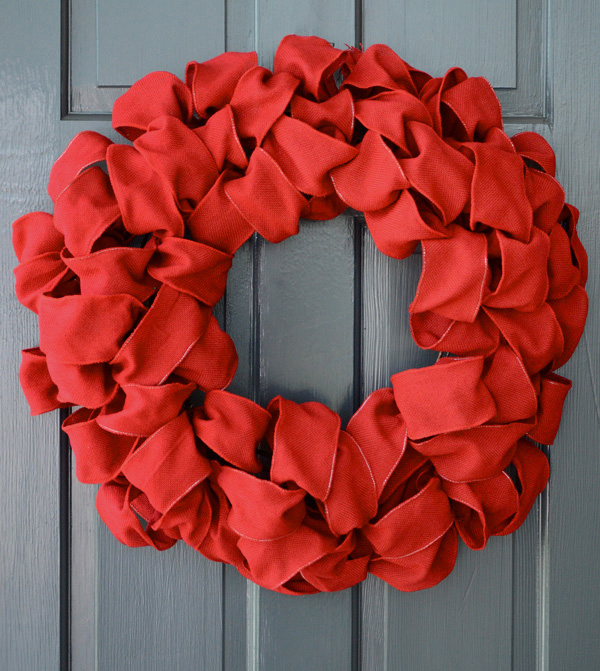
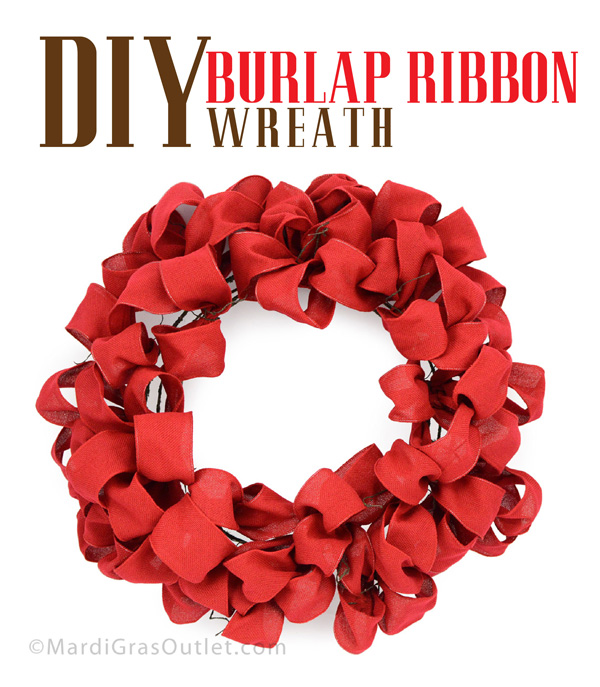
Natural burlap ribbon offers great texture and color--perfect for creating a fun wreath for the summer. This basic everyday burlap ribbon wreath can be transformed into a themed wreath for special events.  Our photo tutorial featured here shows you how to make this basic red burlap ribbon wreath using a Twig-works wreath form.  With some simple additions this wreath is transformed for a summer crab boil, Cajun crawfish boil, Memorial Day, the 4th of July or anything else you can imagine.

SUPPLIES
To purchase these products from www.mardigrasoutlet.com, click on the individual product links below or click HERE for page listing of all products.

Scissors

 
Time/Cost
The supplies for this basic burlap ribbon wreath will be about $18. The added decorative accents shown below in the crab, crawfish and patriotic themed wreaths would be additional.

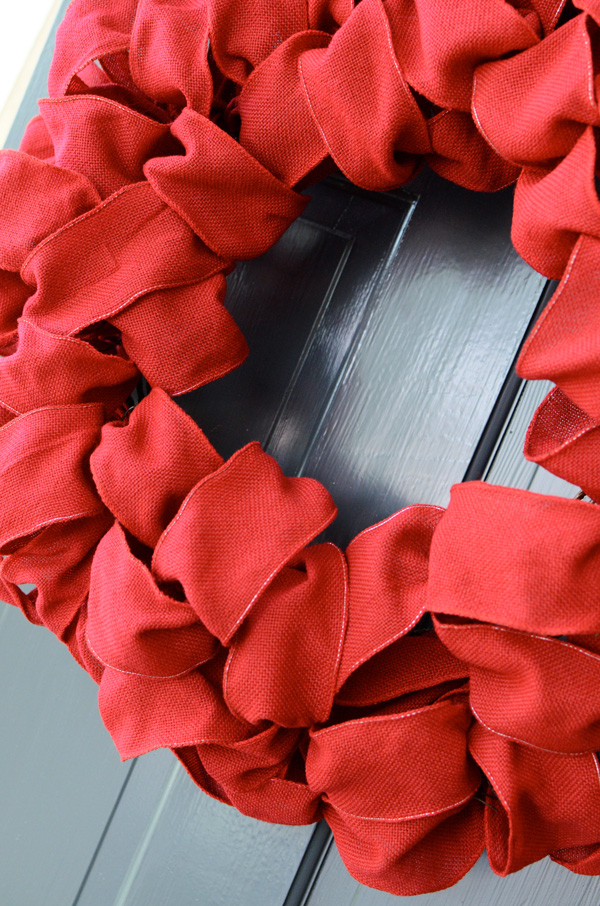
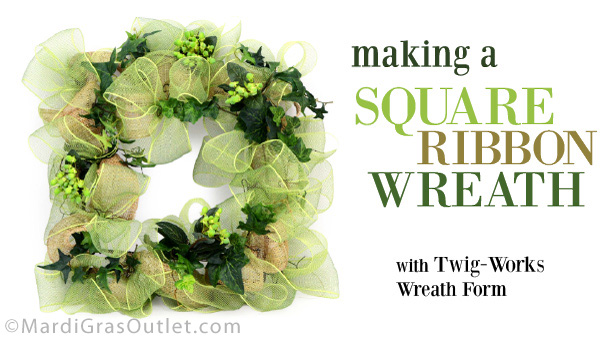
Twig-works wreath forms are covered in a natural moss-like texture and have pre-attached wire ties, making it easy and quick to create your own wreaths.

STEP 1
Form a loop at the end of the red burlap ribbon. This burlap ribbon has wired edges, making it easy for the loops to hold a full shape.
STEP 2
Bunch the loop into one hand, and then twist the ribbon once.

STEP 3
Form another loop, gather it into that hand, and then twist the ribbon once.


STEP 4
Repeat and continue going back and forth to make 3 more loops to form a bow.


STEP 5
Use a pair of wire ties on the twig-works wreath form to secure the bow to the wreath. Twist the ties through the loops that you have been holding.


STEP 6
Without cutting the burlap ribbon, form another bow a length down the ribbon. Make 1, 2, 3, 4 or 5 loops before attaching the bow to another set of wire ties. The more loops you make for each bow, the fuller the wreath will look.

STEP 7
Repeat and go in a zig-zig pattern all the way around the wreath, going back and forth from wire ties on the inner ring to the outer ring.

burlap ribbon wreath tutorial
STEP 8
This wreath form will use most of the roll of ribbon. As you attach each bow, fluff the loops out.

red burlap ribbon wreath diy how to tutorial christmas valentine's day
YOU'RE FINISHED!
Once you have filled the entire wreath, trim the excess ribbon. Keep scrolling down for ideas on creating different types of theme wreaths for summer parties and patriotic door decorations!
fireworks patriotic usa memorial day 4th fourth july deco mesh ribbon burlap red wreath
Make a patriotic wreath for the Fourth of July by adding easy DIY pom pom fireworks. CLICK HERE to see our tutorial on how to make these fun fireworks puffs with deco flex tubing ribbon.

memorial day wreath ideas how to burlap deco mesh patriotic
This red, white and blue wreath is perfect for Memorial Day or the 4th of July. The red burlap ribbon wreath was accented with cream burlap ribbon and royal blue Mardi Gras Beads.

crab boil shack nautical wreath burlap idea
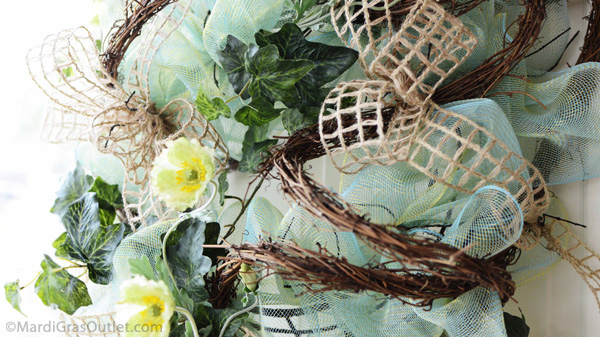
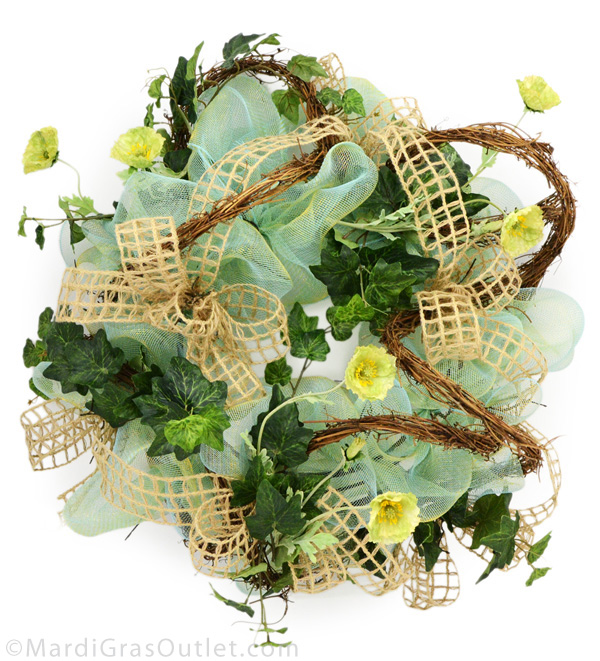
Summer is the perfect time for crab boils. This crab themed wreath is accented with Jute Window-Pane Ribbon  and crab picks. Attach the crab picks to the wreath using the same wire ties used to attach the ribbon.

crab boil decorations wreath door fish netting red burlap making
Using the same crab picks, you can create a different version of a crab wreath with natural-tone fish netting. Attach the netting to the wire ties by going back and forth across the front of the wreath, as opposed to going around the wreath like the jute ribbon. Leave some slack and then open up the netting. Click here for other types of crab party decorations and supplies.

crawfish boil cajun louisiana wreath spanish moss netting red burlap wreath
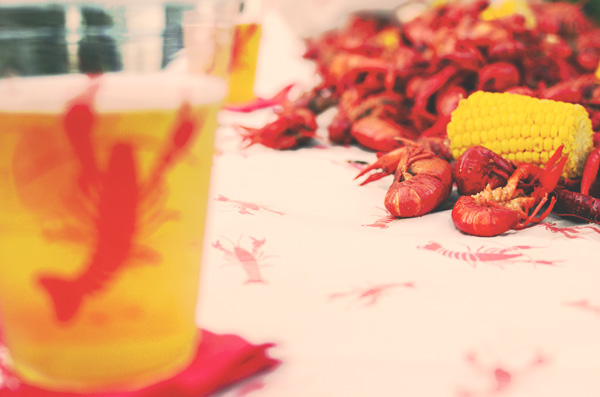
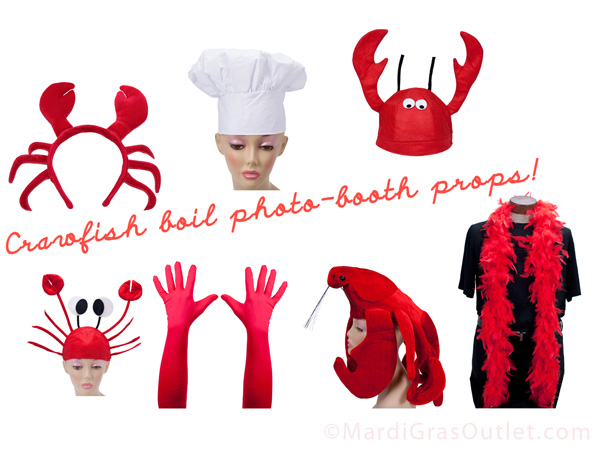
Need a crawfish boil wreath idea? Instead of adding crabs, try these red plastic crawfish and bunches of decorative Spanish moss.  For a variety of different crawfish boil party decorations, click HERE

burlap, ribbon, wreath


April 24, 2012

Twig-Works Square Ribbon Wreath: VideoTutorial

Work wreath forms offer you an opportunity to create your own custom door decoration. Don't limit yourself to filling the wreath form with standard 21" wide deco mesh. Wreaths can be created with ribbon, fabric or greenery. The fun square shaped wreath shown here is crafted using two different styles of 4" wide ribbon.

This video tutorial shows you how to make a natural looking deco mesh wreath  perfect for everyday using deco mesh ribbon and a new product, a natural woven 4" wide Abaca ribbon, on a Twig-Works wreath form.

The Twig-Works Spring Ribbon Wreath Video Tutorial:


Twig-works is a work wreath form with pre-attached wire ties that have a natural moss/brown vine-like finish. The wire ties make it quick and easy to attach deco mesh, ribbon or fabric, with no glue or much cutting. The natural look works well with burlap, natural fiber ribbons and greenery. 

Deco mesh is a type of synthetic netting that comes in rolls and ribbons of different sizes, colors and finishes.
The Finished Square Ribbon Wreath (made with a Twig-Works Wreath Form)
SUPPLIES
To purchase these products from www.mardigrasoutlet.com, click on the individual product link below or click HERE for a page listing all products.

Faux berries

Cost/Time
Products featured here are available at MardiGrasOutlet.com, and will come to about $25, without the artificial greenery and flowers. 


For a full list of instructional videos for making deco mesh wreaths, garlands, bows and more, click here . Or view our collection of photo tutorials,  here.

April 17, 2012

How to Video: Deco Mesh Twig-Works Wreath for Spring

deco mesh spring wreath video tutorial diy instructions how to make twig works
With the Easter wreath and decorations put away for the season, we know many of you are looking for a wreath design that can be displayed thru the summer.  This Spring wreath is a good option. The DIY  video tutorial featured below demonstrates how to make this everyday wreath using a new product- the twig-works wreath form. The pretty Spring wreath created in the video features a fresh turquoise/gold color scheme with natural textures of jute and grapevine garland woven in. The finishing touch is  realistic-looking silk greenery and florals (ivy and poppies) that will stay fresh for the whole season.
deco poly geo art mesh supplier supplies source
SUPPLIES
 To purchase these products from www.mardigrasoutlet.com, click on the individual product link below or click HERE for a page listing all products

Artificial trailing ivy bush and silk flowers
Scissors

Time/Cost
Deco poly mesh rolls, twig-works wreath forms, grapevine garland, ribbon and more are all available at www.MardiGrasOutlet.com.   The total cost of the supplies for this wreath is just under $35, without any artificial greenery or flowers. This wreath takes less than one hour to create.

Here is the video tutorial using the twig works wreath form and supplies listed above:

Twig-works wreath forms are made of moss green and brown wire that resemble twigs. They have pre-attached twig-like wire ties which makes creating a custom wreath with deco mesh simple. This popular natural look works well with grapevine garland, burlap, moss rope and ribbon. It also comes in bigger sizes and different shapes such as ovalsquare, a cross and even in garland form.

spring summer deco poly mesh wreath ideas
Twig-works wreath forms are similar to Work Wreath forms, which have wire ties that are covered in tinsel instead of a mossy twig texture.  

*Please note: Twig works are measured by the true diameter of the work form, as opposed to the standard work forms that are measured by the completed wreath size. Therefore, this 15" twig works wreath is the same size as a 24" work wreath form.

natural deco mesh wreath


Poly Deco Mesh is comes in many colors, patterns, sizes and finishes.  Click here to see more options on colors and styles for your own personalized wreath. 
video tutorial how to make a deco mesh wreath

Want to learn more about deco mesh and see more ideas? See our post: Deco Mesh Ideas Video, or keep exploring our blog for Deco Mesh Tutorials. We also have more videos: click here for our YouTube page.

April 9, 2012

DIY Decorations: Crawfish Paper Fans

crawfish boil party decorations ideas paper fan tutorial photobooth

As you probably already know, Crawfish Season is Here! In celebration, we've been dreaming up DIY ideas for some crawfish boil decorations to set the party scene for a chow-down on our favorite mud bugs. These ideas can also work for a lobster party if you aren't located in the South.

 TABLE COVER: Crawfish Patterned Paper
Crawfish Print Paper isn't just for replacing regular newspaper at your next crawfish boil party. It's also a great craft paper with which to create paper accordion fans to decorate the walls, fence, trees, tables and more!

Use the crawfish paper rosettes as a photo-booth background, garland, table centerpiece or even hanging from the trees for inexpensive outdoor party decorations. Read on for our simple tutorial with step-by-step instructions on making your next crawfish boil a FAN-tastic event!

party ideas lobster crawfish boil how to photo-booth paper fans tutorial diy decorations
PHOTO-BOOTH & PARTY BACKDROP
We used tape to attach the fans on a brick wall for a photo backdrop or for easy party atmosphere. If you are using a backyard fence or other wall, try small nails that go through each fan. Or, cover up an ugly wall with the crawfish pattern paper first. It's only 99 cents for a pack!

crawfish boil lobster outdoor party ideas decorations
DRESSING UP THE TREES
We also hung our fans from the trees using 2.5-inch Jute Window Pane Mesh Ribbon, available from MardiGrasOutlet.com. This natural fibers ribbon looks great in the outdoors, and its wired core is perfect for wrapping around tree branches.


HOW TO MAKE PAPER FANS
paper fans accordion rosettes diy how to make instructions tutorial


SUPPLIES
To purchase these products from www.mardigrasoutlet.com, click on the individual product link below or click HERE for a page listing all products
 Total cost for this project with both types of paper will be under $20. 
crawfish boil table cover pattern newspaper paper

A pack of ten 20" x 24" sheets will only cost you about 99 cents. With a few other simple supplies such as a stapler, tape and scissors, you can start crafting your own low-cost crawfish-theme rosettes!

Visit our Crawfish Boil Supplies Section for more fun decorations, invitations and party supplies for your next crawfish boil!

STEP 1: Creating the Fan Form

Starting on one of the 20 inch sides, begin folding 1 sheet of Crawfish Newspaper back and forth at intervals of about 1 inch.


Once you fold the entire sheet, gather the folds and crease in half into a fan form.

how to make paper fans accordion garland centerpieces photo booth party decor dessert table


Lay fan form long-ways and use a stapler to secure the center. Make the staple as parallel to the center crease as possible.


STEP 2: Beveling the Fan Edge

Refold fan.


Using scissors, cut across all ends of the folded fan at about a 45 degree angle to create a beveled edge. Make sure and remove about 2 inches of length from the end to create an appropriate ratio of height-to-width for the circular fan form.


STEP 3: Taping the Fan Into a Circular Form


With the trimmed fan form lying in a V shape, pinch together the two closest edges.


Attach the edge with two small pieces of clear tape from the outside or double stick tape from underneath. One piece of tape should be closer to the center, and one should be near the outer edge of the fan form to avoid gapping. You could also use glue to attach the fan edges. Just use a clip to keep them together until the glue dries.


Gather the opposite side of the form together, and tape the same way.


STEP 4: Get Busy

Admire the awesome fan you just made! Then get to making some more!

You can create variation in the fans by making them different sizes (just remember to maintain a ratio of about twice as long as it is wide), by cutting a scalloped edge in Step 2 or by cutting a variety of angled edges.

Also consider creating some fancy snips along the side of each fan fold during Step 2 to create a "Snow Flake" effect, as shown below.


To add some color and shine to the display, we made some of our fans using Red Foil Paper. You can purchase a 26" by 25' roll of red foil paper and a variety of other colors for just under $18 a roll here: Foil Paper Rolls.

paper fans diy party outside
diy paper fan flower


Photo Booth Ideas:
Now you can attach the paper fans to a wall or fence for an easy photo background, or for a festive atmosphere.

For more photo booth backdrop ideas and how to set one up, check our our previous post: DIY Photobooth Ideas.

Spice up your boil photo shoot with some crawfish-themed props for your guests, as well.
crawfish boil party decorations ideas diy photobooth photo booth paper fans accordions rosettes tutorial instructions


Click below for a few suggestions:
crawfish boil party ideas decorations photobooth

crawfish boil party ideas diy decorating paper fans

LinkWithin

Related Posts with Thumbnails