February 6, 2012

Curled Paper Bow Gift Wrap with Mardi Gras Paper

curly wrapping paper bow how to diy tutorial
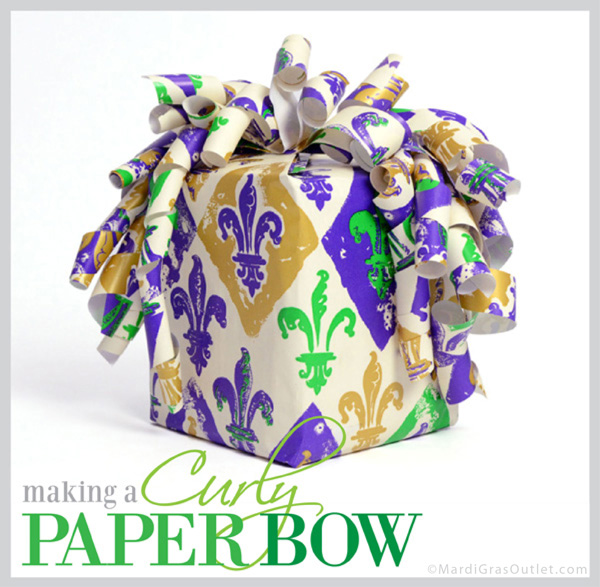
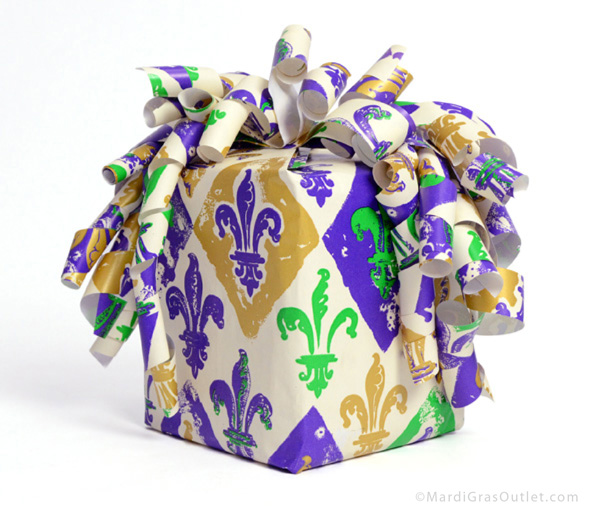
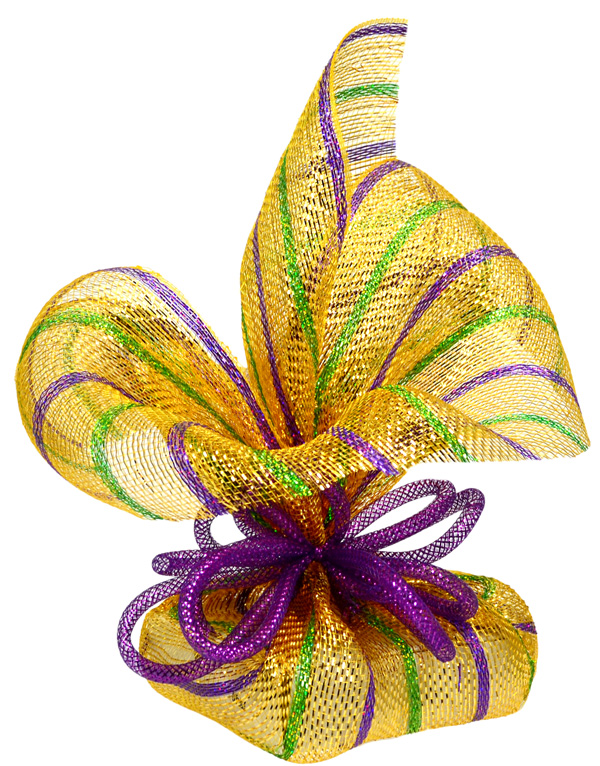
If you find yourself without a bow for your gift wrap, don't worry, making your own is simple with leftover wrapping paper. This present was wrapped with Fleur de Lis Mardi Gras gift wrap ($29.95) but it needed a festive top to match. Here's a short tutorial on how to make your own curly paper bow. 
STEP 1:
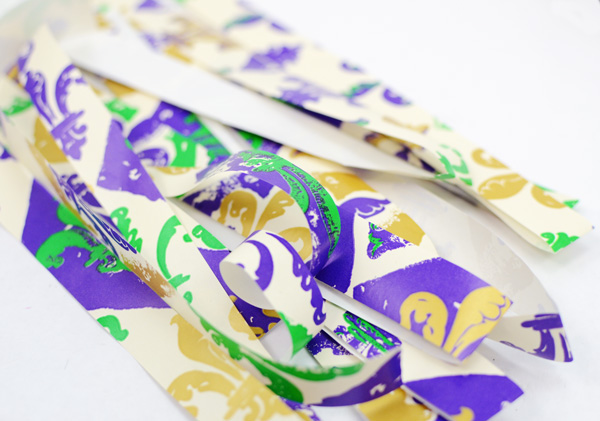
Cut about 15 strips of gift wrapping paper that are about 1/2" to 3/4" wide, and 10" to 15" long. They don't need to be exact because different lengths make a fuller looking bow. 

You also should adjust the lengths according to the size of the present and how big you want the bow. Longer strips makes a bigger bow and vice versa. Our gift box was 4 in. x 4 in. x 5 in and we made the curly bow over sized, so that it would cascade down the sides.
STEP 2:
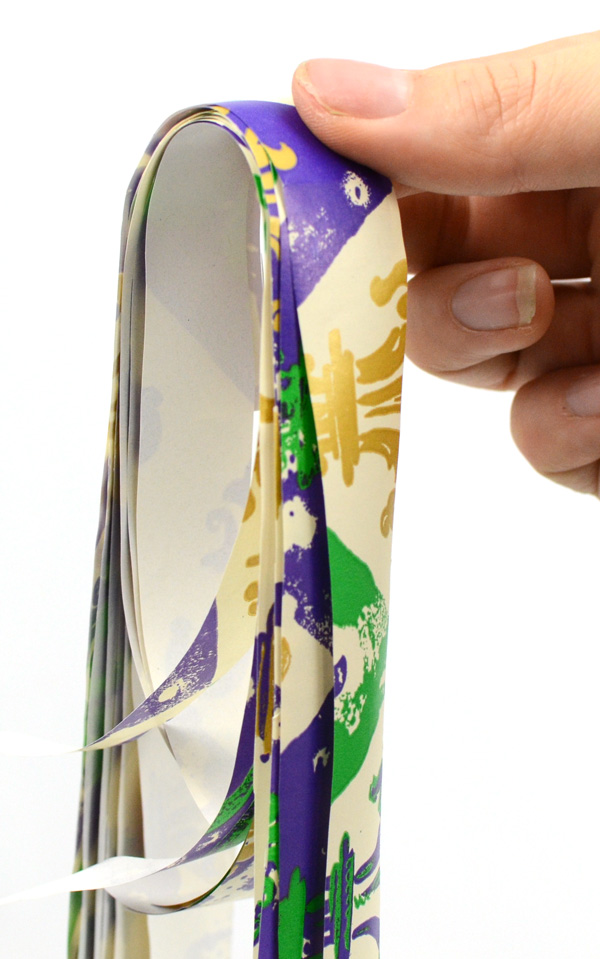
Gather all of the strips evenly and hold the stack at the middle.
STEP 3:
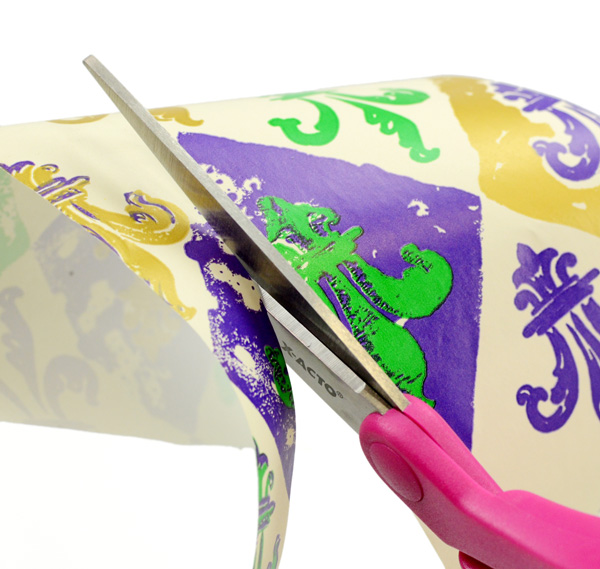
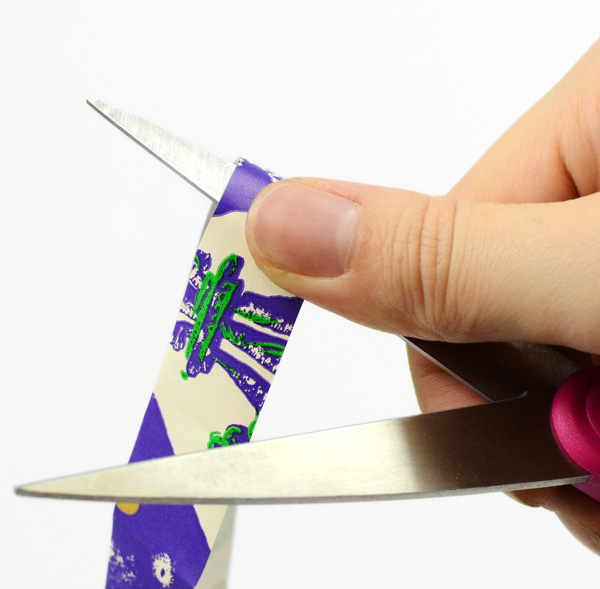
Curl them! This is just like curling ribbon: open up your scissors and put the paper between your thumb and the scissors edge at an angle. Pull going towards the end of the paper strip. 

Curl both sides of each strip from the middle where you are holding the bow. It is okay to have tighter and looser curls for this whimsical type of bow.

STEP 4:
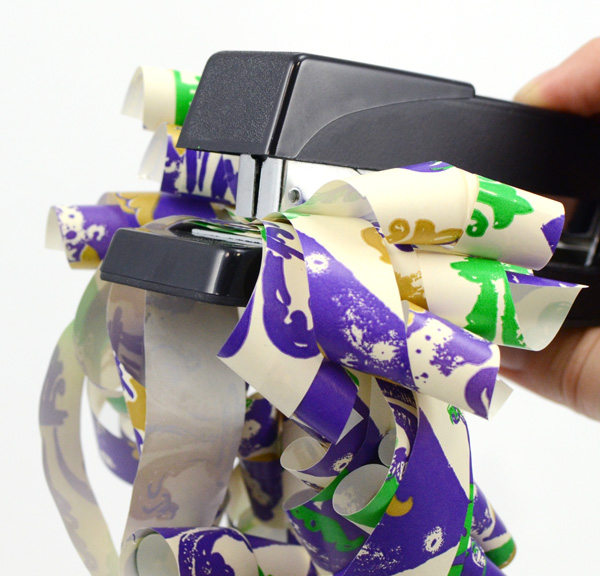
Staple or tape around at the center where you have been holding the bow. 
Finally, attach your bow with tape or a glue dot to the top of the present.
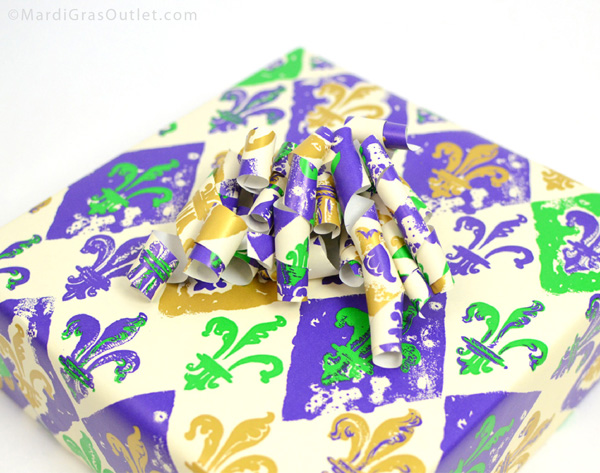
We also made a curly paper bow for a larger sized gift.

And there you go! An easy, fun and inexpensive way to decorate your presents.

Looking for more Mardi Gras or Louisiana gift wrap ideas? Click here to see our previous blog post on how to make this fleur de lis cut-out wrapping. Template provided for free!


February 2, 2012

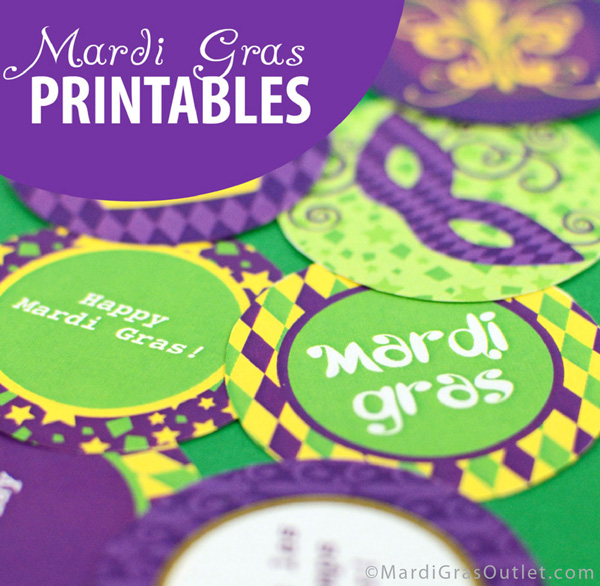
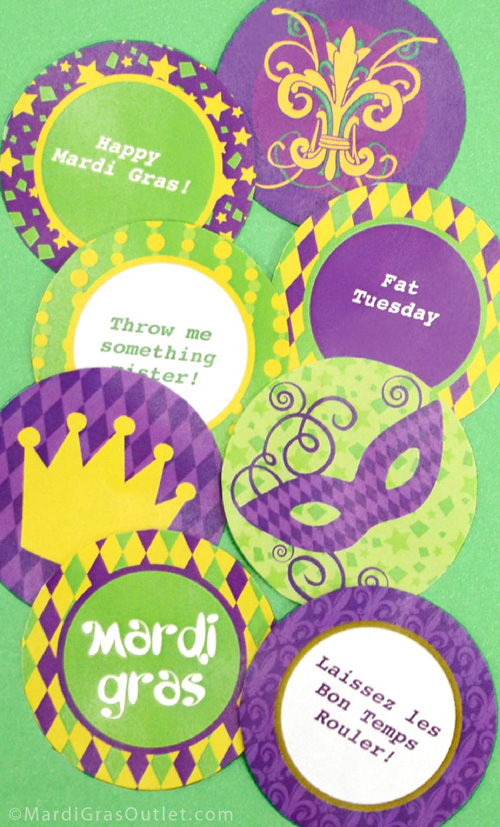
Free Mardi Gras Printable Stickers and Labels


Create custom Mardi Gras Beads, party favors or decorate gift packaging with our free printable stickers and labels. These Mardi Gras graphics include a crown, mask, scrolled fleur-de-lis and harlequin patterns. Similar to our other downloadable designs, you can personalize and customize the labels for a special event, party or parade.


Click on the links above to download each page. You will need Adobe Acrobat Reader, which is free here if you don't have it. To customize the Mardi Gras Labels, open the file in Acrobat Reader. You should see some highlighted boxes where you can click and type your text before printing. Or, you can simply print out the labels and write on them by hand. Only the "labels" page has customizable text.

Print these out onto 8.5"x11" sticker paper or cardstock (Avery is a good brand) with your inkjet or laser printer. Any office supply store sells both types of paper. Use a 2" circle cutter or scissors to cut out each circular design. 

We have tons of ideas on how to use our Mardi Gras labels, so here are images of what we did.

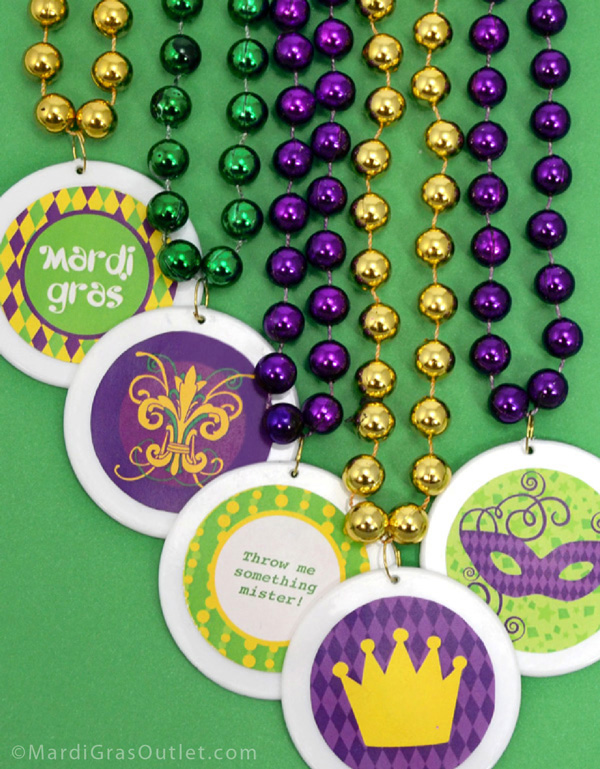
Easily personalize Mardi Gras beads with these designs! They fit perfectly onto blank discs, which you can buy separately or already attached to a bead necklace at a really affordable price (12 necklaces for only $3.40!). Available at MardiGrasOutlet.com, we used the traditional Mardi Gras colors of gold, green and purple for the beads with white blank discs. If you need more bead colors, click here

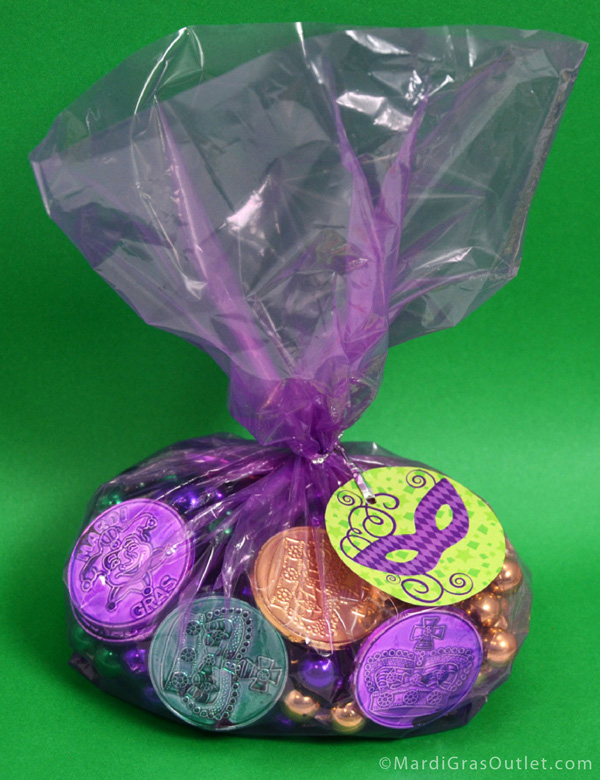
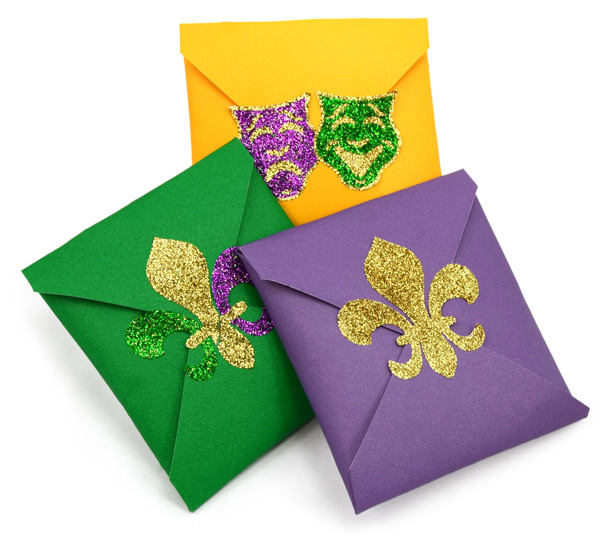
Printed onto stiff cardstock, these also make easy and festive gift tags. Use a hole-punch to make a place to thread ribbon or string through, and tie around a gift bag. We filled a purple cello bag with Mardi Gras doubloons and purple, green and gold Mardi Gras beads for a party favor that everyone can enjoy. The cello treat bags come with twist ties that you can use.

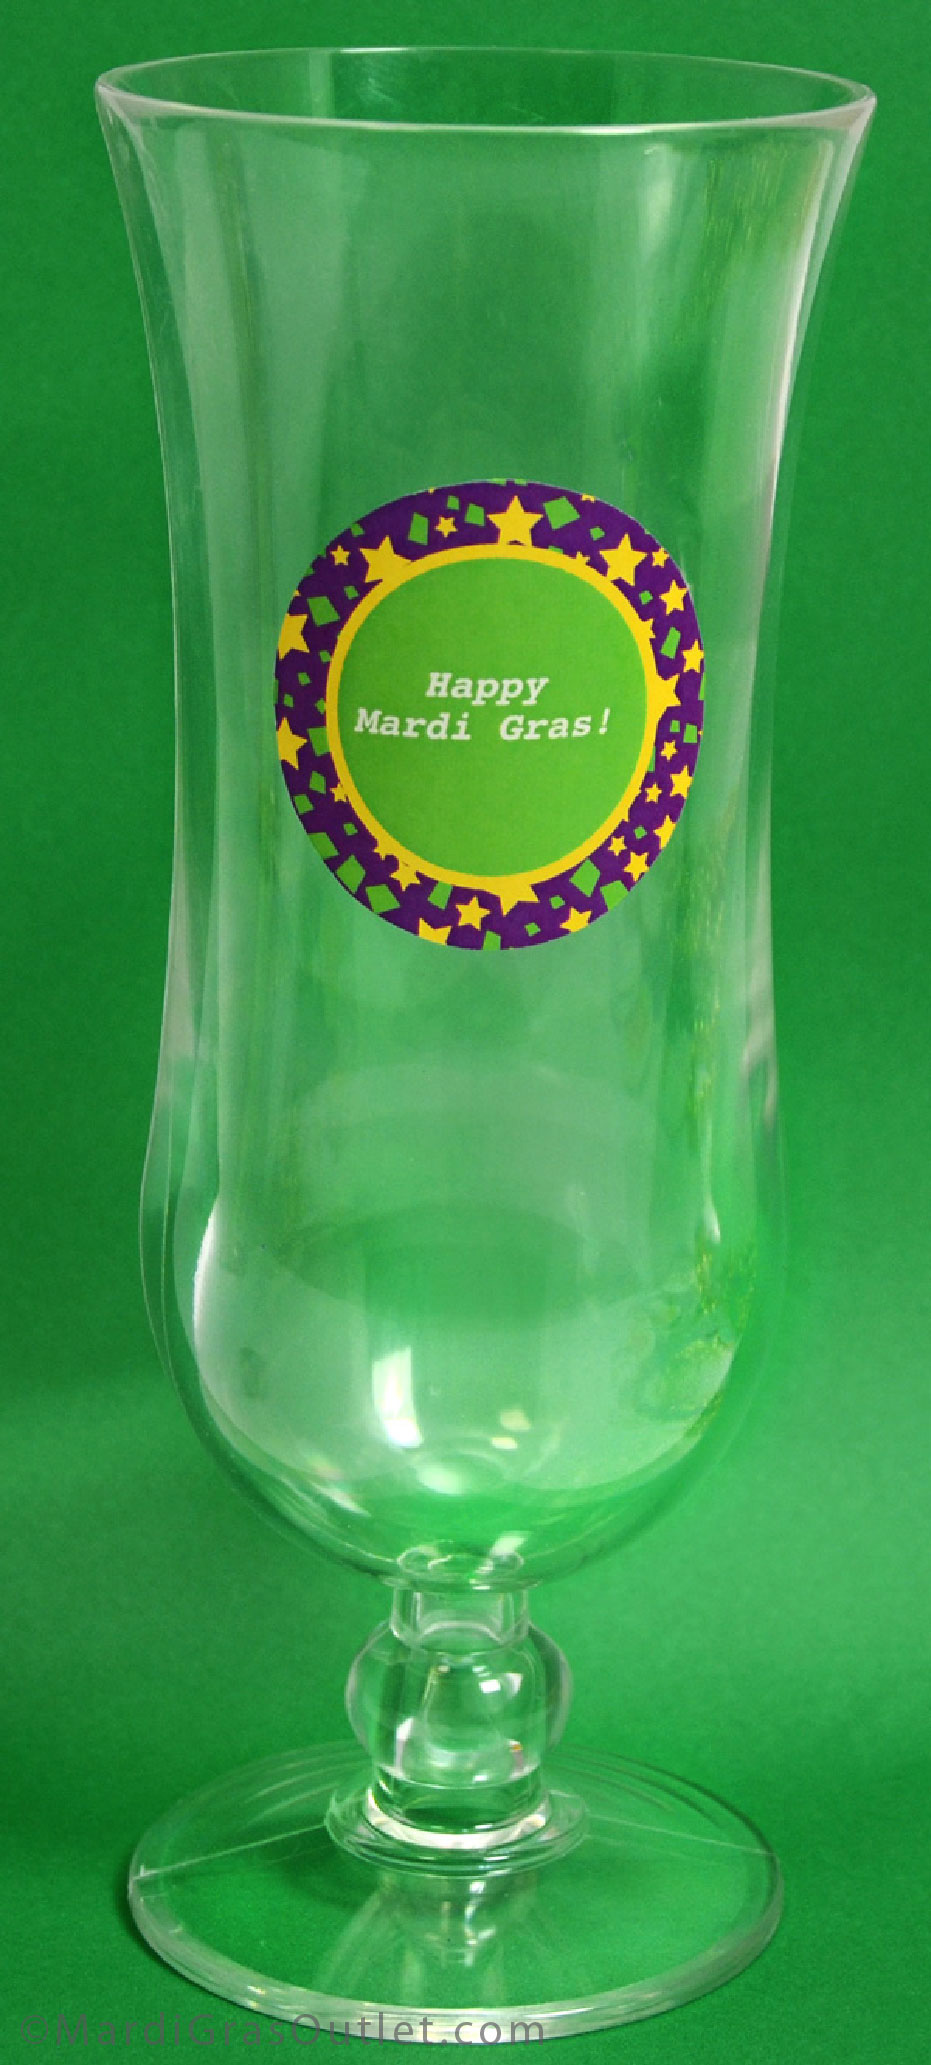
Last but not least, customizable stickers are great for drink labels. We put ours on a clear plastic hurricane glass, but this idea works for plastic party cups and glasses as well. Give your guests sharpie markers to write their name on their glass, or use the type-your-own text feature to customize for the special event.

Here are even more possibilities: 
Scrapbooking and scrapbook pages
Candy, cookie or praline packaging (click here for a DIY tutorial) 
Name tags or seating cards
Cupcake toppers by gluing to toothpicks (see examples here, and Mardi Gras cupcake recipe here)
Appetizer or buffet signs


January 30, 2012

Making a Mardi Gras Wreath with Deco Mesh

mardi gras wreath ideas deco mesh
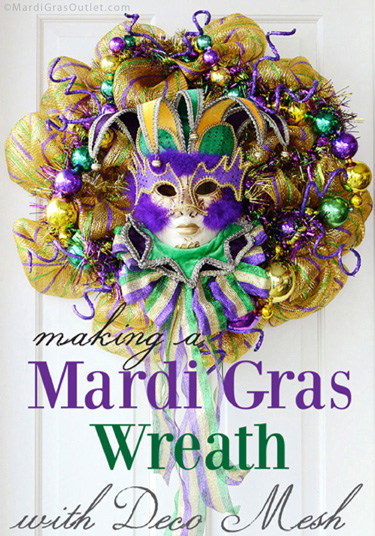
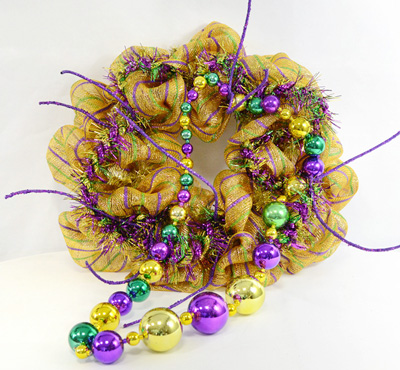
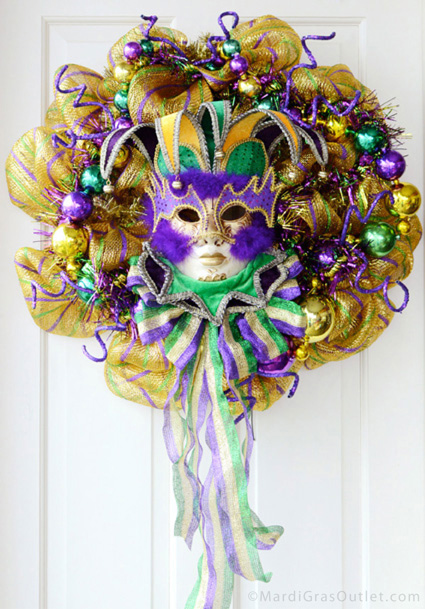
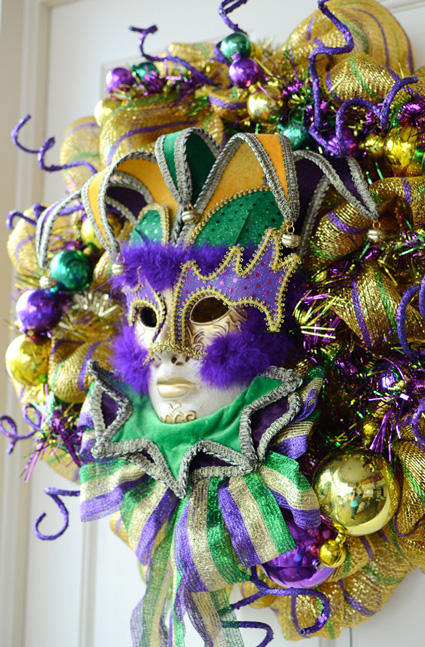
Celebrate the Mardi Gras season by making a festive deco mesh wreath in purple, green and gold, the colors of Mardi Gras. This wreath is embellished with a jester mask, jumbo Mardi Gras beads and metallic tinsel garland. Keep scrolling down for a tutorial on how to create your own!

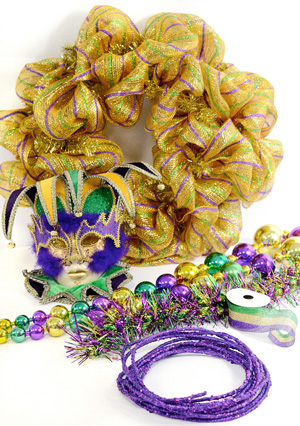
SUPPLIES LIST (Click on the product name for supplies source) 
(1) Mardi Gras Stripe Ribbon (2"x10yards) 

The wreath supplies can be purchased at www.MardiGrasOutlet.comCLICK HERE. All of the supplies needed for this wreath is about $62.

STEP 1: MAKE THE BASIC DECO MESH WREATH
The video above shows you how to attach the 21" Deluxe Mardi Gras Deco Mesh Roll onto the 24" metallic gold work wreath form. You will use the pre-attached tinsel-covered wire ties to secure the puffs of mesh all the way around the inner and outer rings of the wreath form.

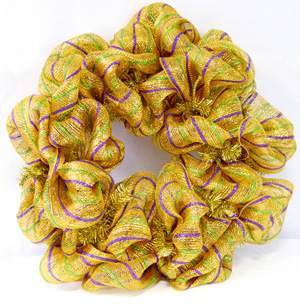
The basic Mardi Gras deco mesh wreath should look like this.

STEP 2: CUT THE GLAMOUR ROPE
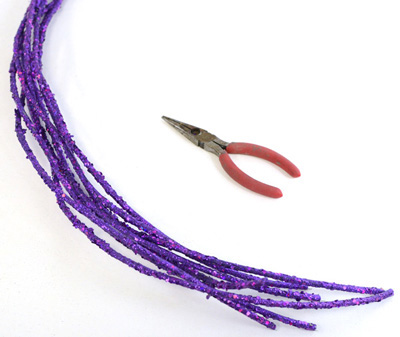
Using wire cutters, cut the wired purple glamour rope into 6 pieces ranging from 20" to 25" long. Glamour rope is a great creative product, and it comes in many colors. It is also wired so that you can bend it into many different shapes.

STEP 3: ATTACH THE GLAMOUR ROPE
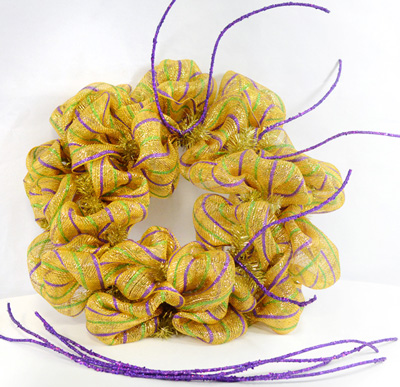
Thread the pieces of glamour rope halfway through the work wreath frame and twist a few times to secure the glamour rope. Place the glamour rope pieces several inches apart from each other so that they are evenly spaced all the way around the wreath.
STEP 3: ATTACH THE GARLAND
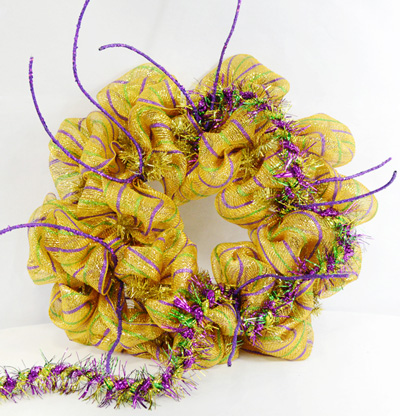
Attach the metallic spiral tinsel garland all the way around the wreath. Twist the glamour rope around the garland to secure. Try leaving some slack as you attach the Mardi Gras garland so that it looks wavy.

STEP 4: ATTACH THE JUMBO MARDI GRAS BEADS
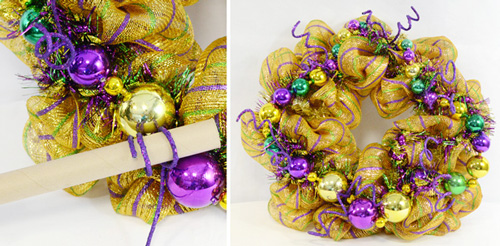
Using the glamour rope ties again, secure the giant mardi gras ball necklace to the wreath. Make sure the larger balls are placed at the bottom of the wreath versus the top.

STEP 5: CURL THE GLAMOR ROPE
Curl the glamour rope around a cylinder or tube to form each of the glamour rope pieces into spirals.

STEP 6: MAKE A BOW
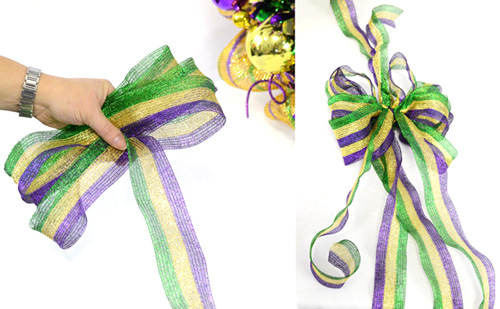
Use the Mardi Gras Stripe Ribbon to make a bow. Form a loop and hold in one hand. Form another loop on the opposite side and hold them in the same hand at the middle. Continue going back and forth until there are 4 loops on each side. Now cut 2, 30" long strips of ribbon and one shorter piece. Use the short length to attach the tails at the middle to the place you have been holding the loops.

For more detailed directions on how to make a similar bow, click here.

STEP 7: ATTACH THE MASK
At the back of the Deluxe Jester Mask, there is a loop. Use a tinsel-covered wire tie on the work wreath form to secure the loop and the mask to the middle of the wreath. 

mardi gras deco mesh wreath how to make
STEP 8: ATTACH THE BOW
Finally, attach the bow you made to the bottom center of the wreath, directly underneath the Jester Mask. Spread and fan apart the bow loops, as seen in the photo above. 

mardi gras wreath
Happy Mardi Gras!

January 26, 2012

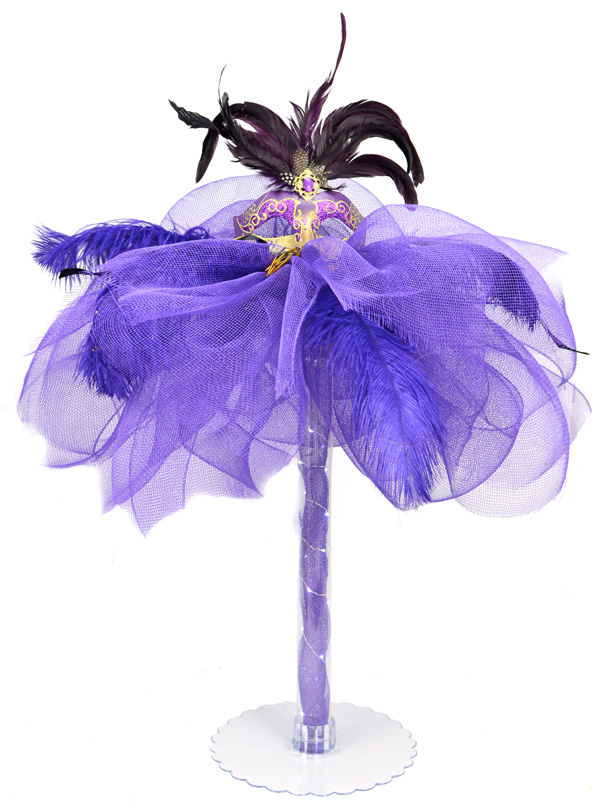
Masquerade Column Deco Mesh Centerpiece: Tutorial


how to make masquerade centerpiece idea deco mesh

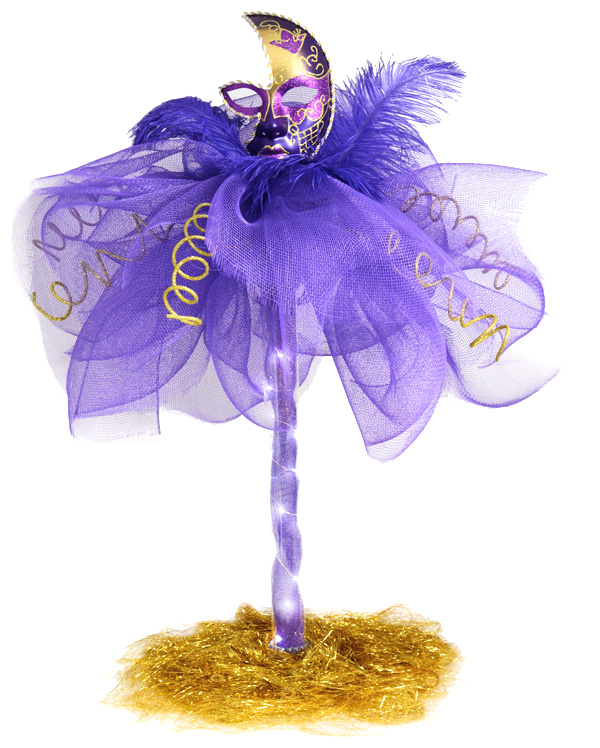
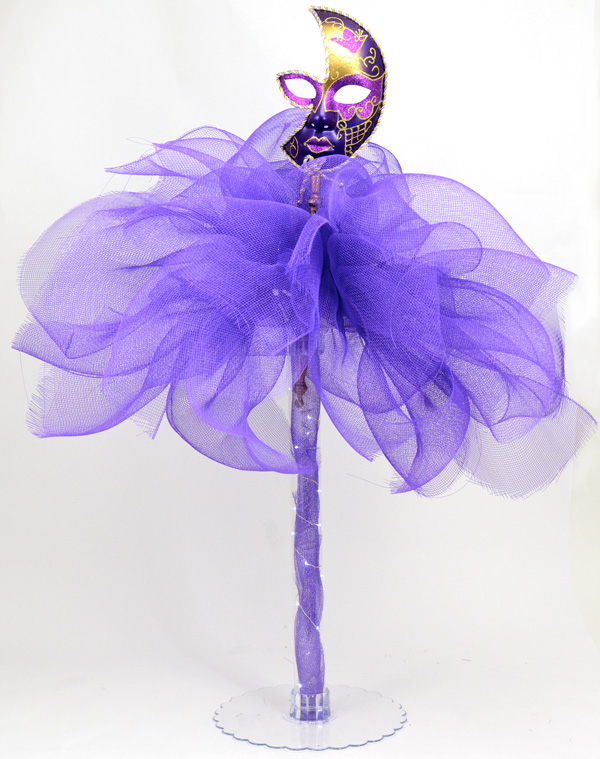
Create an element of mystery, opulence and elegance for your event with the right centerpiece. Versatile clear column and plate pieces combine to create striking table decorations for Masquerade or Mardi Gras themed parties, proms or events. And, making one of these centerpieces takes only a few easy steps and some key ingredients such as a mask, deco mesh puffs, clear column with base and feathers.


The idea for this tall puff centerpiece with mini lights was inspired by a combination of hanging mesh pompoms from our previous blog post, and feather tree centerpieces (click here for our tutorial)that have been floating around the blogosphere. One of the great things about this centerpiece is that it is easy to change the colors and decorative accents to suit your needs for specific occasions. Here's how to make it.
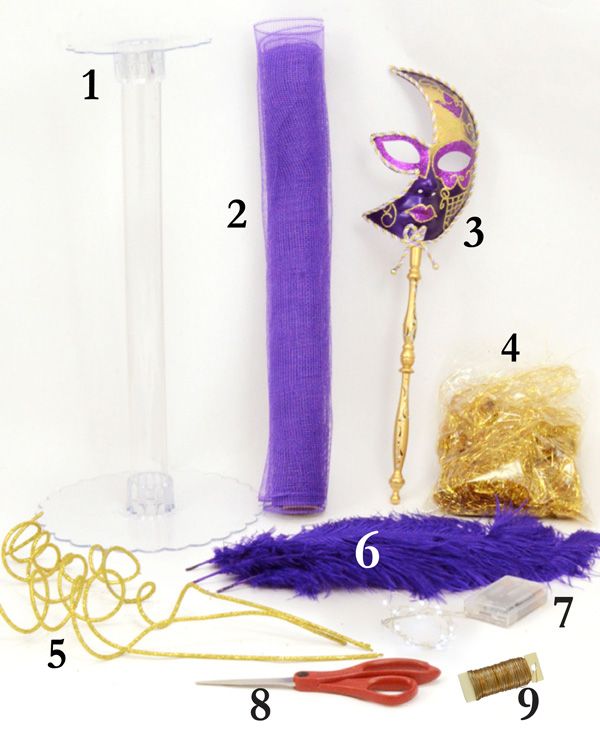
SUPPLIES:
8. Scissors

You can find all of these at MardiGrasOutlet.com.

STEP 1: Assemble the Centerpiece Base
  
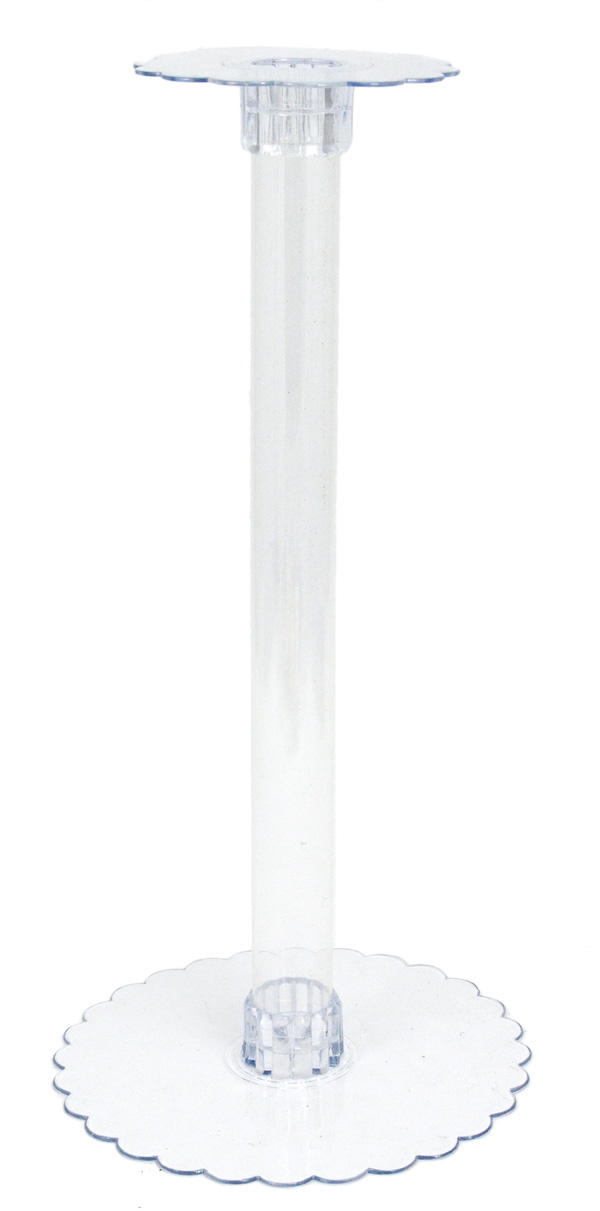
Assemble the clear plastic centerpiece bases. The 10" plate should be at the bottom, into which you should insert the 18" column. Finally, place the 6" plate on top. These are perfect for adding height to make tall centerpieces.                                                

If needed, you can add another column and plate to make it taller, or use the 10" column to make the centerpiece shorter. All of these clear plastic centerpiece parts are interchangeable and fit together many different ways.

STEP 2: Fill the Column
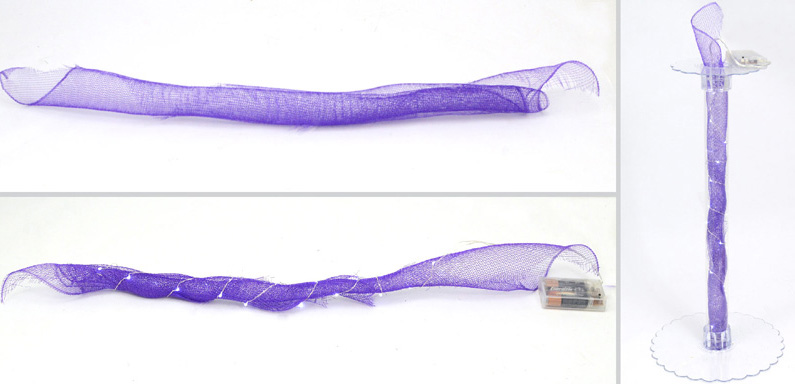
For some sparkle, fill the column with purple deco mesh and mini lights. Cut about a 5 inch wide strip from your 21"x10 yard roll of mesh. Roll it tightly. Now, wrap the wired LED lights around the roll. Insert this into the column, with the battery end last, so that it sits on the top plate. You will need to roll the mesh tightly enough to fit into the column.

STEP 3: Make Deco Mesh Puffs
Make 3 deco poly mesh puffs with the purple mesh roll. The puffs give this centerpiece shape and volume. You can always use more puffs for a bigger and fuller centerpiece. 3 pom poms use up a little more than half a roll of deco mesh. For detailed directions, click here to see the previous blog post. Or, scroll down for a summary.
First, cut 3, 12 inch long pieces of craft wire to eventually tie the puffs together. Cut 3 sections of mesh that are each 2 feet long (3 pieces make 1 puff). Gather up one piece of mesh into one hand, and then layer on the other 2 pieces by first bunching in the middle. Tie it with craft wire in the middle where you have been holding. Make a loop with the wire ends so that it is easy to attach them to the centerpiece. Pull and fluff the puffs out. 
STEP 4: Assemble the Puffs and Mask on Stick
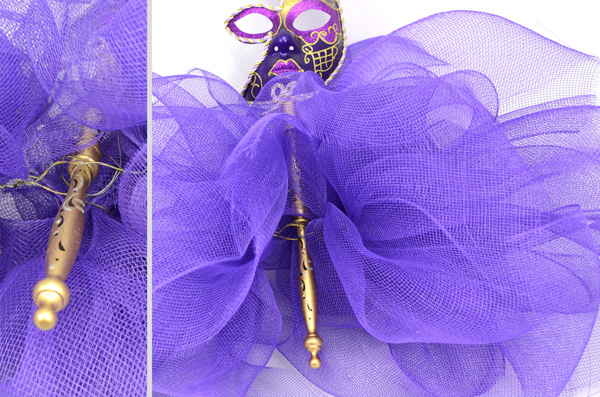
Insert the end of the phantom mask's stick through each of the wire loops to hold the puffs. The puffs should be spread out evenly, like a tutu, so that the centerpiece looks good from all angles. The mask acts as the focal point for this centerpiece.

STEP 5: Insert
Insert the mask's stick into the column as shown in the photo above. Adjust the puffs and mask and take a step back to make sure the centerpiece looks even. 

STEP 6: Create and Add Accents
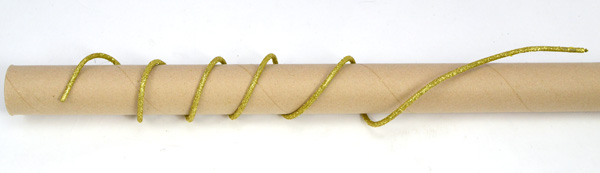
Now you can add new textures and color accents. Insert 3 purple ostrich feathers around the mask into the column. Add about 5 gold glitzy sticks into the column. Glitzy sticks are wired and easy to twist around tubes to make spirals. You can also bend them into any other shape you need. 
Finally, cover the base with gold angel grass shred to complete the look. Another great thing about this centerpiece is that it is easy to move around the accents till you are happy with the arrangement.

MORE DECO MESH CENTERPIECE IDEAS
mask masquerade mardi gras centerpiece DIY ideas
This type of centerpiece is easy to customize. Here is a different version topped with a beaded purple and gold princess mask and with about 5 purple ostrich feather placed throughout the mesh puffs instead of at the top.
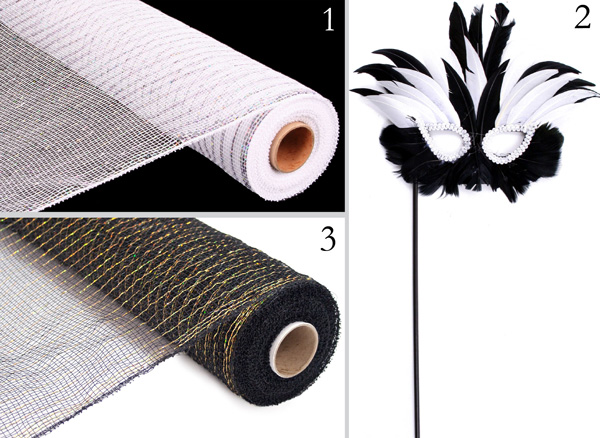
A black & white color scheme would be great for Masquerade party as well. The only difference would be to use both black and white mesh pieces when you are making each puff.

Shown above is: 

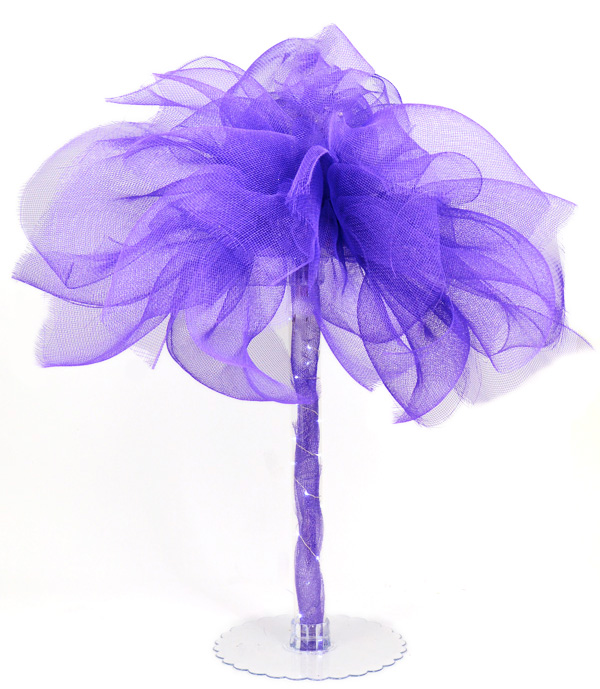
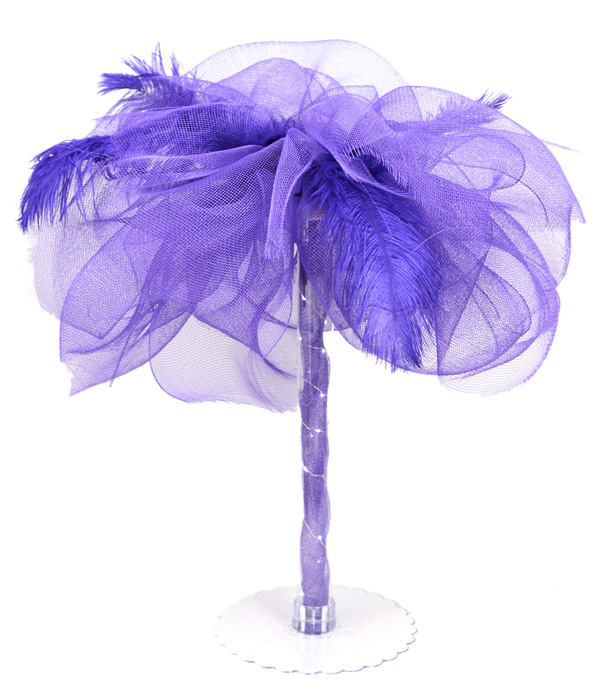
Having a party, birthday, wedding or event that isn't a masquerade? Here is a simplified version with  just the deco mesh puffs and lights, and another with feathers. Since there isn't a stick mask to hold and attach the puffs, simply use a thin wooden dowel or other type of stick. Choose accents and colors to customize for your event.
deco mesh centerpiece centerpieces ideas tutorial how to diy

Deco mesh is a type of soft plastic netting  that holds a full shape very easily, and it comes in a huge range of colors, finishes like metallic, and many patterns. Click here to see a great selection.

Have fun!

January 23, 2012

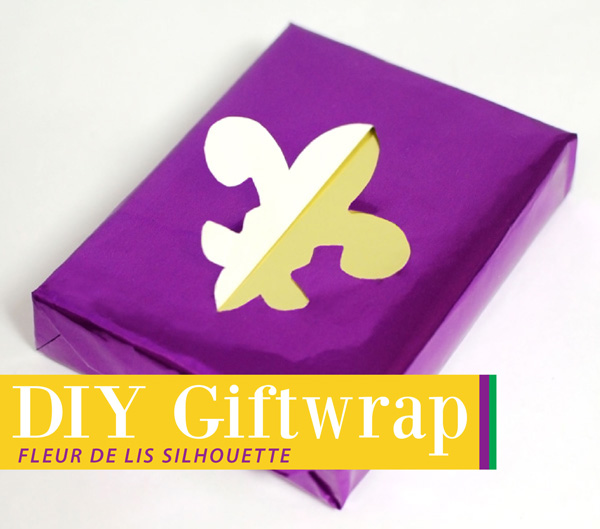
How to: Fleur de Lis Silhouette Gift Wrap

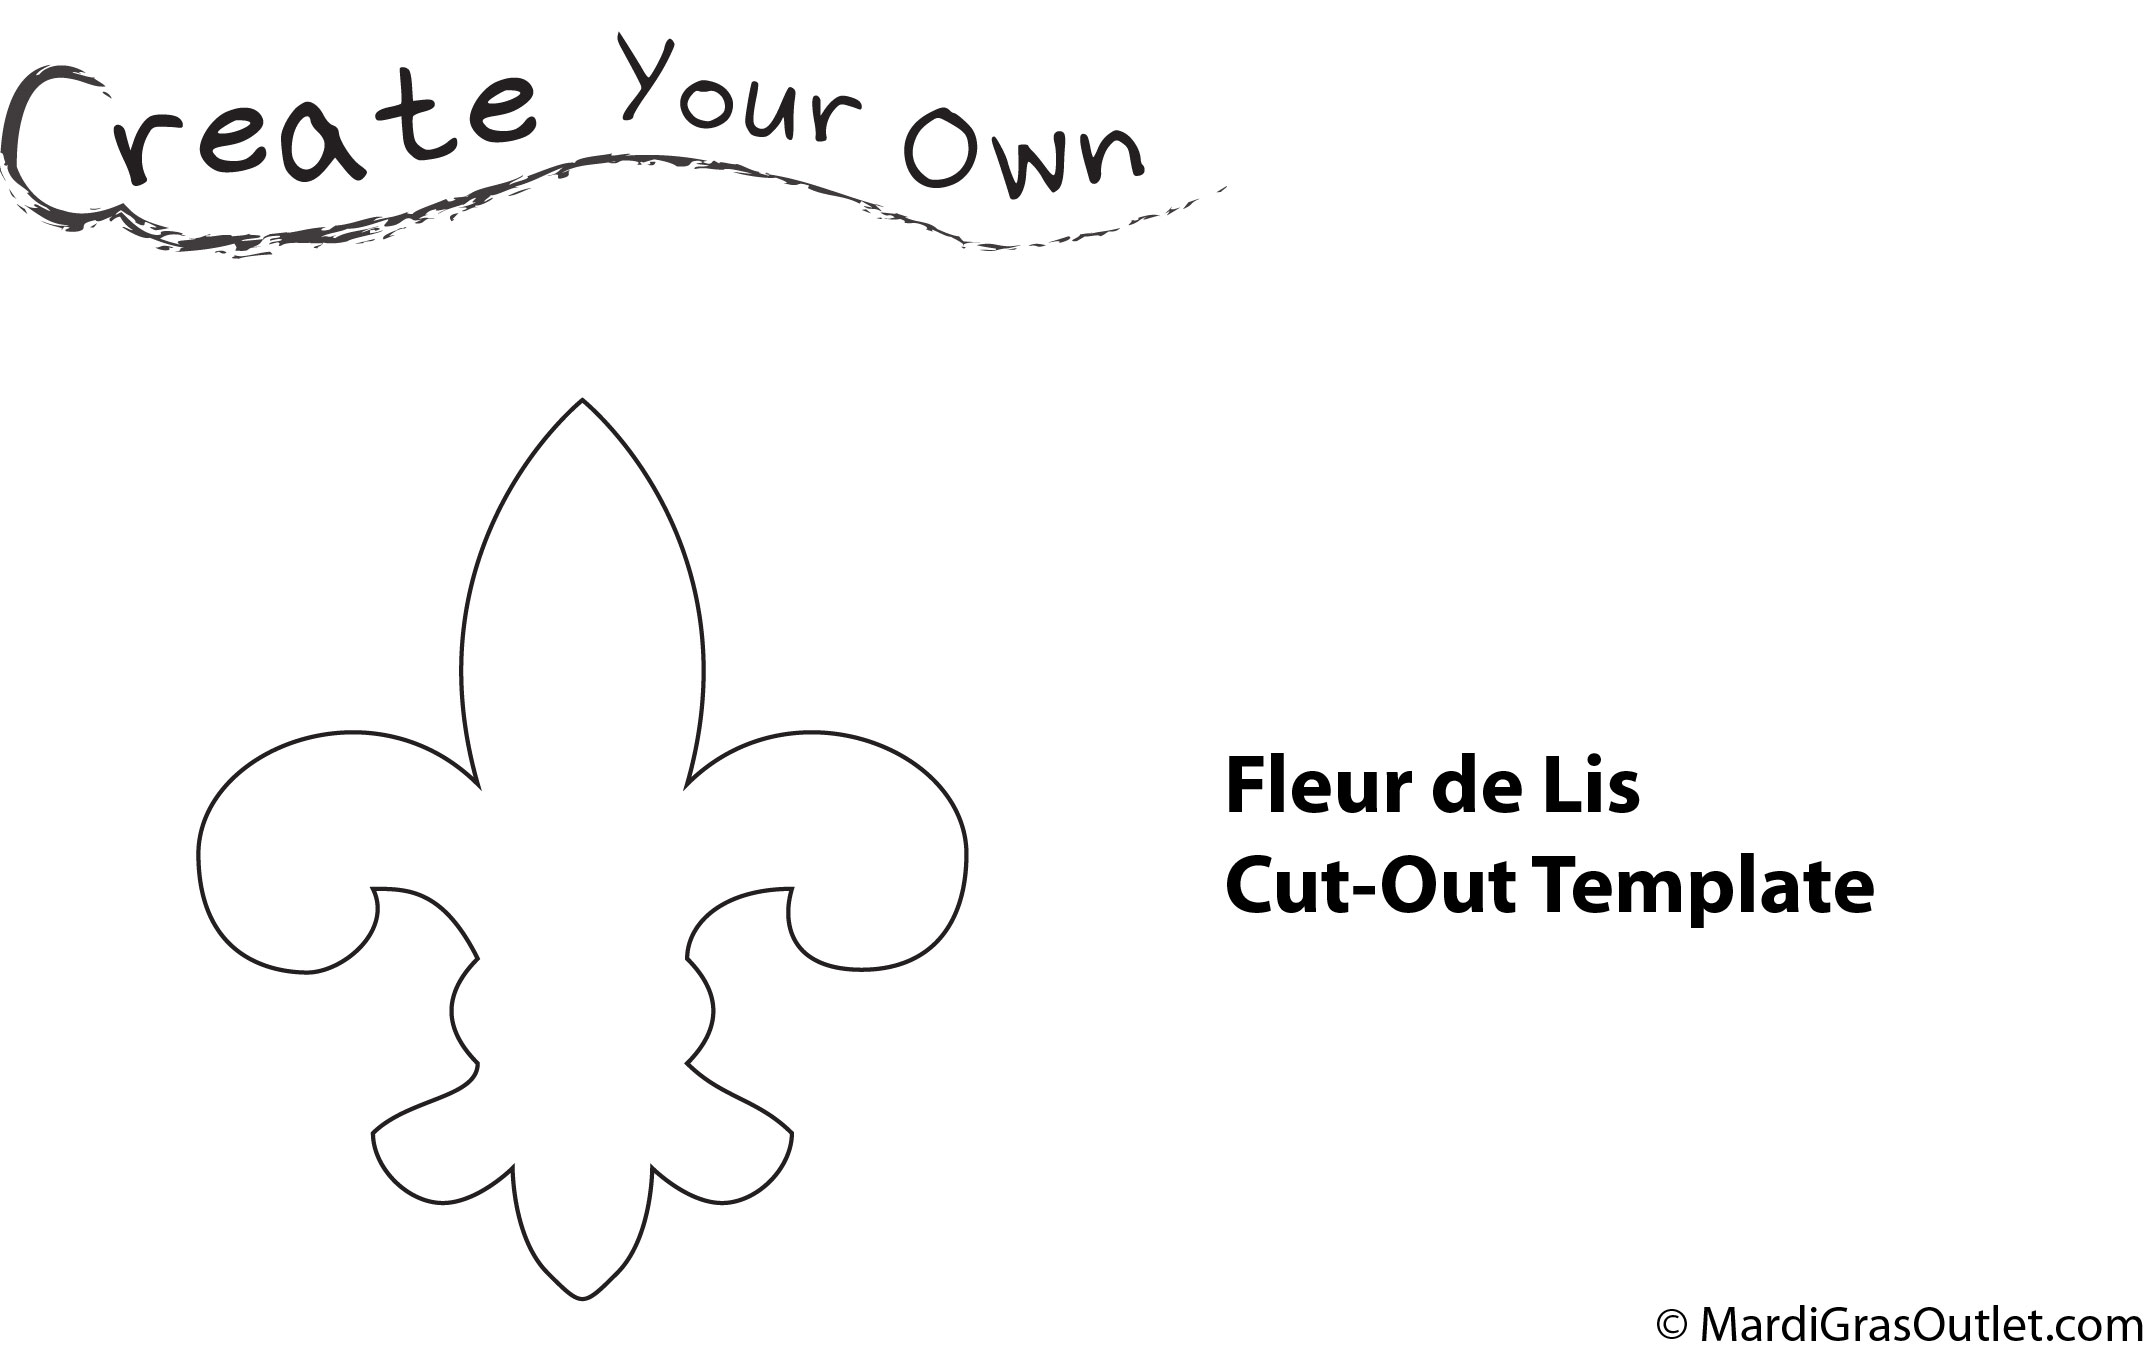
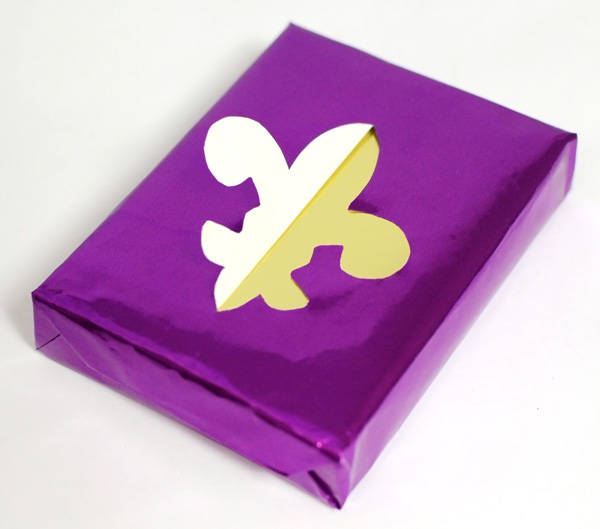
Mardi Gras is around the corner, so we wanted to share some inspiration for a short DIY craft project: pop-up fleur de lis gift wrap. It's a simple but elegant way to accent gifts for krewe presents, Mardi Gras party favors and more. Cut-out template provided here for free!

Supplies:
X-acto knife
Scissors, tape & pencil
STEP 1
Wrap the box in gold metallic wrapping paper first. Cut enough of the purple metallic wrapping paper to cover the present. 

Place the box at the center of the purple paper, and crease it around the box. This way you can center the fleur-de-lis design. The purple wrapping paper should be frontside down. 
STEP 2
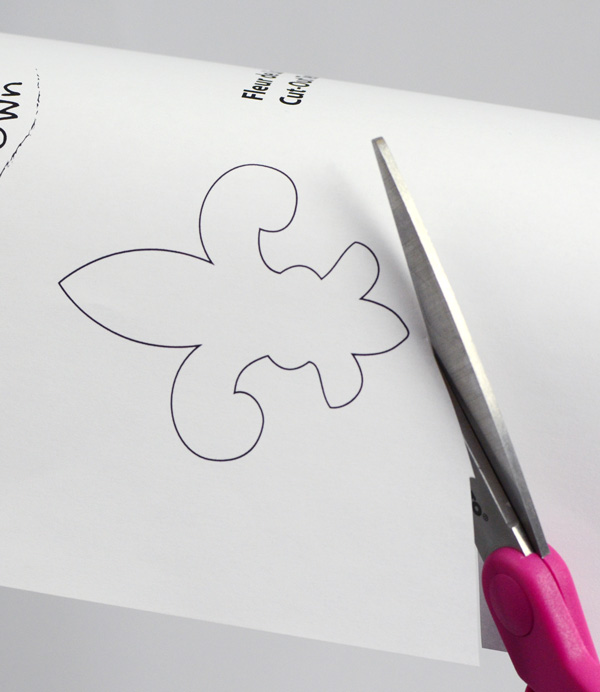
Print out the fleur-de-lis template (click here to download), and cut the shape out. You will need a PDF reader to view it, click here to download.

STEP 3
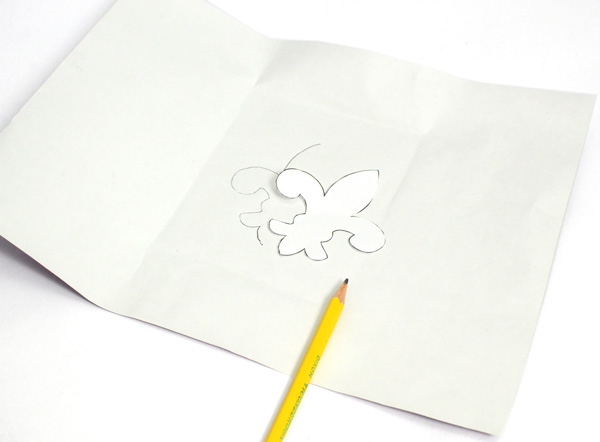
Center the fleur de lis shape on the backside of the wrapping paper; use the creases as a guide. Trace half of the fleur de lis in pencil.

STEP 4
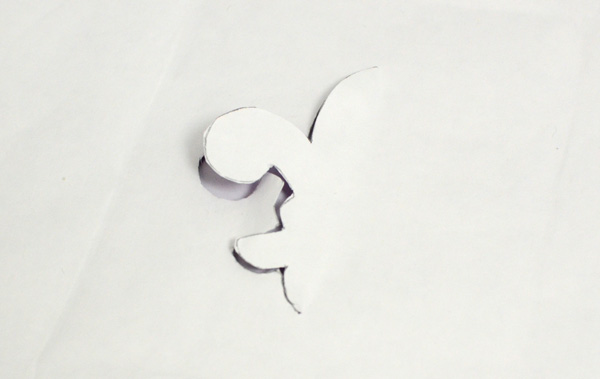
Use an X-acto knife and follow the line you drew to cut through the paper. Erase the pencil lines.

diy gift wrap mardi gras cut out fleur de lis wrapping idea
STEP 5
Now simply wrap the box with the purple cut-out paper as normal, following the creases you made. Fold open your fleur-de-lis pop-up silhouette.

This present is about 5 in. x 4 in. x 1 in., but the template can work for many other box sizes as well. You can try putting the fleur de lis at a diagonal or closer to a corner for larger boxes.

Looking for more DIY gift wrap ideas? Browse our previous blog posts:


LinkWithin

Related Posts with Thumbnails