
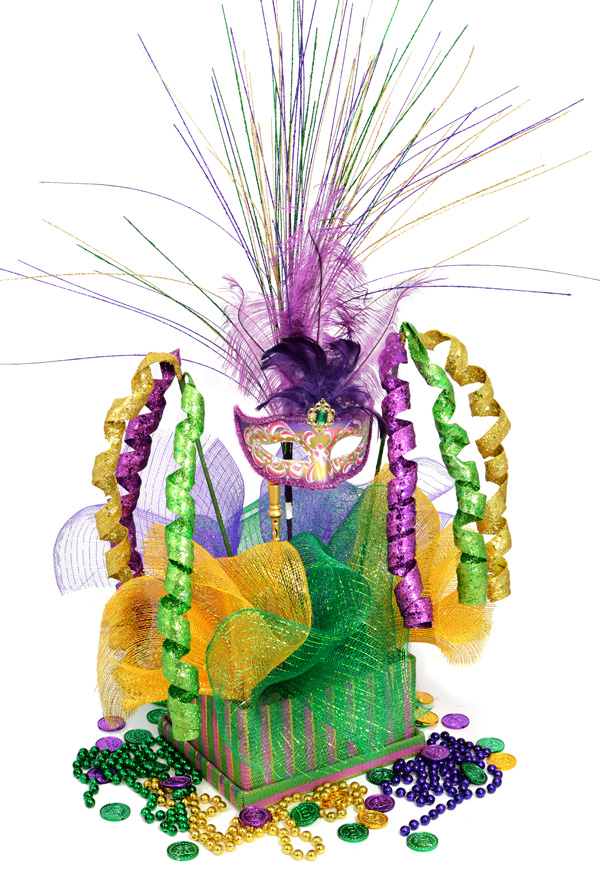
For Mardi Gras decorations, there are a few simple things to remember. The traditional Mardi Gras colors are: purple, green and gold. Mardi Gras decorations should be predominately these traditional colors. Also, the more glitter and glitz the better. Mardi Gras decorations are best when sparkly and metallic.
10 easy steps to create a sparkly Mardi Gras centerpiece:
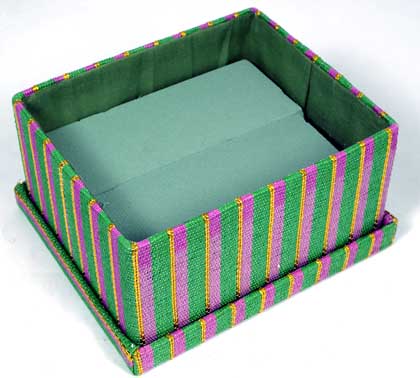
STEP 1: Choose a container for your centerpiece.
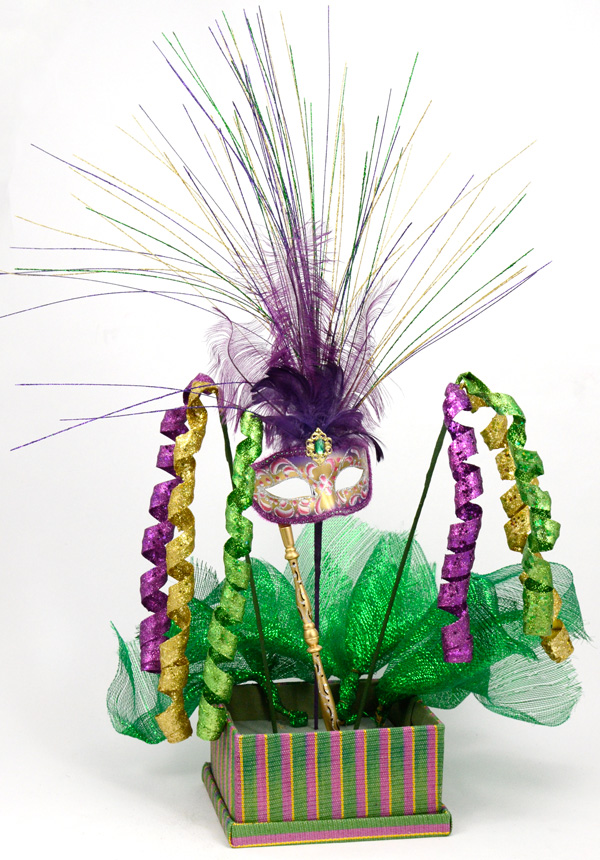
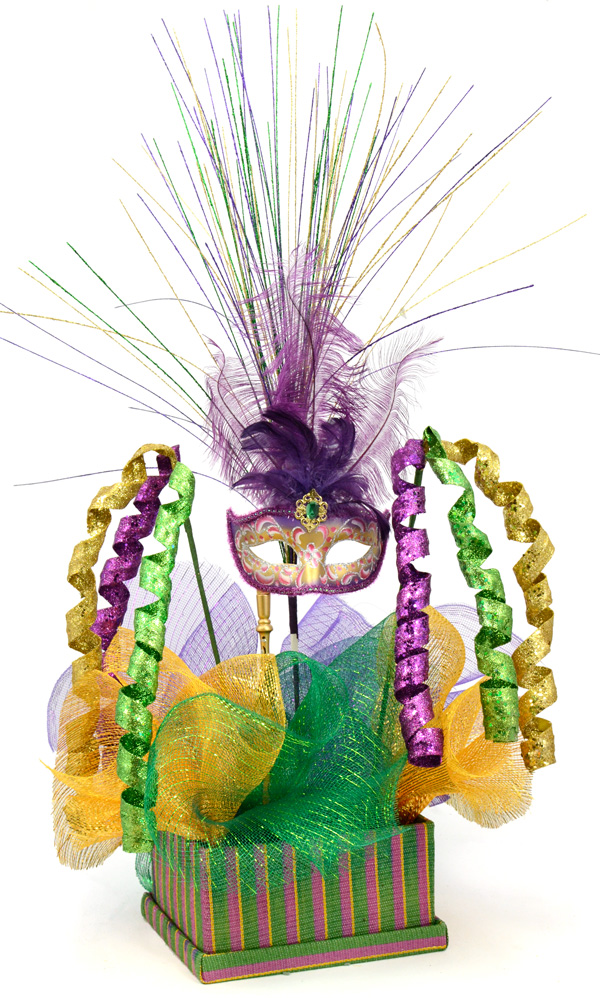
Here, we picked a fabric covered, striped Mardi Gras box. Ideally, you want a container that has a large opening so you can layer in multiple Mardi Gras decorations and a nice flat bottom so it sits securely. Placed in the Mardi Gras box are two standard blocks of floral foam. Use floral foam labeled for artificial flower arrangements, not the type for wet floral arrangements. Two blocks of the standard size foam fit snugly in this box so there was no need to trim or anchor them. If you need to cut the floral foam down to size to fit your container, use a knife or scissors to shape the block for your container.

STEP 2: Add height to the centerpiece with floral sprays
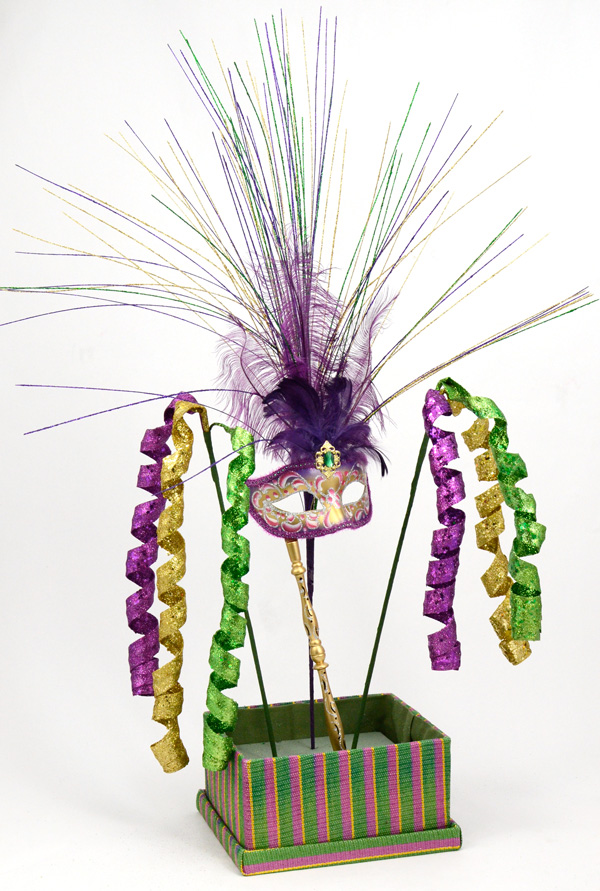
Add an element of height to the centerpiece with tall floral sprays, picks or branches. We chose these two Mardi Gras curls floral sprays which added height and a sense of whimsy. Pairs or a group of three creates a more pleasing arrangement. This pair of curly Mardi Gras streamer sprays anchored into the floral foam is situated on opposite corners of the box to balance the visual weight of the centerpiece.
Step 3: Add a focal point and center filler to the centerpiece.
A striking Fantasia Feather mask on a stick becomes the centerpiece focal point. The colors of the feather mask coordinate with both the box and floral sprays so the whole centerpiece is cohesive. To mimic the feather accents on the mask, a large feathery floral spray called, Weeping Grass Mardi Gras spray, is added to the center of the arrangement. This Mardi Gras grass spray not only provides height and filler, but also repeats the feathery details on the purple mask.
Step 4: Fill in the open base of the centerpiece container

Step 5: Create custom floral spray/picks out of Deco Mesh
To hide the green floral foam and base of the the floral picks, we created fluffy floral sprays out of the 21" wide roll of poly deco mesh in the traditional Mardi Gras colors of purple, green and gold. We used the supplies shown above for these simple floral sprays (21" wide deco mesh, floral wire and scissors).
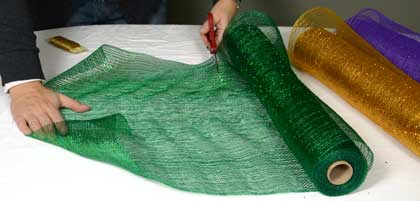
Step 6: Cut the deco mesh into squares.
Roll out the deco mesh and cut squares that are approximately 21" square. For this arrangement we used (6) six sprays of the deco mesh to cover the floral foam, so we needed 6 square pieces of deco mesh, two from each of the three colors. In addition, cut the same number of pieces (6) of floral wire. The pieces of floral wire need to be approximately 16" long.
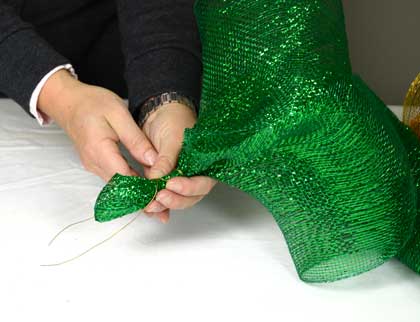
Step 7: Gather the deco mesh to form a floral spray
Gather up the deco mesh by the center of the square to form a puff or flower shape out of each. Wrap the wire around this gathered section in your hand to secure it into this form.
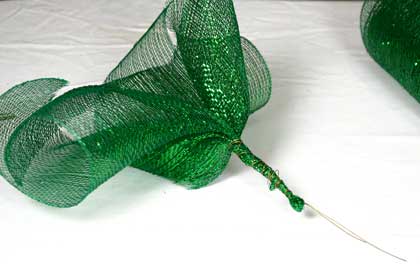
Step 8: Use the floral wire to create a wire stem
Wrap the end of the deco mesh to form a stem for this floral spray. At the base of the stem, wrap the wire to create a pick for this deco mesh spray. This wire end will be the pick used to insert the deco mesh into the floral foam of the centerpiece. Repeat the process with the remaining 5 pieces of deco mesh.
Step 9: Cover the floral foam at the base
Using the wire tips on the deco mesh sprays you created, insert the sprays of deco mesh into the floral foam at the base of the centerpiece. Layer in alternating colors of deco mesh across the entire base until you can no longer see the floral foam.
Step 10: Fluff and arrange the pieces of the centerpiece.
After all the parts of this centerpiece are assembled, take a step back and arrange the pieces to balance each other. The curls of the wired sprays can be manipulated into any place and shape you prefer.The floral foam is very forgiving so if you need to move a piece of the arrangement, simply pull it out and move it to another spot. Be sure to look at the the design from the angle it will be presented a the party. For example, if the centerpiece will be displayed on a round table make sure it looks good from all sides. Don't forget this important step. It can make the difference between a good design and a great one.
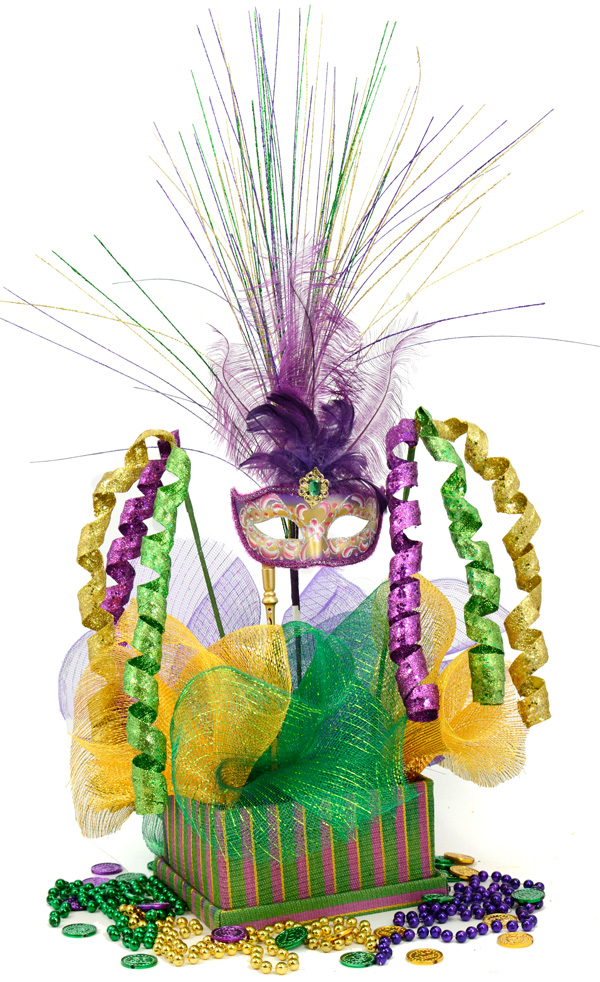
At the base of the completed centerpiece scatter purple, green and gold Mardi Gras beads and doubloons. These Mardi Gras parade throws add to the festive feel of the centerpiece and gives your guests a little something to take home.
 Links to supplies:
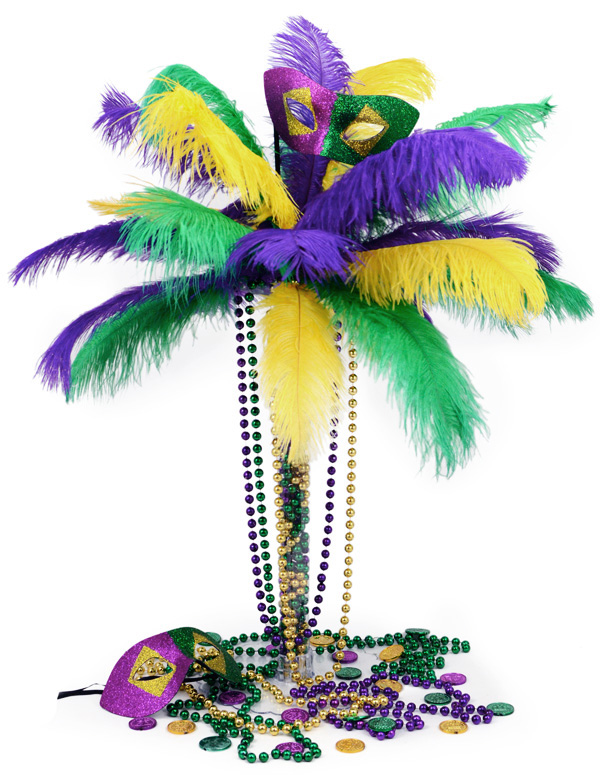
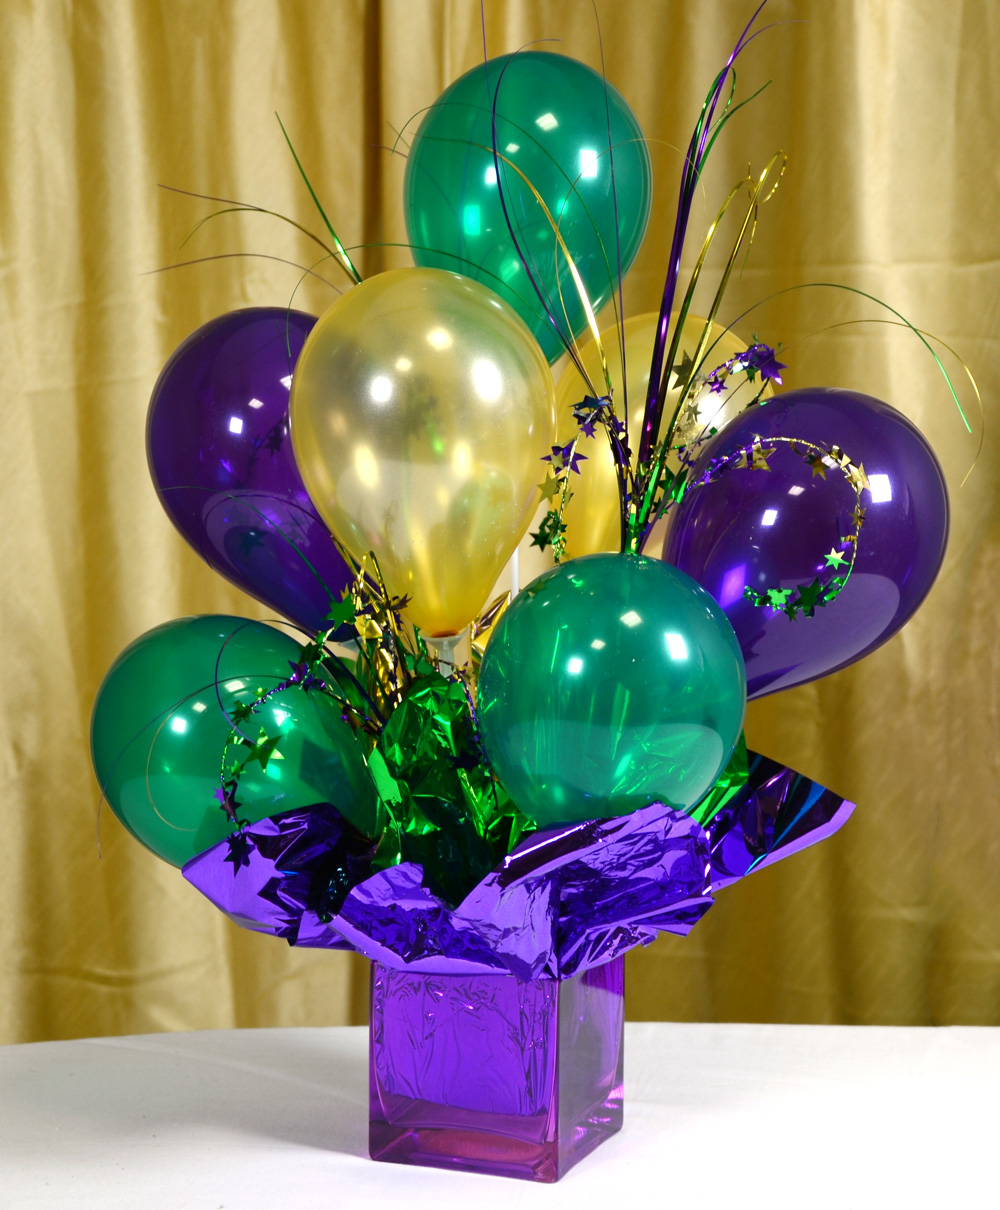
For Mardi Gras centerpiece options, see these links:
Use these 10 easy steps to create a custom Mardi Gras centerpiece of your own!
Be sure to share your ideas with us at ideas@mardigrasoutlet.com.
Here are even more Mardi Gras centerpiece ideas and tutorials:


I LOVE this centerpiece! I'm in the very early beginning stages of planning a Mardi Gras themed graduation party and I definitely think these will be the table centerpieces. Thank you for the inspiration.
ReplyDeleteGlad you liked the centerpiece idea. Be sure to send us pictures of your version. We love inspiring ideas. Good luck with the graduation party!
ReplyDeleteMy Mom was selected as the 2013 Mardi Gras Queen for her Club. She wants to throw a party and needed centerpieces for the tables. I saw this and went wild (so did my Mama). I have to make 10 in all - 9 Mardi Gras colors and 1 w/White and Gold. Thank you for making my job so easy. And, thank you for making my Mom so happy.
ReplyDeleteMM, Jr.
So glad we could help! We would love to see some pictues of your finished centerpieces.
DeleteThe party was a great success and everyone LOVED, LOVED, LOVED the centerpieces. Someone actually offered me big $ for one of them. Another person wanted to know where my shop was located. Anyway, thank you for making the Queen's party the hottest ticket in town. One other thing, how do I upload a picture of the Queen's (gold and white) centerpiece? I do not have any great pictures of the PGG centerpieces, but I will be more than happy to upload that as well.
DeleteMM, Jr.
We are so thrilled your centerpieces turned out so well! Please send us some pictures. We can share them on our pinterest page and on the blog- share page. Email them to us at ideas@mardigrasoutlet.com.
Delete