
Looking for the perfect centerpiece? Inexpensive and easy-to-make air filled balloon centerpieces are the answer! Air filled balloons make festive centerpieces with the added bonus that they can be created days in advance of an event. While standard helium balloons only last a few days, air filled balloons last for weeks. This type of balloon centerpieces is also well suited for outdoor events where helium balloons can get blown around by the wind.

When creating a table top centerpiece of air filled balloons, the smaller 5” balloon is the perfect choice. To keep the air filled balloons upright like helium filled balloons use plastic balloon sticks and cups. The air filled balloon is inflated and the stem / knot of the balloon is inserting into a small plastic cup that sits on a 12’ plastic stick.

Creating an air filled balloon centerpieces is easy and quick. Here are tutorials for two different versions of a Mardi Gras balloon centerpieces using these 5” air-filled balloons.
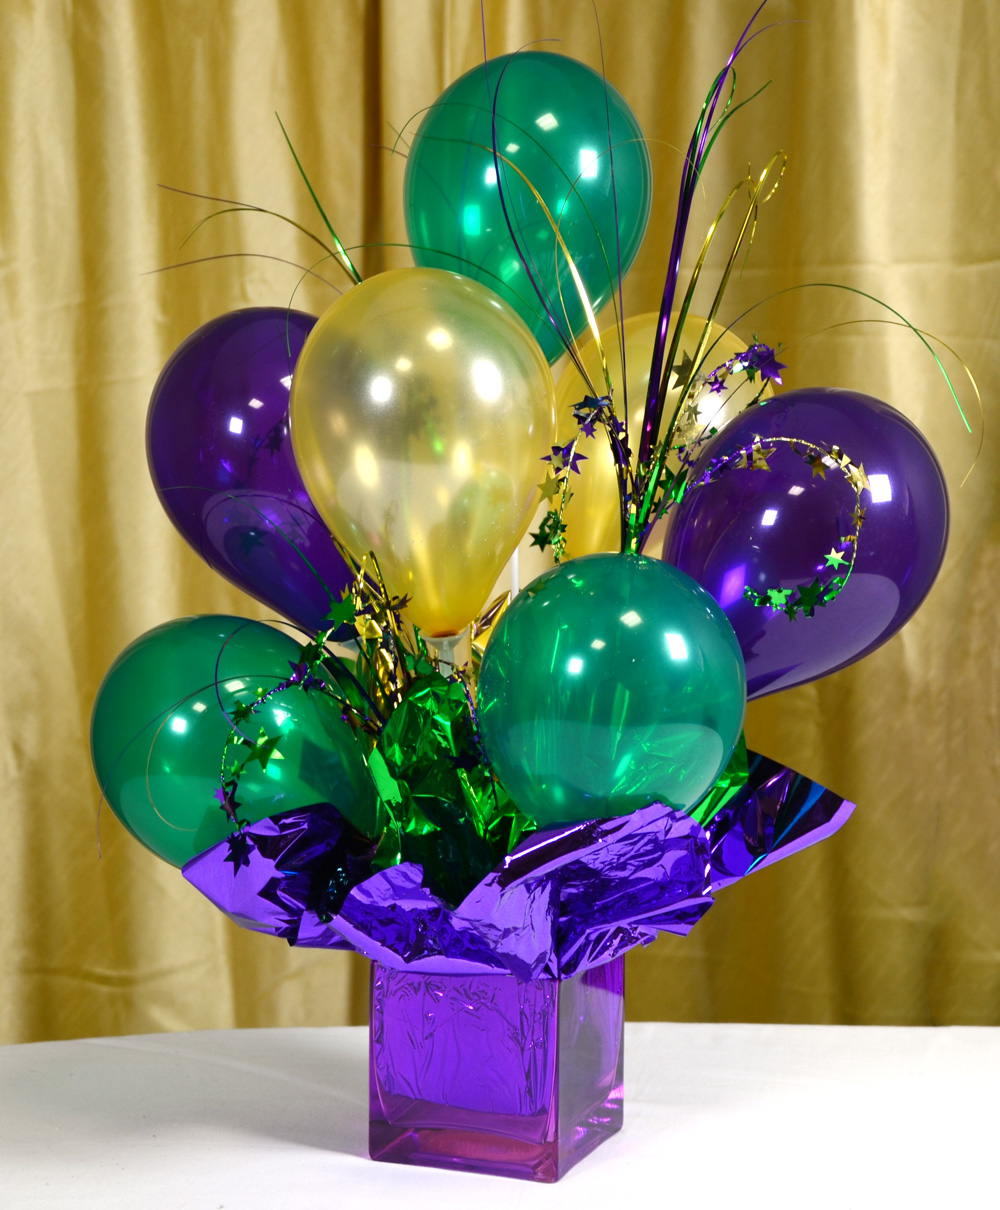
This arrangement made with five balloons is anchored in a Mylar foil covered bag weighted with sand. The larger seven balloon centerpiece (shown above) uses a purple glass vase with Mylar tissue as a base.
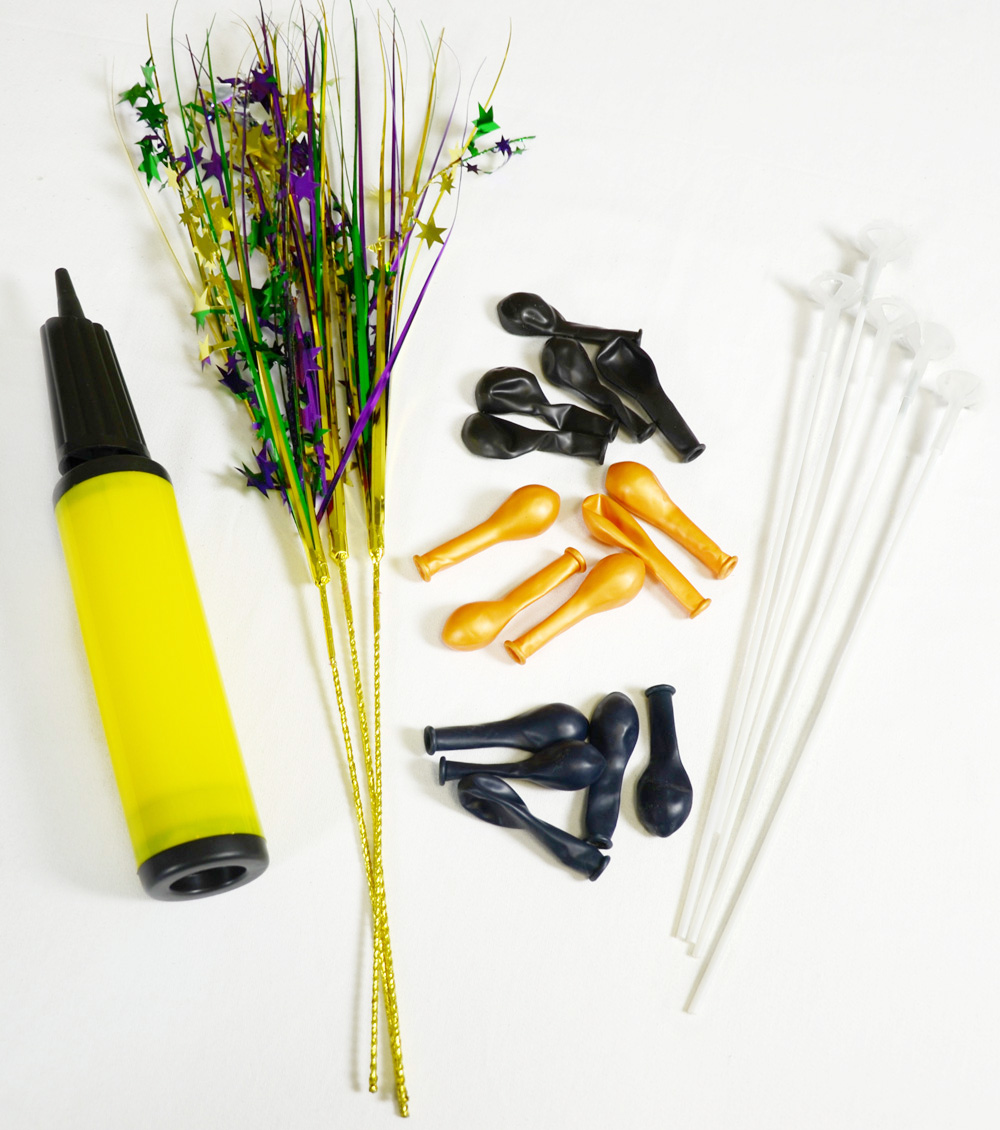
Supplies:
5” latex balloons (in purple, green and gold)
Plastic stick and cups sets (sized for 5’ balloons)
Air pump (optional)
Bag filled with sand for weight/stability or Floral foam
Mylar tissuePurple cube glass vase
Yellow rectangle glass vase
Plastic hurricane glass
Ribbed metallic glass votive holder
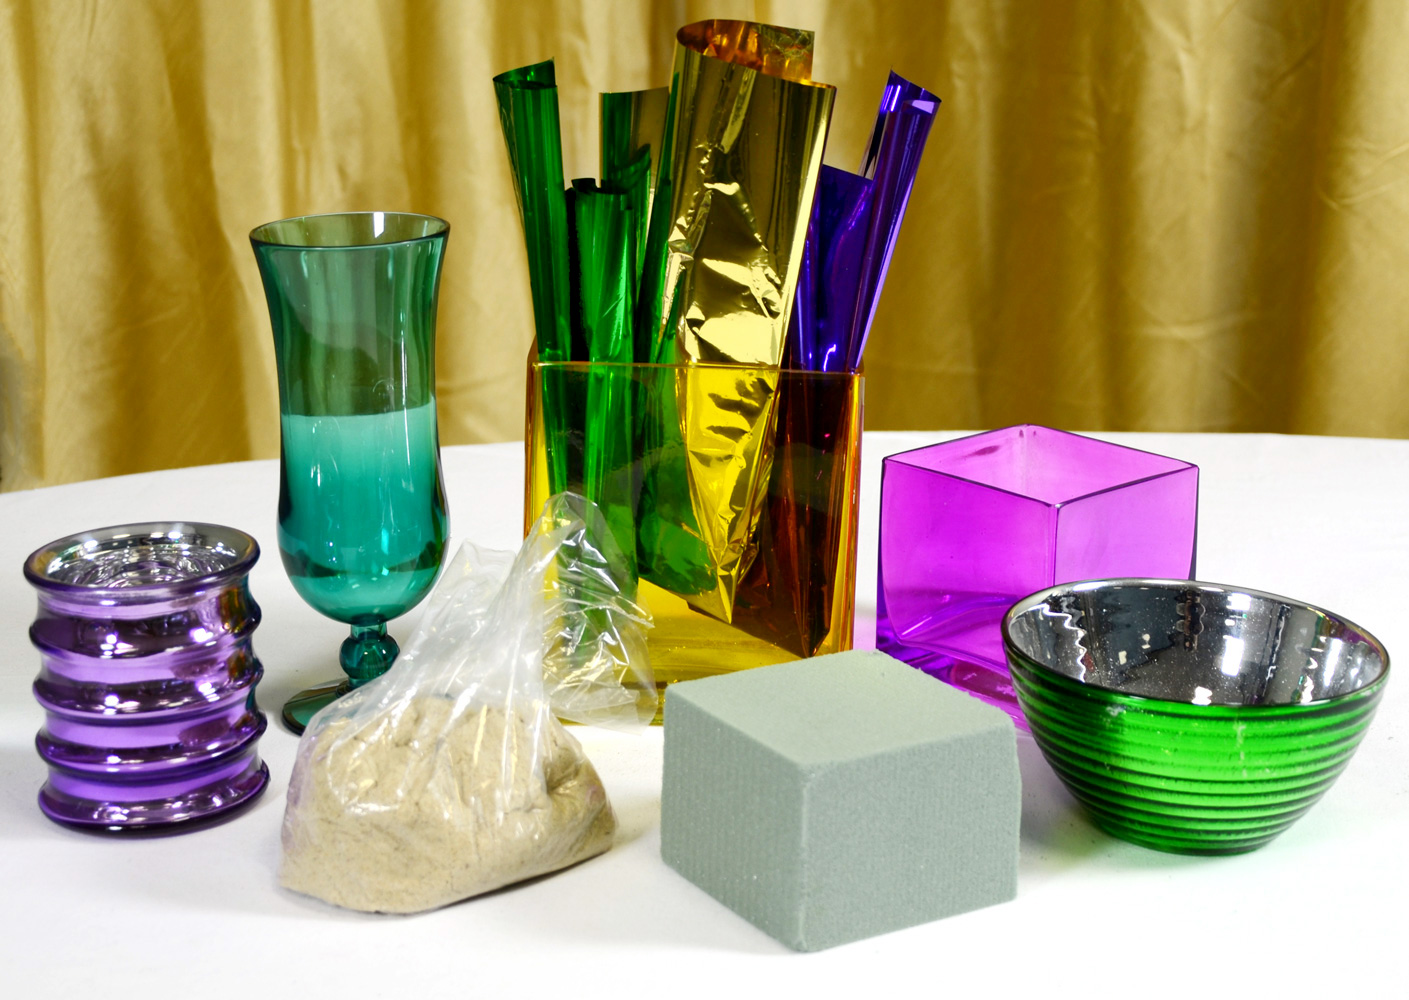
Centerpiece base
The options for a centerpiece base are only limited by your imagination. Vases, bowls, boxes or glasses will all work. Here are a few different options from Mardi Gras Outlet. A simple bag filled with sand provides an inexpensive weight for the arrangement. Fancier clear and metallic glass vases add a touch of sparkle and weight to the centerpiece. With the vases you will need to use floral foam to anchor the balloon sticks. Mylar tissue is used to cover the floral foam, adding another layer of sparkle as well.
Tutorial: Air-filled Balloons with sticks/cups.
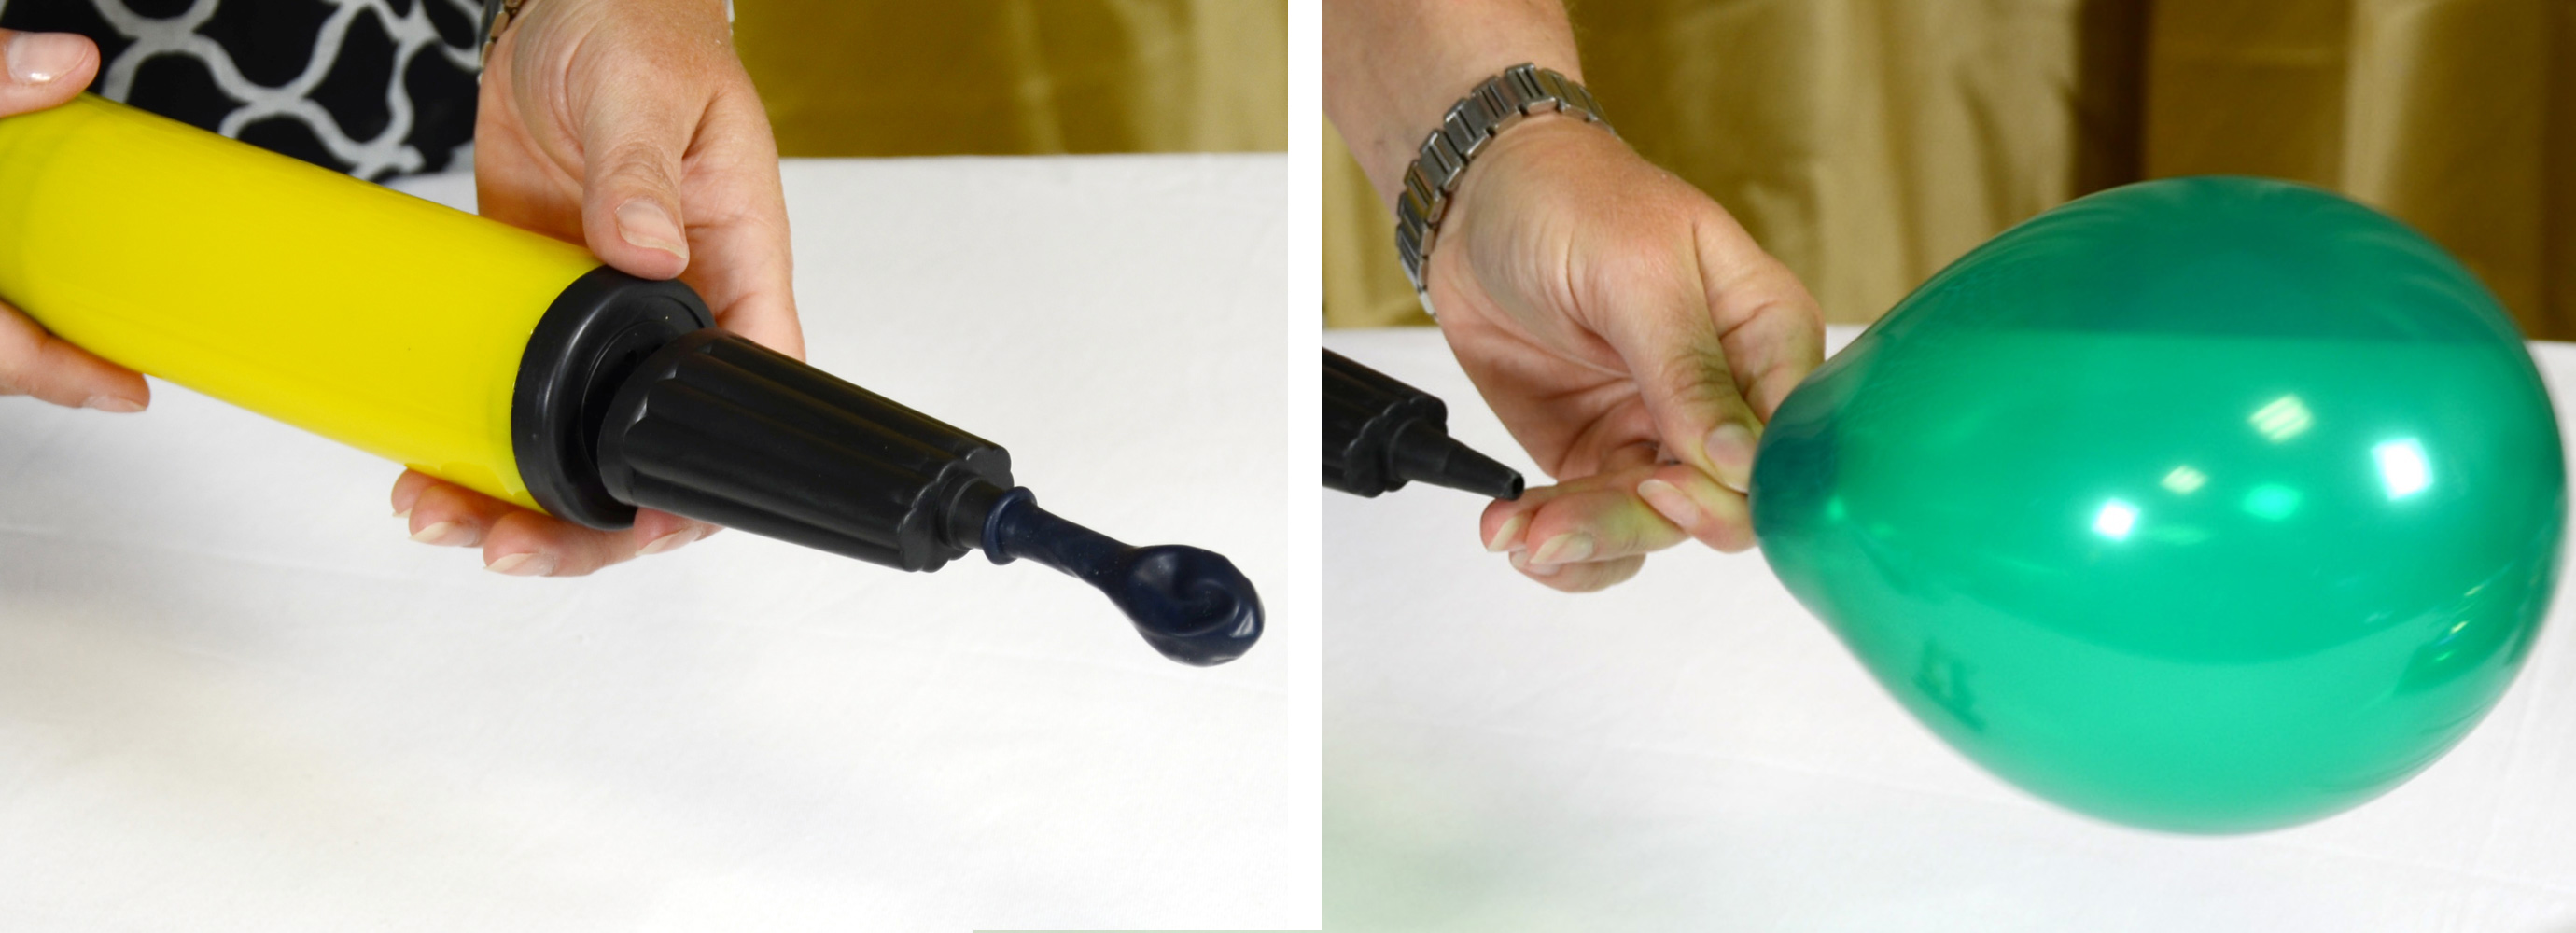
Inflate the 5” balloon until it begins to form a pear shape (apx 5” long).
Seal the balloon by tying a knot in the neck of the balloon.
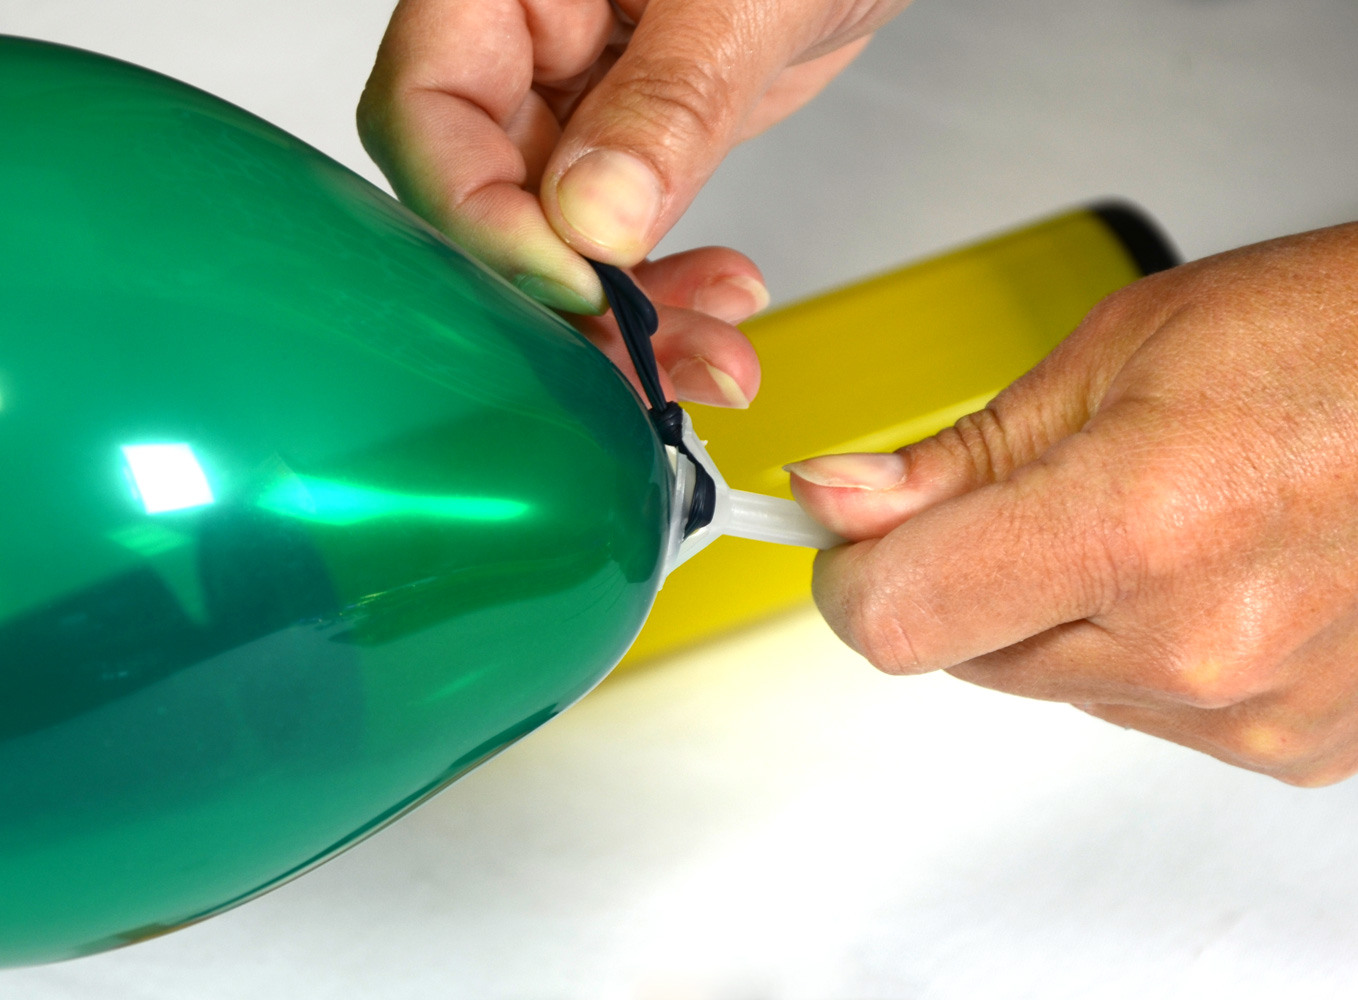
Insert the knot of the balloon into the center of the cup, pushing it back out the side of the plastic cup. Insert the knot into the slit in the cup to secure the balloon in place.
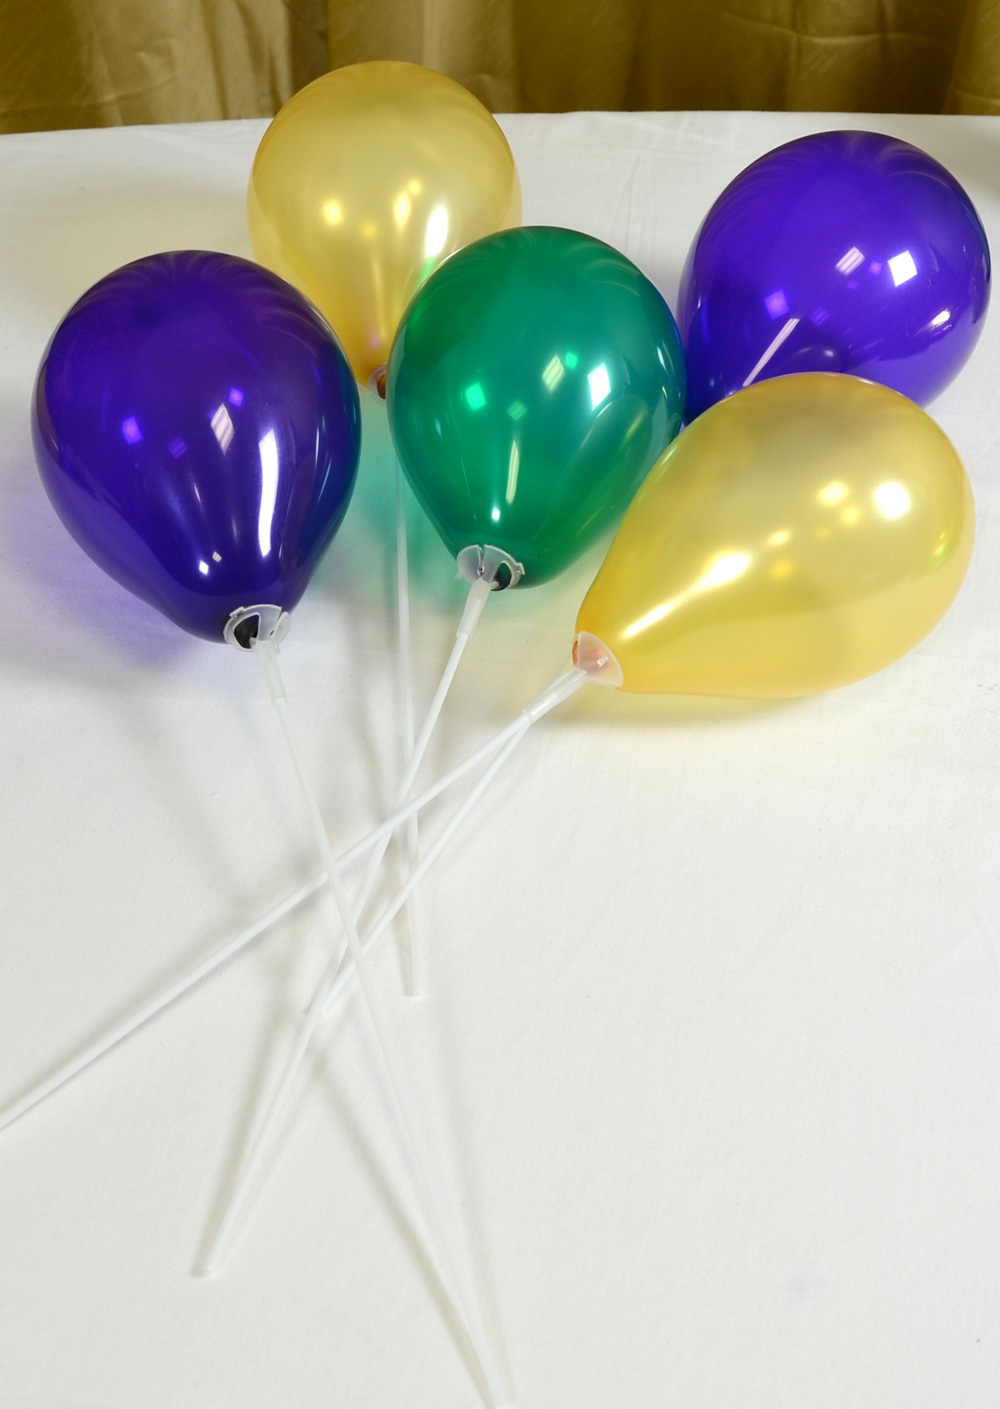
Place the plastic cup onto the 12” long plastic stick. Repeat for each of the balloons you will need.
Tutorial: Basic five balloon centerpiece

With all five of the balloons attached to the cups and sticks, arrange them into a pleasing shape.
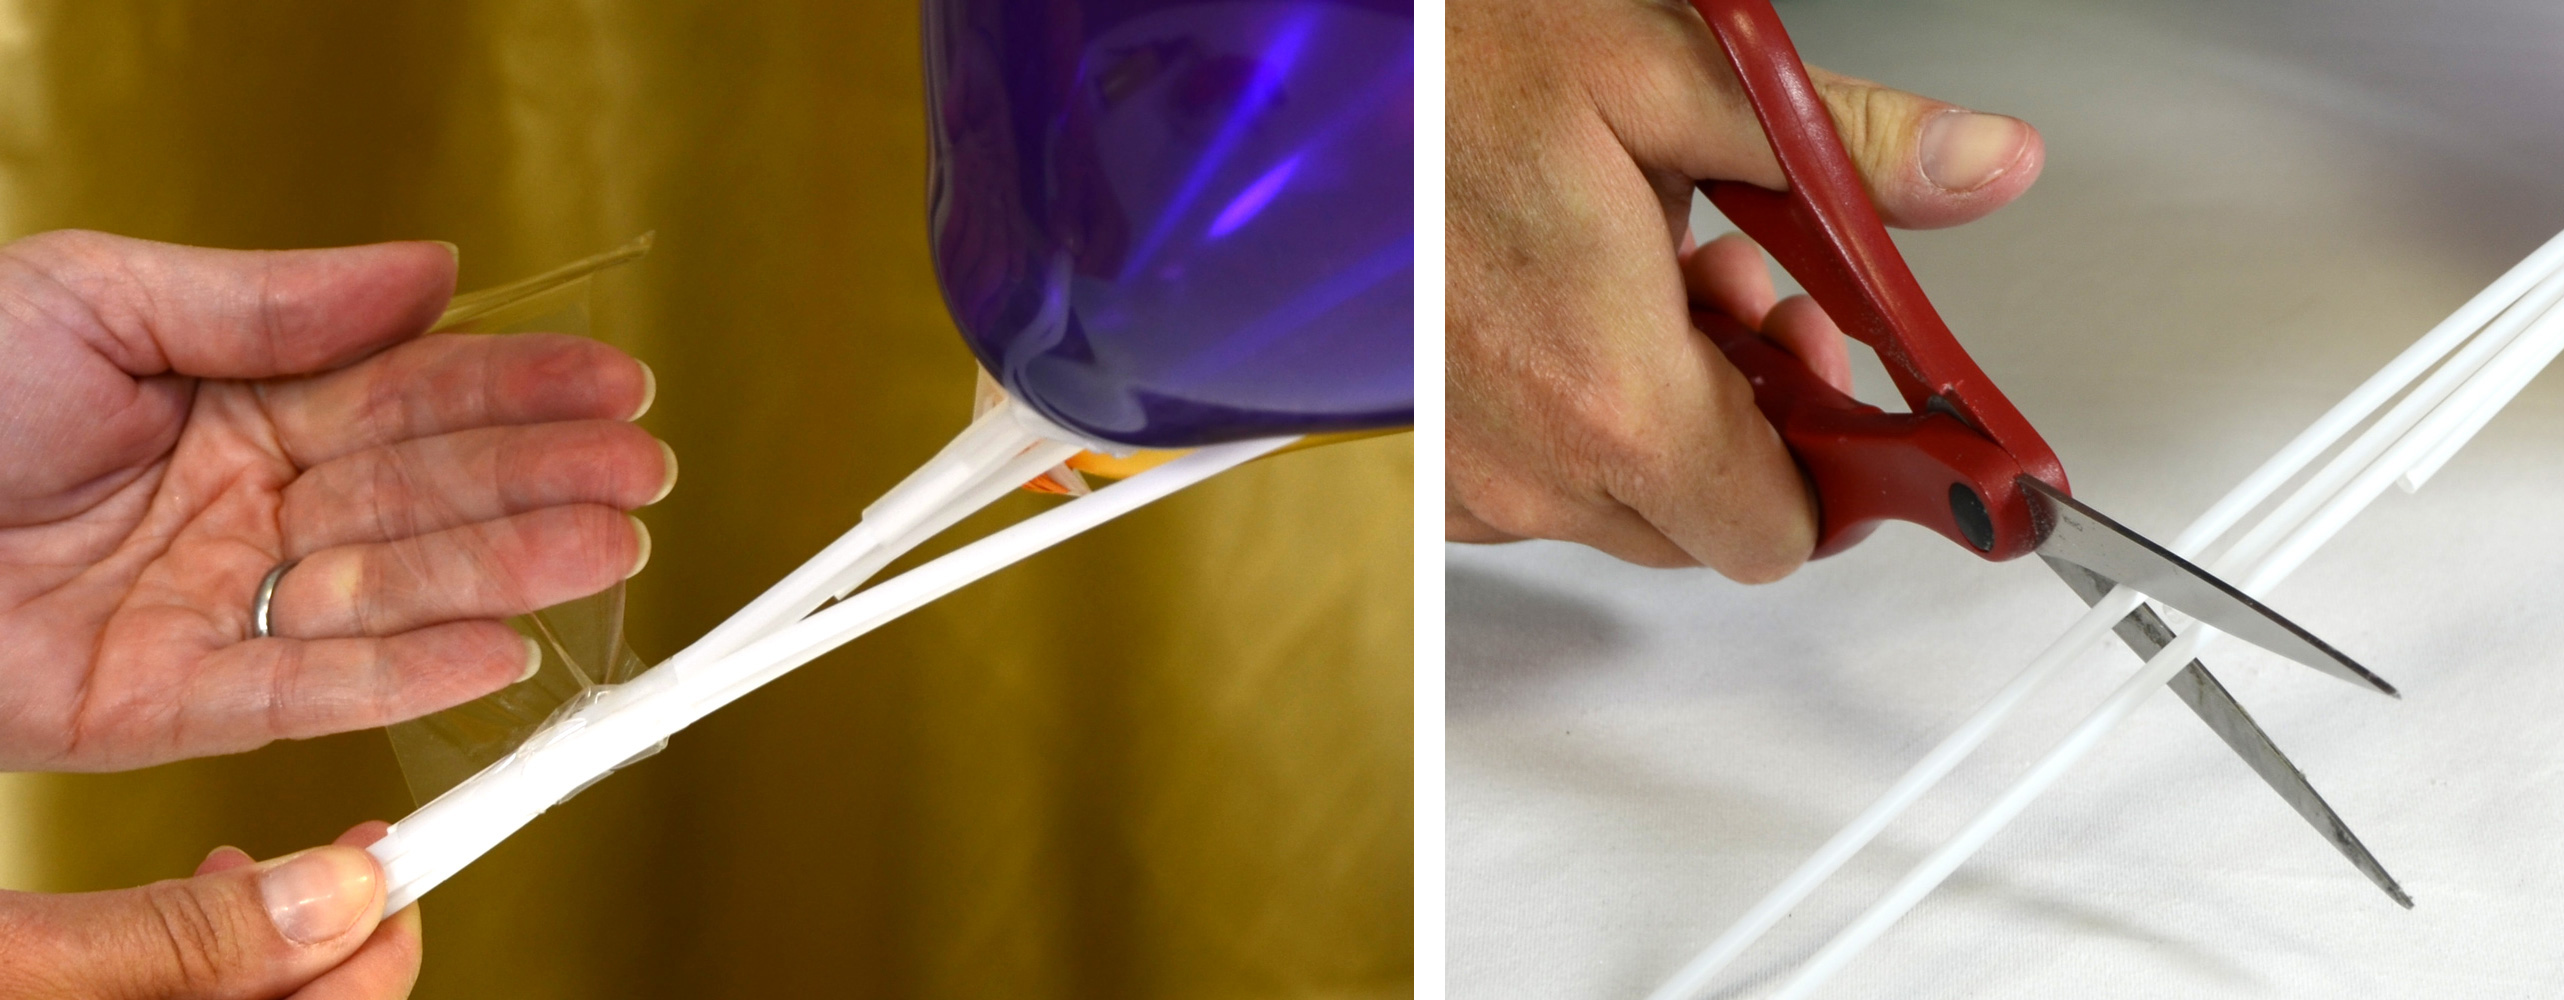
Once arranged, use a piece of clear tape to secure the sticks together at the base.
Cut off any extra long pieces of balloon stick.
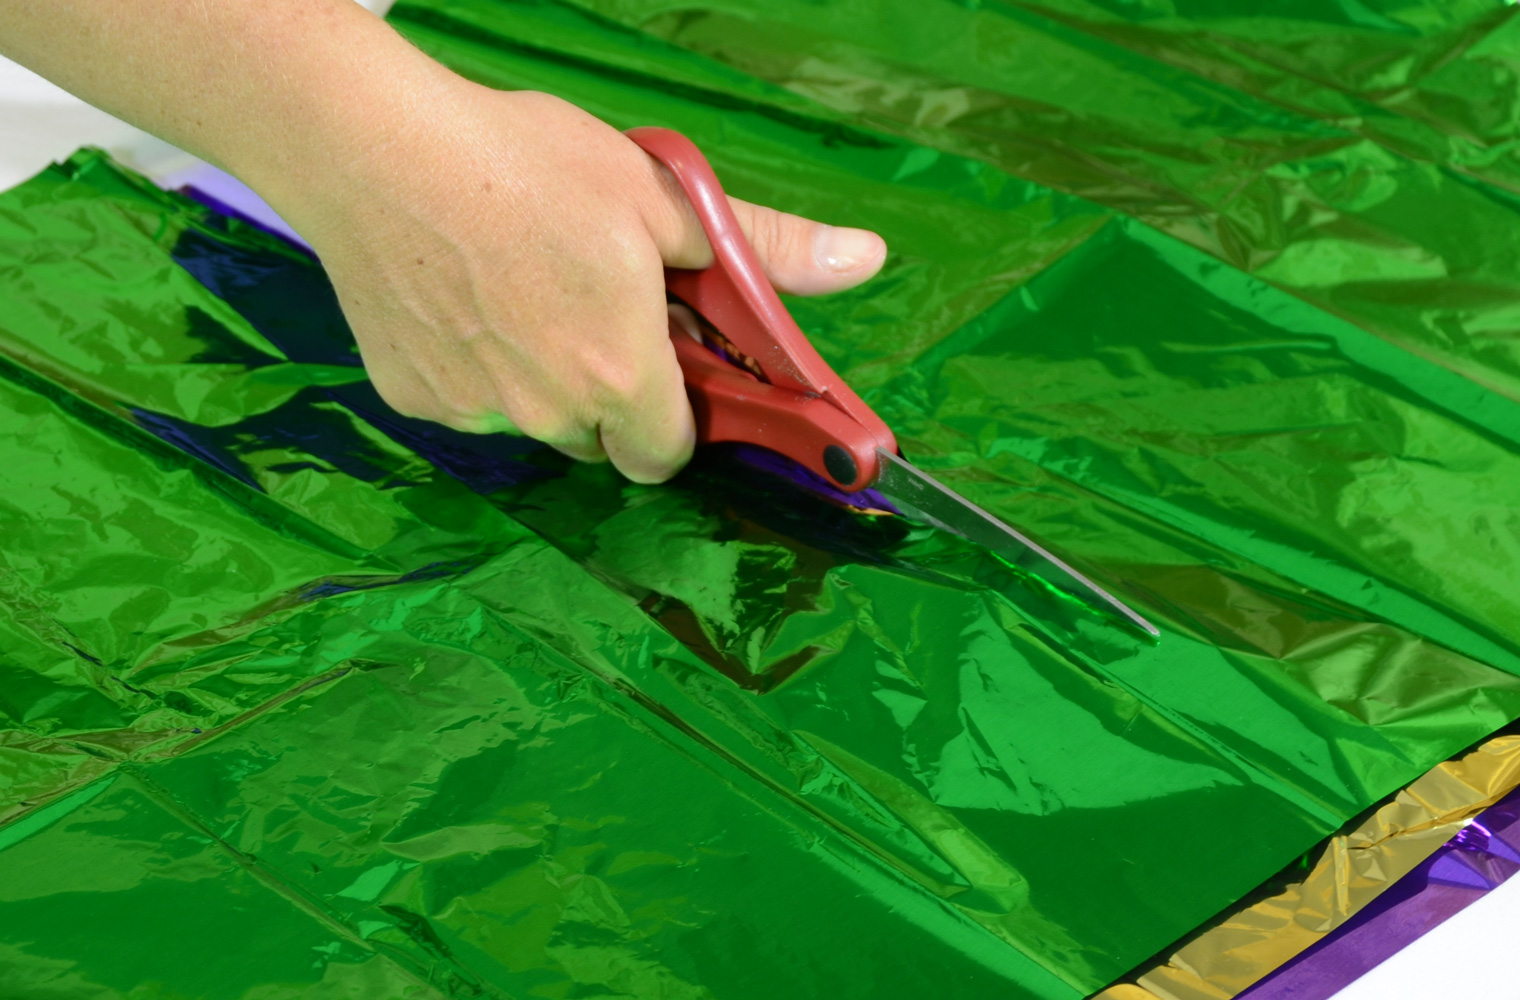
Cut the mylar tissue sheets in half. We used one of each of the traditional colors of Mardi Gras (purple, green and gold). Layer the three (3) half sheets of tissue on top of each other.
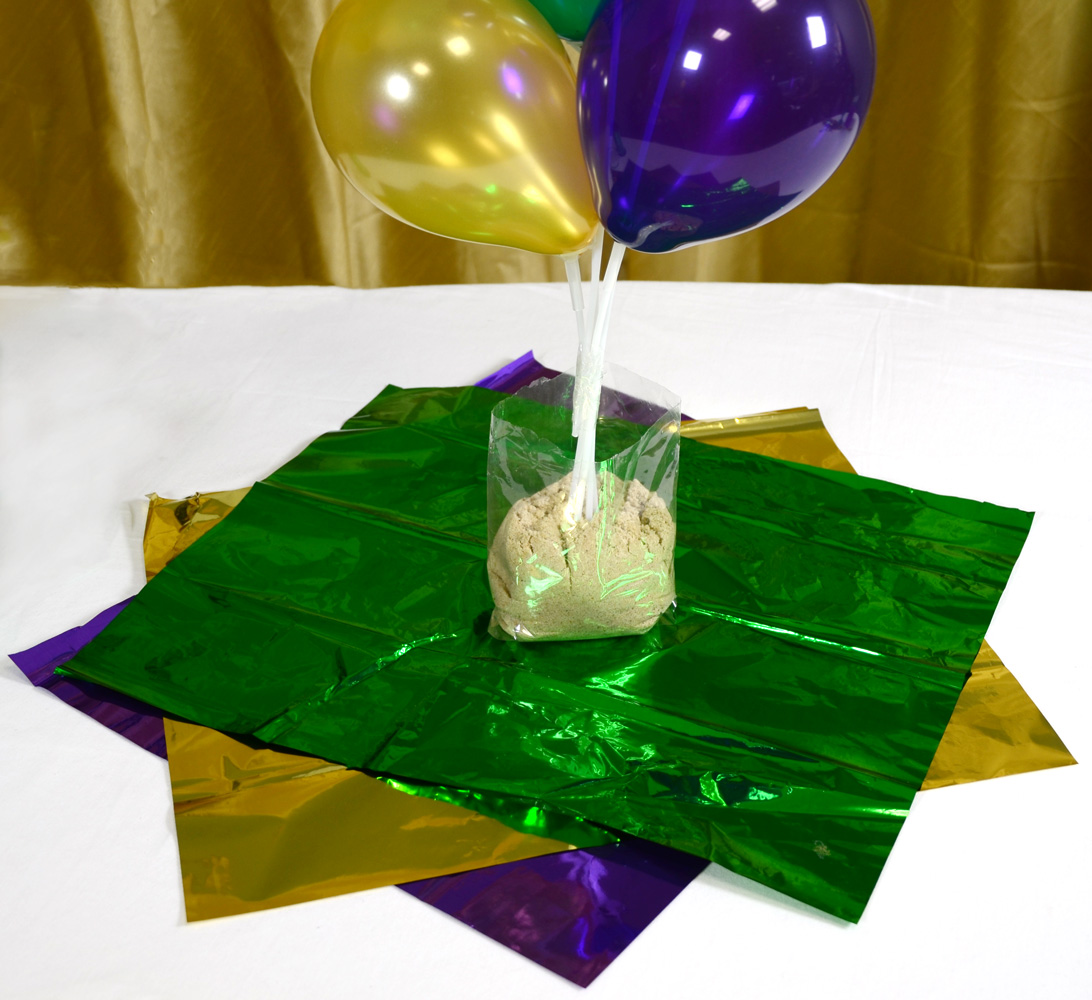
Put the balloon sand bag on top of the mylar tissue. Insert the sticks into the sand bag.

Secure the sticks into the bag, sealing in the sand, with clear plastic tape.

Gather the tissue up and around the balloon sticks. Secure the tissue in place with ribbon. Green curling ribbon is used here. Curl the ends of the ribbon.
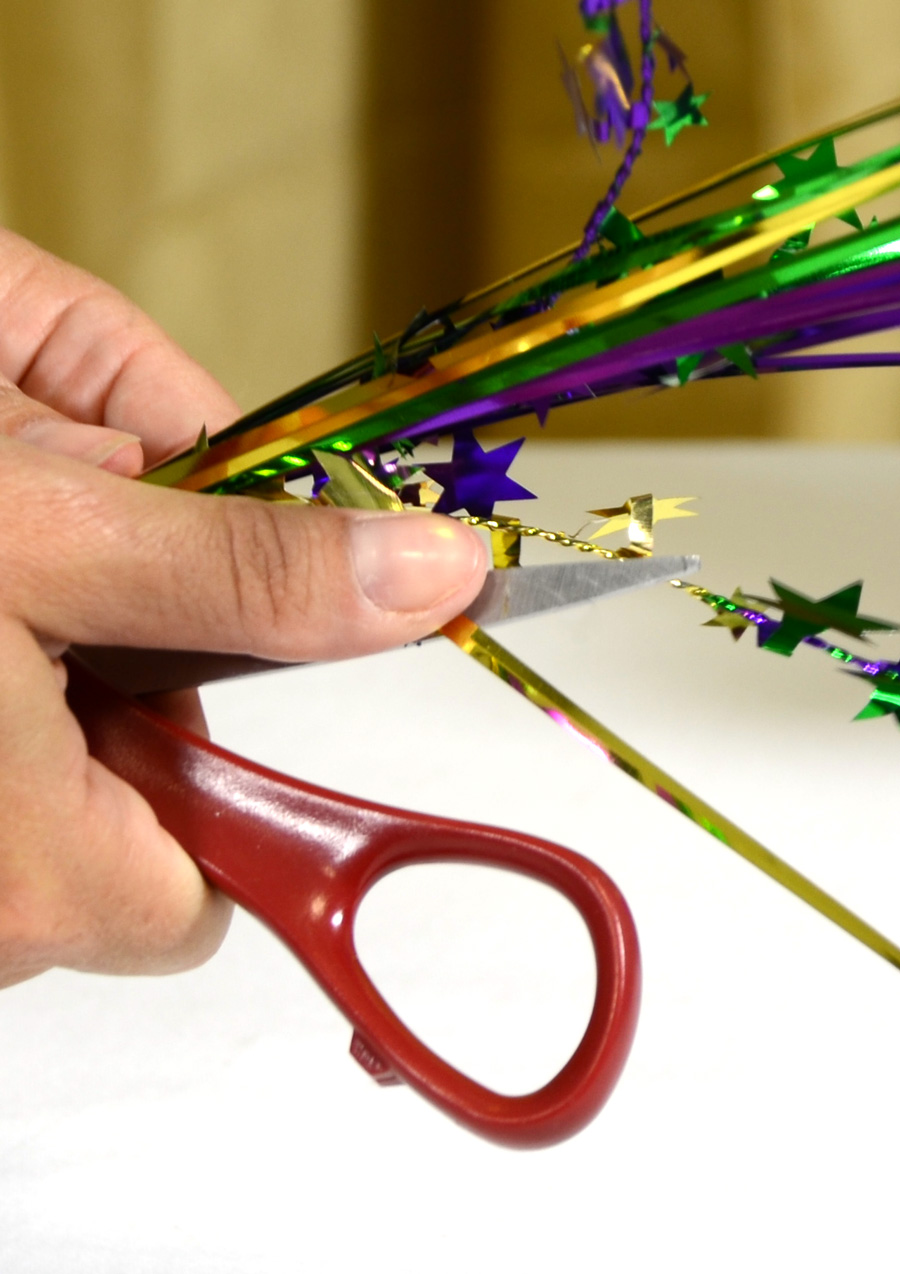
OPTIONAL: Add some more sparkle with floral sprays. Three metallic star picks were added to the arrangement. This can be done now or in the beginning when you are arranging the balloons. Each star pick is inserted into a different part of the arrangement (and at different heights).
TIP: The (non-wired) mylar pieces in the pick can be curled just like curling ribbon. Run the blade of the scissors over them to create soft or tight curls.
The complete Mardi Gras balloon centerpiece

Tutorial: 7 balloon centerpiece in vase
Inflate seven of the 5” balloons and place on the sticks and cups as instructed above.
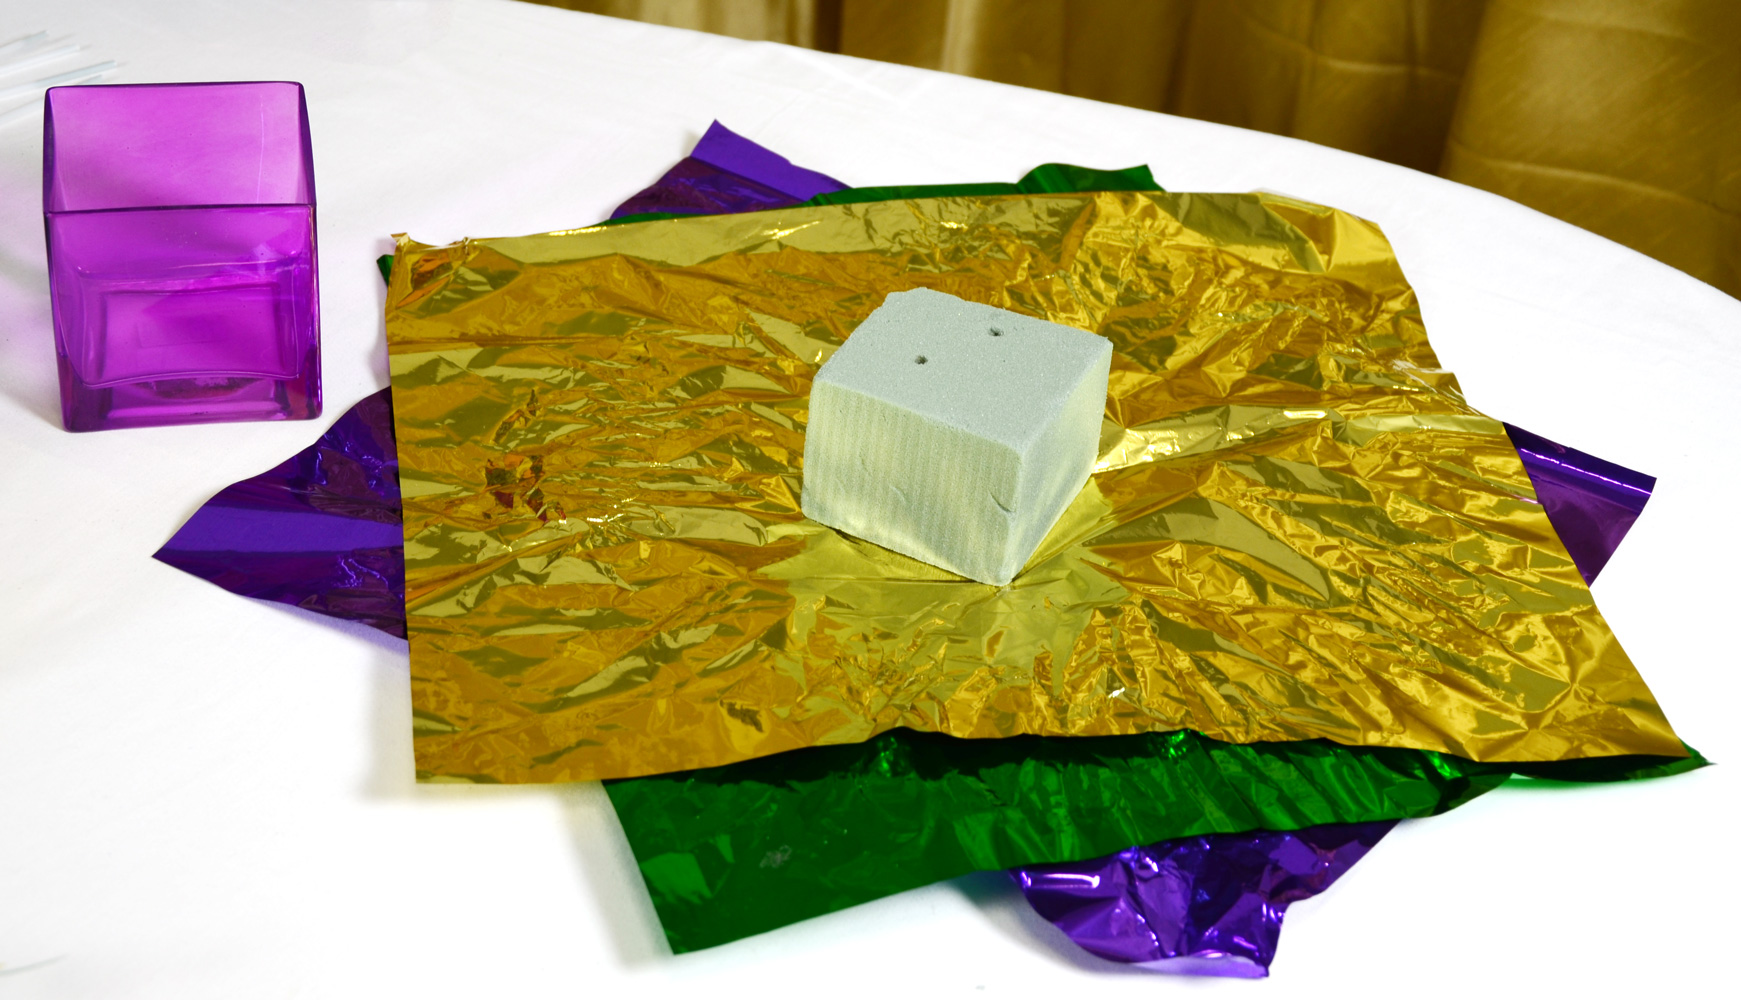
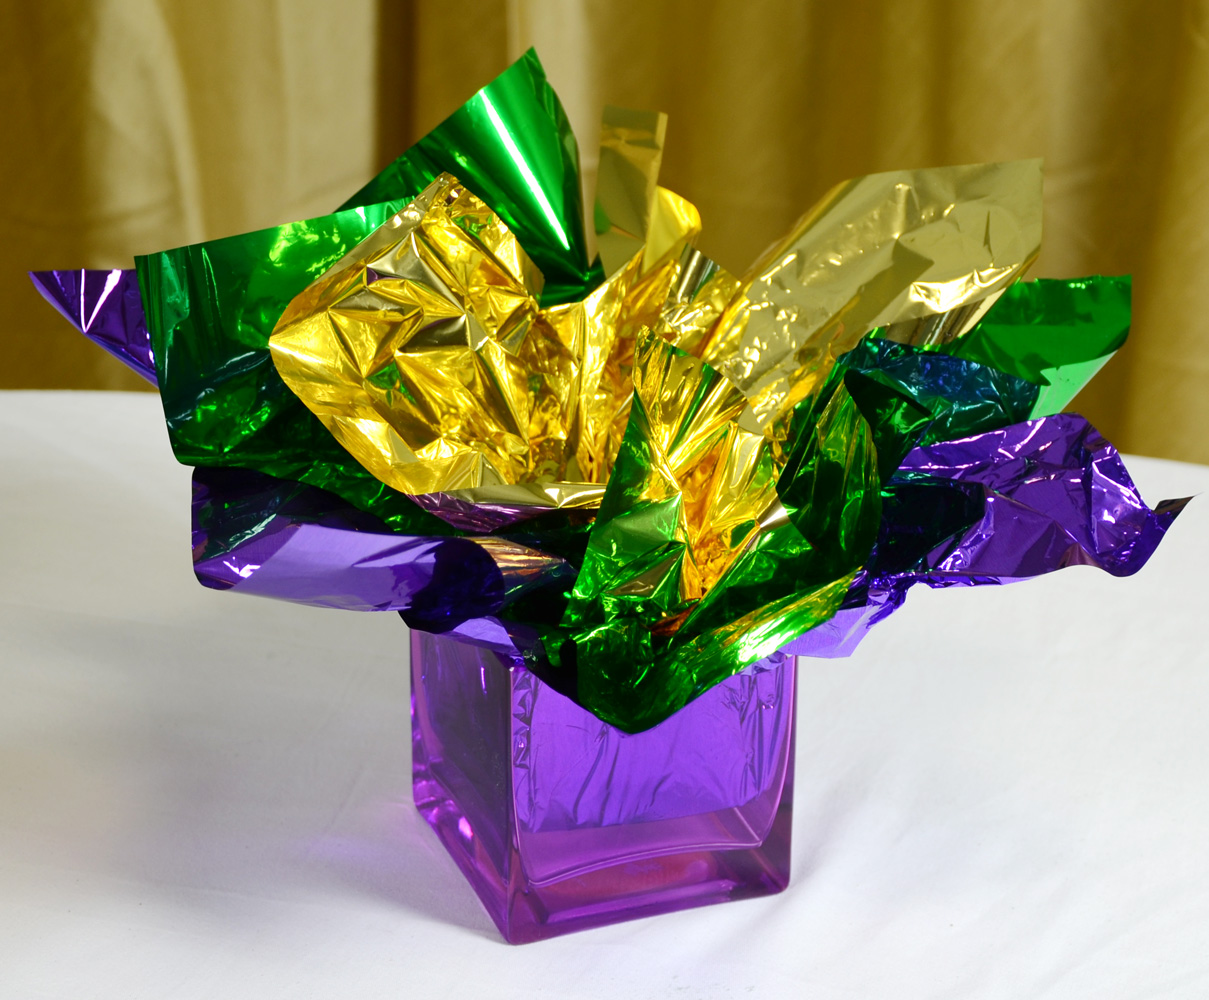
Use a piece of floral foam cut into the shape of your vase. If you are using a clear container like this one, use the mylar tissue to conceal the green floral foam.
Layer three (3) half sheets of mylar tissue under the floral foam and push the floral foam into the container.
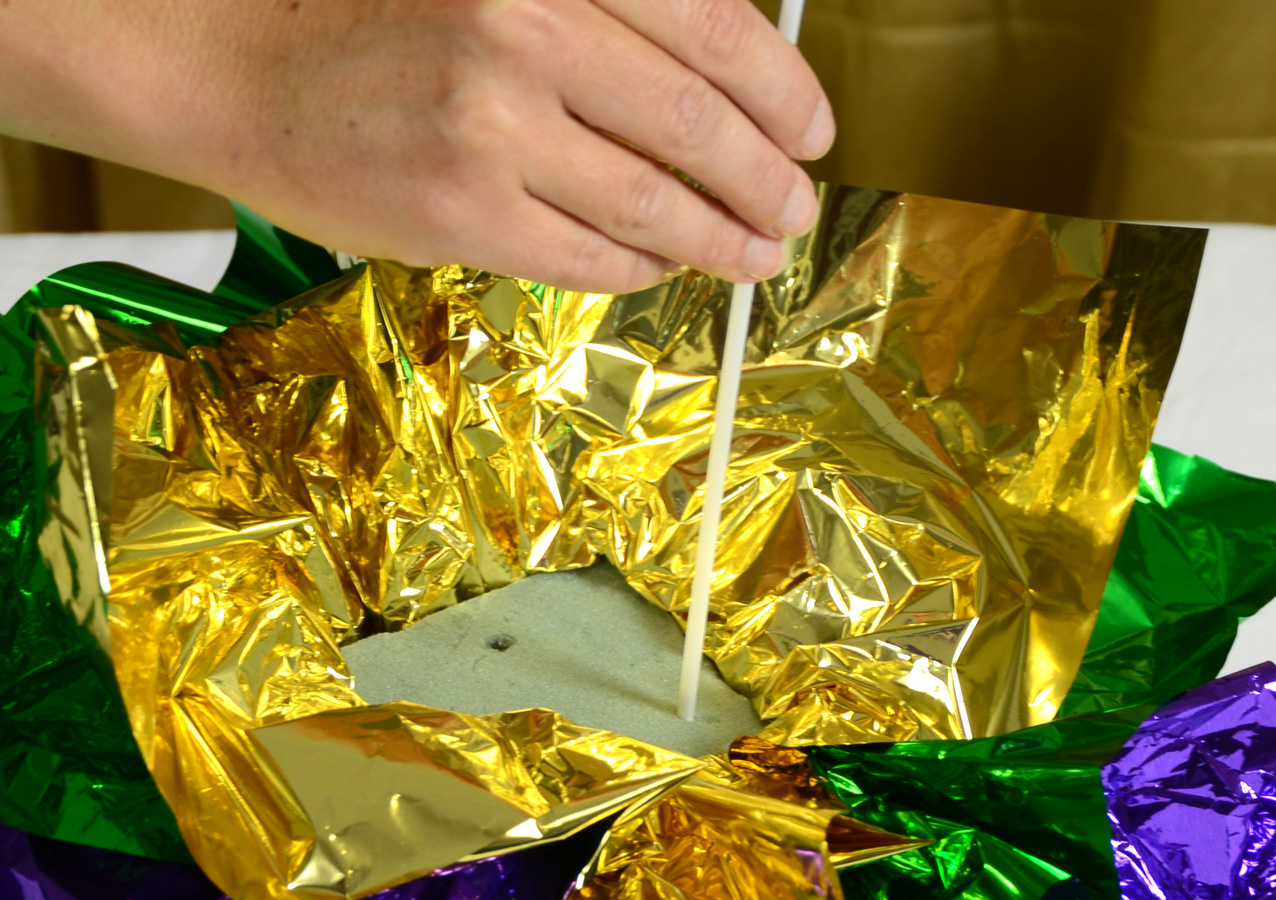
Insert each of the balloon sticks into the floral foam.
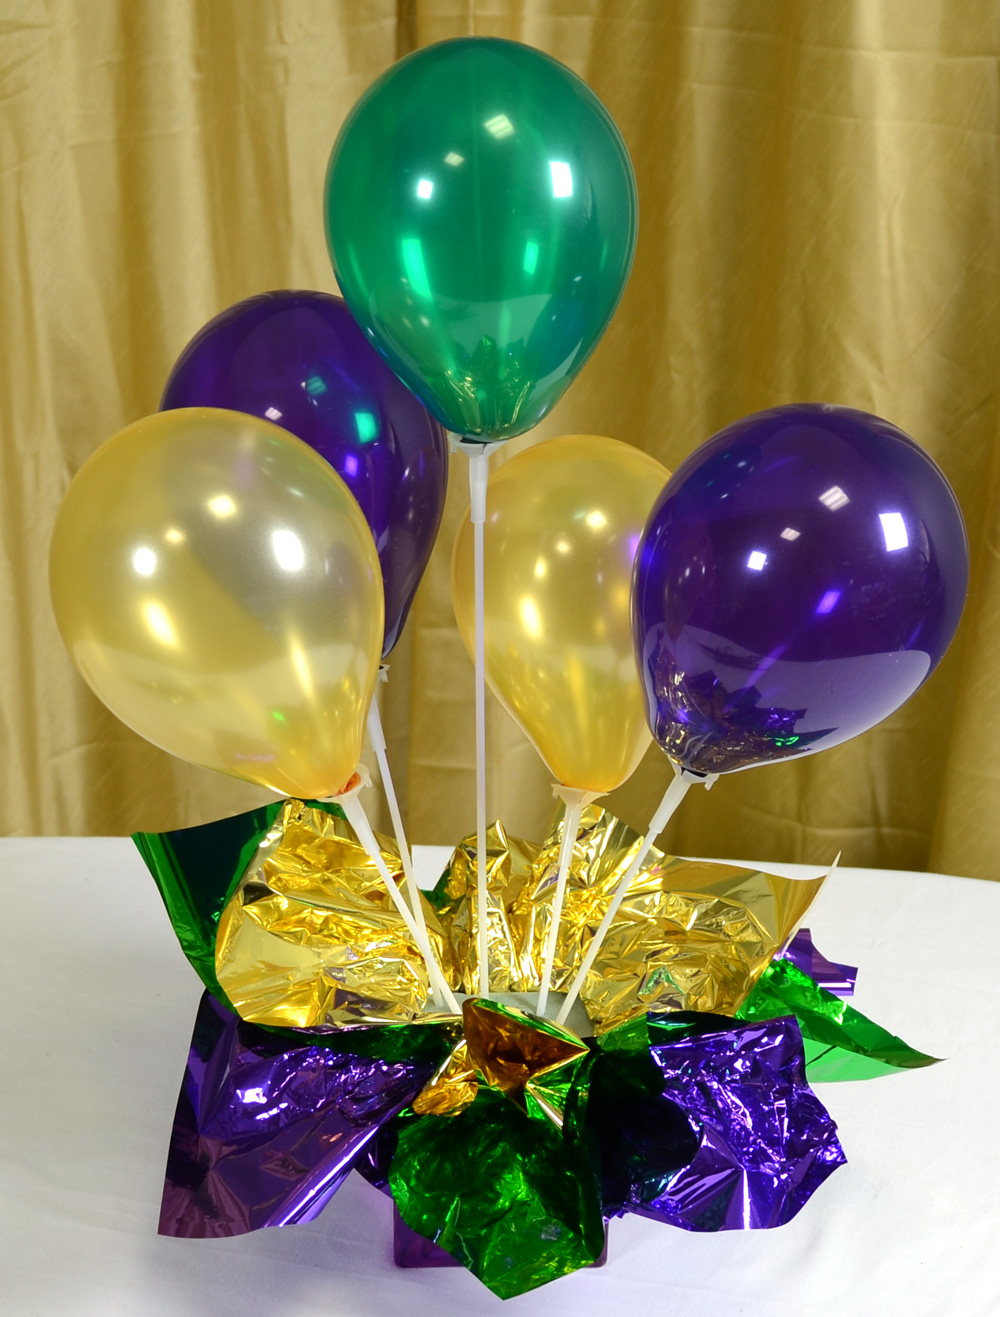
Balance the three colors in the arrangement. Cut some of the sticks down to shorter heights so you can vary the levels of the balloons.
Add in the three metallic star picks around the arrangement. Fluff the tissue up and over the balloon sticks, hiding the green floral foam.

OPTIONAL: Add in mask or other floral picks for added interest. This is a great way to bring in a theme for an event.
With simple supplies and inexpensive air filled balloons, these festive centerpieces can transform a large space on a small budget. By changing the color scheme and floral accents this style centerpiece will work for any themed event.
Be sure to SHARE your balloon centerpiece creations with us!
With simple supplies and inexpensive air filled balloons, these festive centerpieces can transform a large space on a small budget. By changing the color scheme and floral accents this style centerpiece will work for any themed event.
Be sure to SHARE your balloon centerpiece creations with us!

for the supplies shown in these tutorials!
that was beautiful
ReplyDeleteI loved the instructions
ReplyDeleteThis is a great idea!
ReplyDeleteAwesome balloons centerpieces
ReplyDeleteOh my goodness. This is exactly what I had in mind and spent hours looking online for help and finally found your site. Thank you, thank you, thank you!! Absolutely stunning!!!
ReplyDeleteGlad you liked the ideas!
DeleteThis is a great tutorial, but what if I wanted to make something similar with a much larger globe balloon? We had originally planned to use a single 36" helium balloon on table at our wedding but decided against the helium because of the shortage. Do you know of any way we could get a similar affect with air?
ReplyDeleteNedra-
DeleteThey make balloon cups for larger 12" balloons that you could use with air filled balloons. We have one in our post with our crawfish balloon centerpiece (http://blog.mardigrasoutlet.com/2012/04/crawfish-balloon-centerpiece-tutorial.html). I do not know if it would work with a larger paddle balloon (36"). The problem would be finding a balloon stick sturdy enough to support the weight. Could you suspend the balloons from the ceiling over each table? Or try mounting the large balloon to a sturdy column like these (http://www.mardigrasoutlet.com/catalog/4753.html). Email me at ideas@mardigrasoutlet.com if you have any other questions. Good luck!
Hi. What size are the balloons used in this picture? I feel like 5inch balloons are too small. Are the 5inch balloons like water balloon size? Thank you
ReplyDeleteThe balloons used in this tutorial are 5" balloons. Water balloons are usually smaller than that. If you used larger balloons you would need to use less (probably 3) balloons. Standard balloon sizes are usually 11/12 for regular helium balloons. We used that size in another air filled ballloon centerpiece. Check that one out for ideas. Hope this information helps!
DeleteHi I want to do this but with an18" foil balloon also. What size of latex balloons would I need? The 12"? It would exactly like the 1st centerpiece but with the foil balloon being the tallest one.
ReplyDeleteI would still use the 5" balloons around a larger 18" mylar balloon. 12" latex balloons would be too large. For a similar look, Check out this blog post(http://blog.mardigrasoutlet.com/2012/04/crawfish-balloon-centerpiece-tutorial.html). Just exchange the 12" red balloon in the center for a air filled mylar balloon. Please let me know if you have any more questions.
DeleteThanks!
I am using an 18" mylar balloon would 9" latex balloons look ok or are they too big need to know asap. Love your ideas
ReplyDeleteI think 9" balloons would be too large. One option if you already have the balloons is to underinflated them to a smaller 5-6" size.
DeleteI hope that information helps!
I'm not one to leave comments but you deserve it. I absolutely love the five balloon centerpiece, so much in fact that I made 12 for my stepson's graduation party this past weekend. I got tons of compliments and one mom is borrowing them for her son's party. Thank you so much for such a great tutorial.
ReplyDeleteThanks Rhi, we are so glad they worked for you. We really appreciate your feedback, and would love to see pictures of how they turned out, (info@mardigrasoutlet.com)! Hope the graduation party went well, and we're betting the decor was lovely :-)
DeleteI love the balloon centerpiece!! The tutorial is very helpful and I want to give this a try for an upcoming event. How many days prior can I prepare the center pieces. I don't want the balloons to get droopy.
ReplyDeleteThe great part about the balloon centerpiece is that you can get everything ready ahead of time. Wrap your base, add the tinsel garland and floral sprays, even set them out on the table. The latex balloons however will be droopy in 24 hours, so we recommend doing that the morning of the event.
DeleteIf you are in a crunch for time there is a commercial product available called "hi-float" that is available in some craft stores and online. It is used by most floral shops that send out balloon bouquets (with helium) to make sure the balloons will stay expanded and floating for about 48 hours+. (It acts like a sealant, but if you aren't using helium, its probably just easier to wait to fill the balloons until the day of your function.)
Hope this helps, we would love to see photos of your centerpiece!
This looks beutiful i am using it.
ReplyDelete