February 16, 2012

Mardi Gras Glitter Leaf Wreath: Three Different Ways


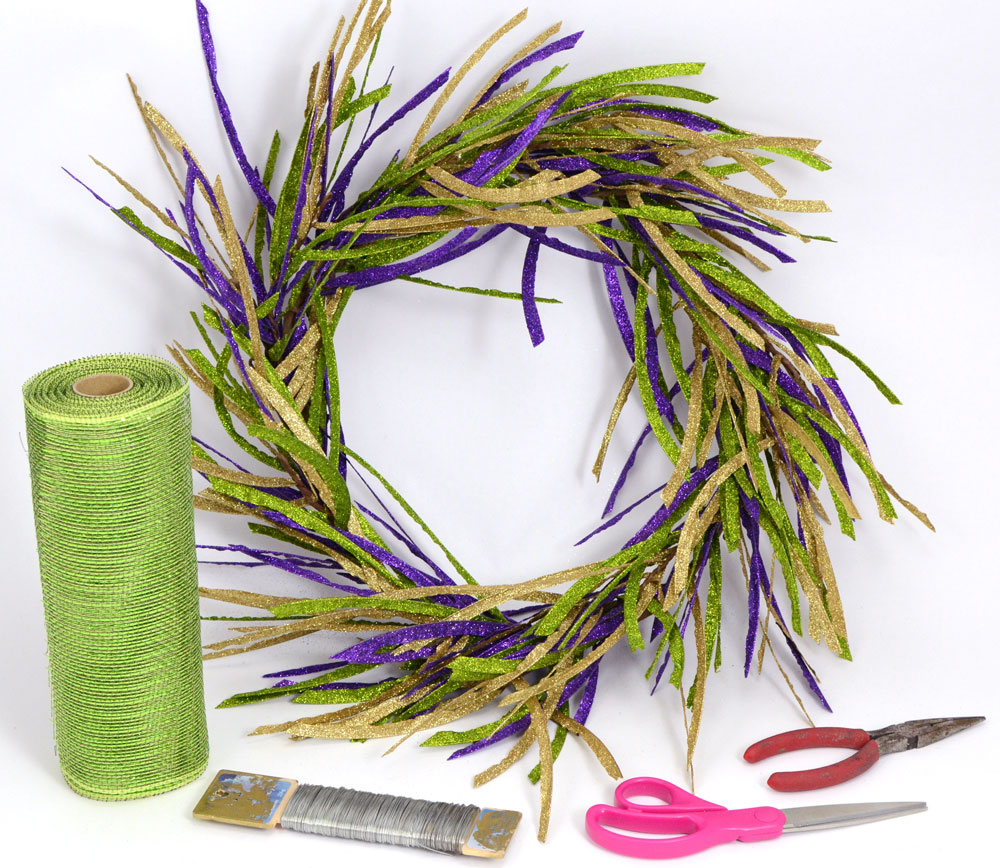
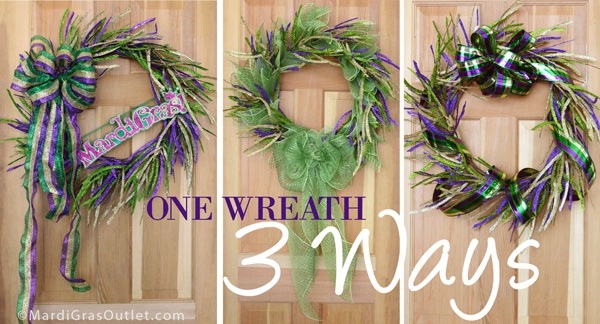
Transform a simple Mardi Gras glitter leaf wreath into your own personalized Mardi Gras door decoration. A year ago, we posted about how to create three different looks with one basic Mardi Gras tinsel wreath from (click here to see the post). For 2012, we wanted to do the same concept with a new style of wreath form. This basic Glitter Leaf Wreath was easily updated with inexpensive Mardi Gras accents: lime green deco meshMardi Gras ribbon and a glitter wall sign.
available at Mardi Gras Outlet.com
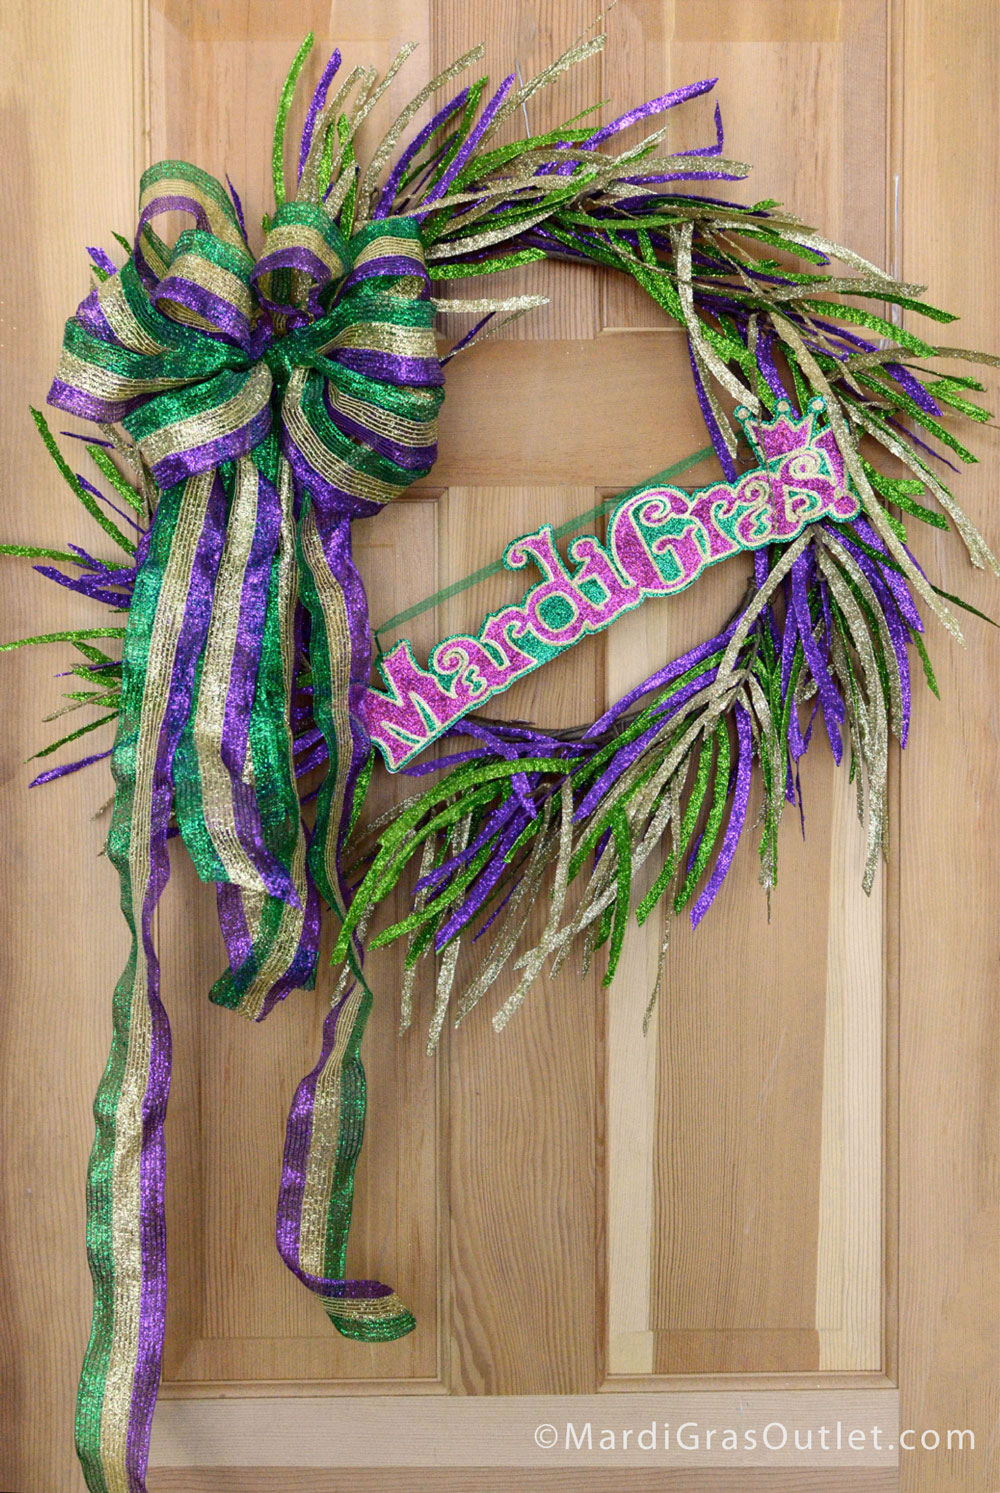
Option 1: Mardi Gras Sign
SUPPLIES

All of the supplies can be purchased at www.mardigrasoutlet.com, for about $34.

This first Mardi Gras wreath version uses a Mardi Gras sign and bow. You will need to use craft wire to attach both decorative accents.
First, attach the Mardi Gras sign at the bottom right of the wreath at a slight angle. Secure it on both sides with craft wire to the glitter leaf wreath form.
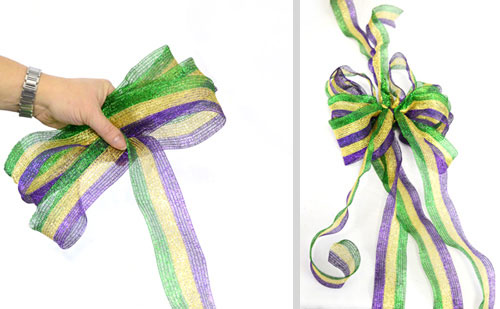
Use the Mardi Gras Stripe Ribbon to make a bow. Form a loop and hold in one hand. Form another loop on the opposite side and hold them in the same hand at the middle. Continue going back and forth until there are 4 loops on each side. Now cut 2, 30" long strips of ribbon and one shorter piece. Use the short length to attach the tails at the middle to the place you have been holding the loops.
Attach the bow with craft wire to the left side of the wreath.
For more detailed directions on how to make a similar bow, click here.
Option 2: Deco Mesh
SUPPLIES
Scissors, Wire Cutters

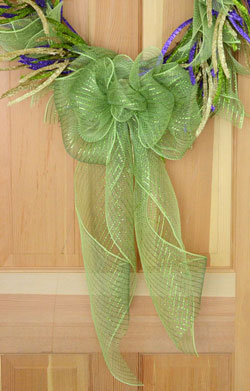
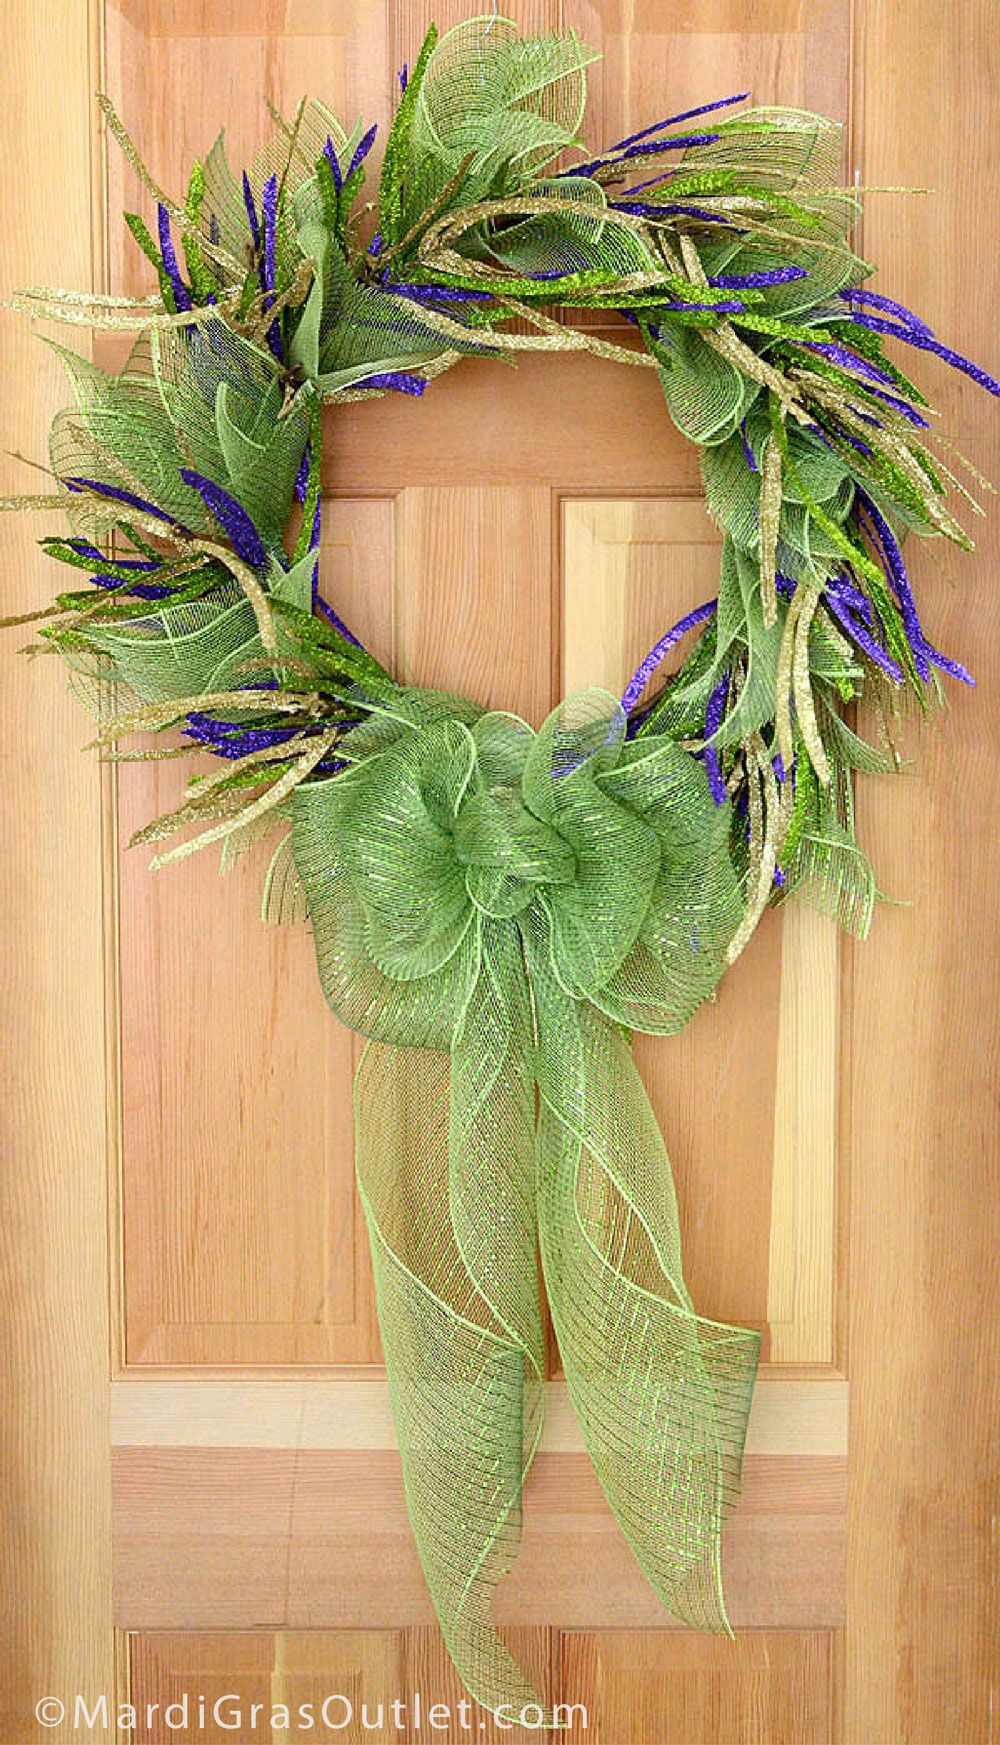
This Mardi Gras wreath version uses 10" wide poly deco mesh ribbon to add volume to the wreath. There should be enough deco mesh on the roll to fill in the wreath and to make a big bow. The supplies needed for this wreath will be about $26.
STEP 1
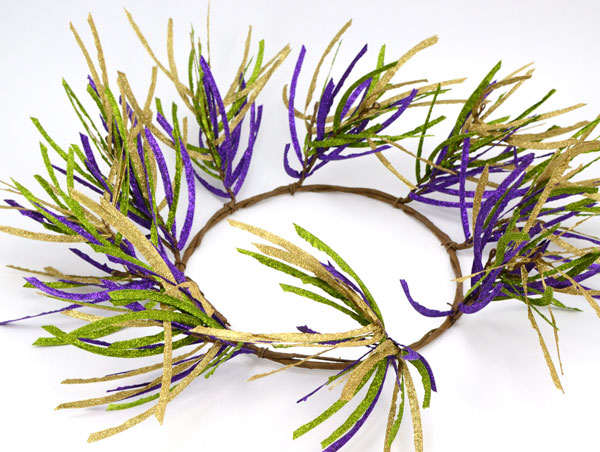
Open up and fluff the Glitter Leaf Wreath so that you can easily reach the brown wreath frame.
STEP 2
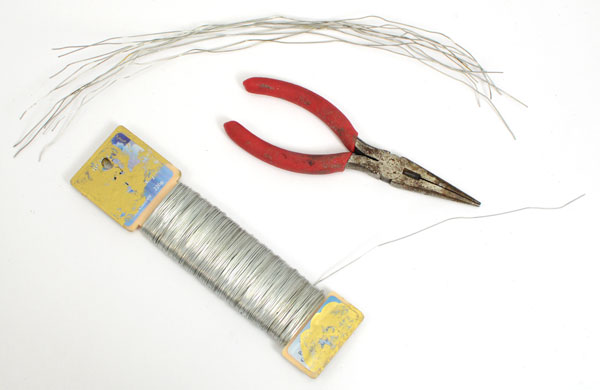
Cut about 10 pieces of craft wire that are 10"-12" long.
STEP 3
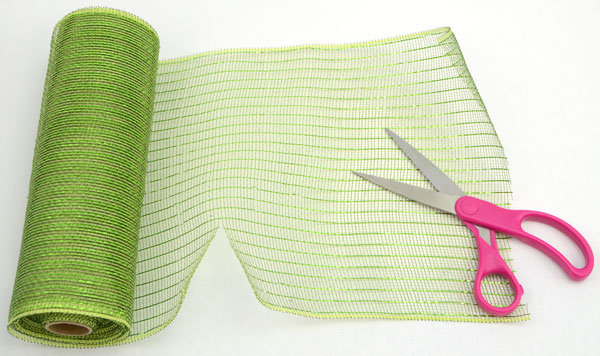
Cut approximately 16 pieces of the deco mesh. Each piece should be square, measuring about 10"x10".
STEP 4
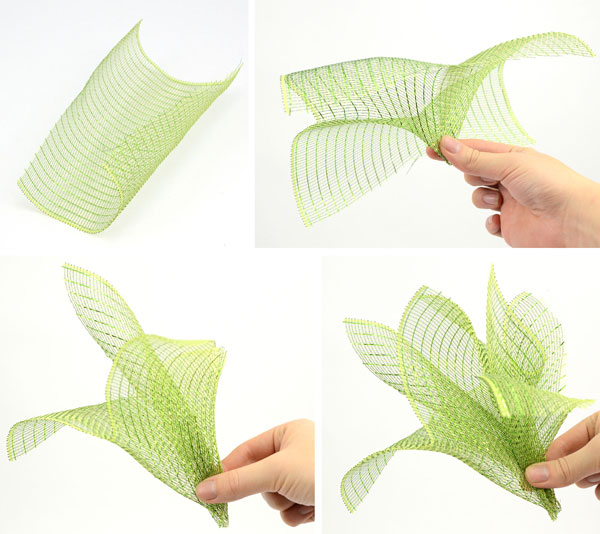
Form the deco mesh sprays that you will eventually attach to the wreath frame. With a piece of mesh placed curl side up, pinch the very center and bunch it together. Make another and group the two together.
STEP 5
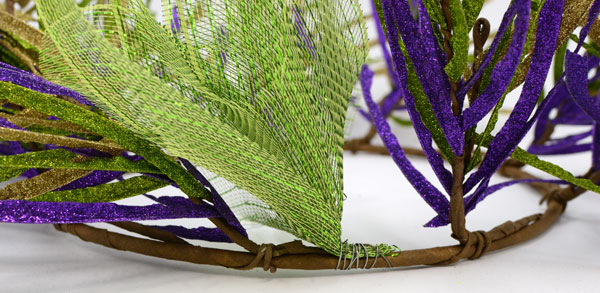
Use the craft wire to secure the deco mesh spray you created to the wreath frame, in between two branches. The mesh should be pointing in the same direction as the wreath's branches. Wrap the wire tightly and securely.
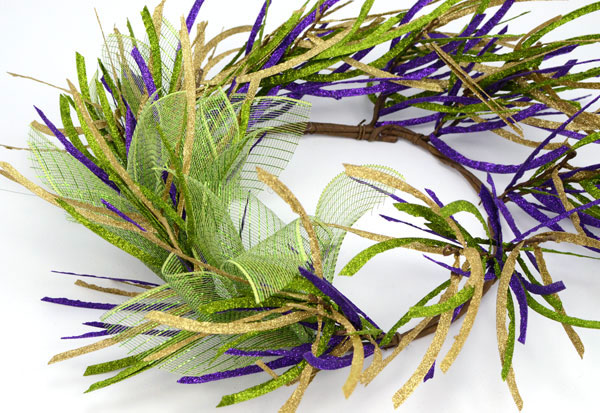
STEP 6
Repeat for each space between the branches, continuing all the way around the wreath.
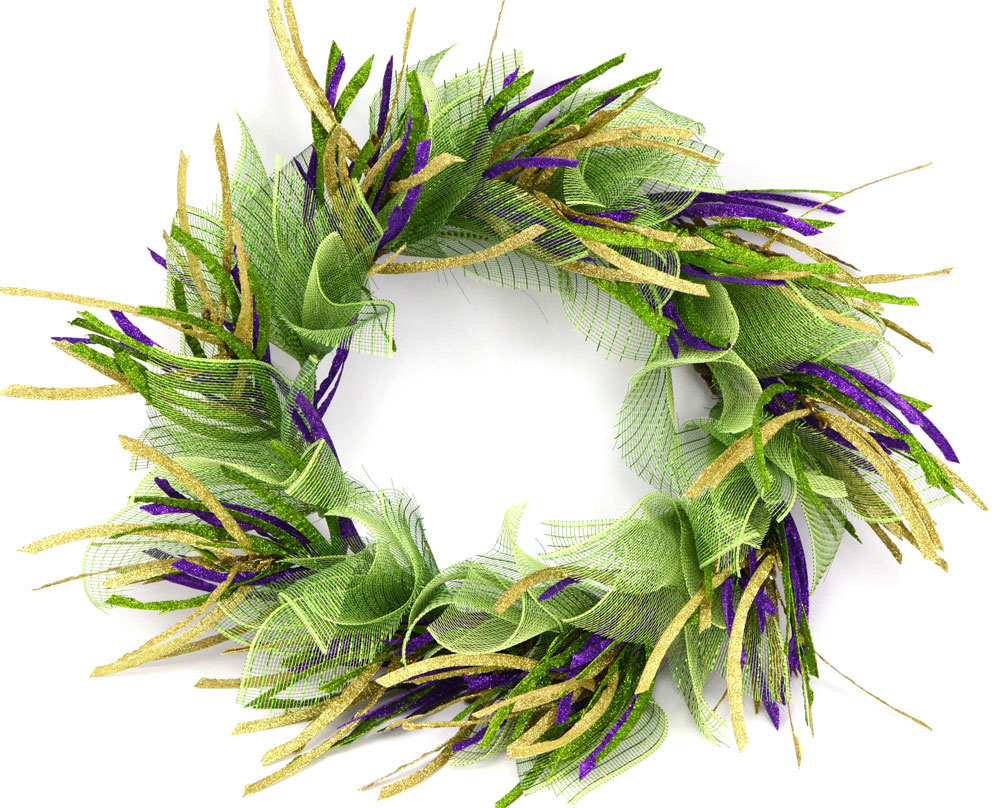
STEP 7
Using the rest of the deco mesh roll, make a bow and attach it with craft wire at the bottom center of the wreath. For exact directions on how to make a bow with 10-inch deco mesh, CLICK HERE for our previous blog post tutorial on making a bow with 10" deco mesh.
Option 3: Bow and Ribbon
SUPPLIES

This version will cost about $25 in supplies from www.mardigrasoutlet.com.

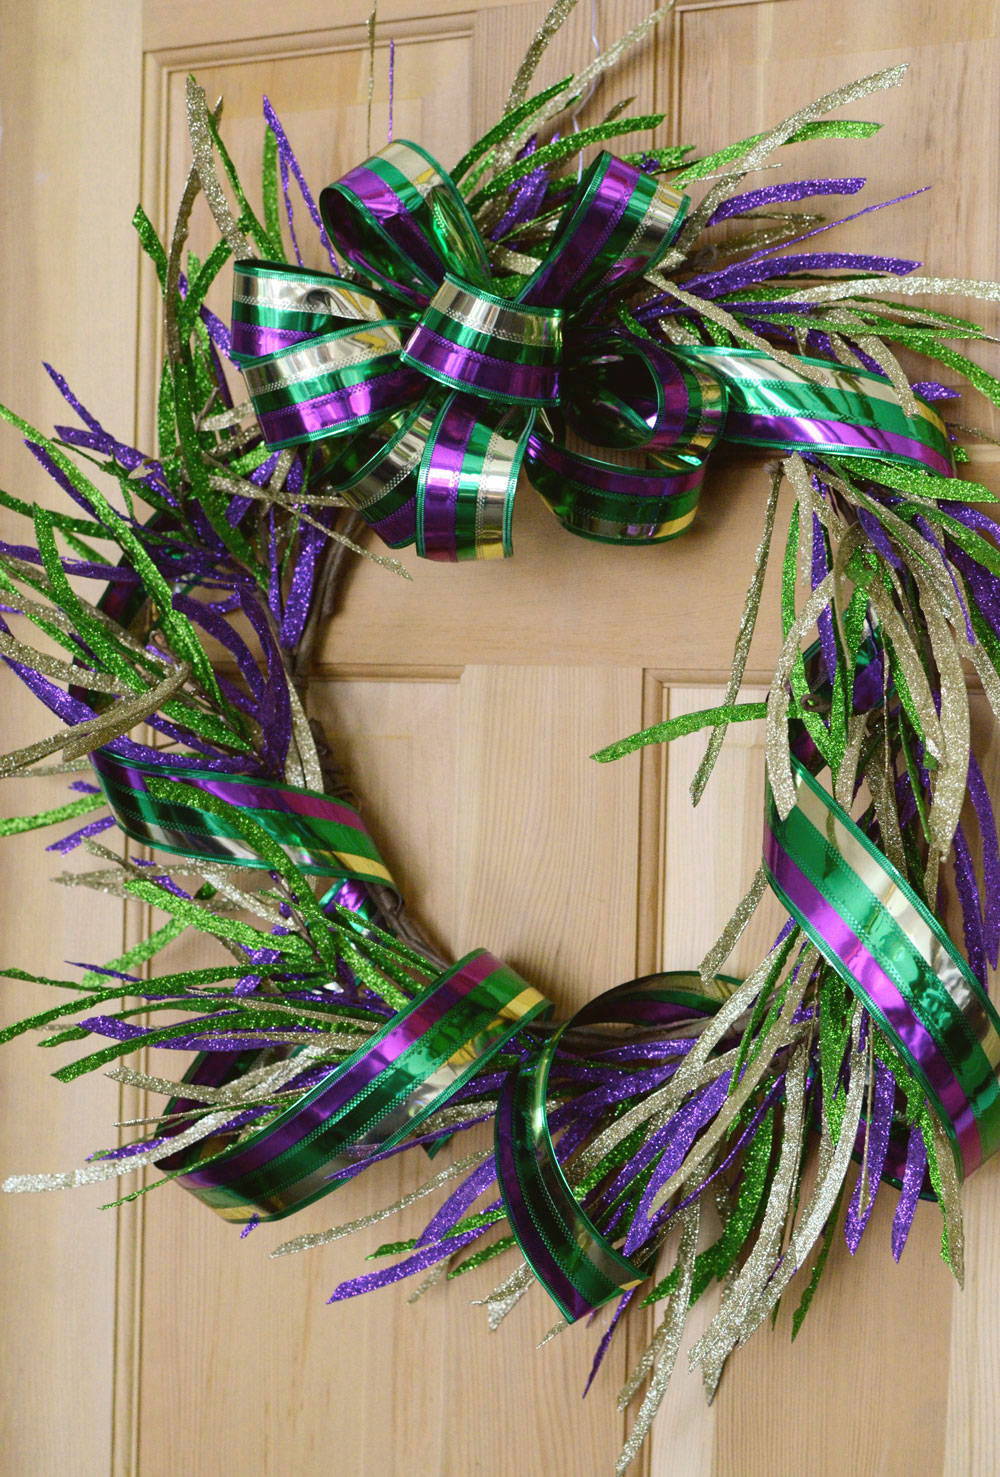
First, form the bow. This bow was made the same way as the first version of the wreath, except there are 10 loops total. Tie the bow with craft wire, and pull and fluff out the loops. Cut a long tail, about  6 feet long, and attach at its center to the back of the bow.

Place the bow at the top of the wreath, and simply loop the ribbon tails all the way around the Glitter Leaf wreath.
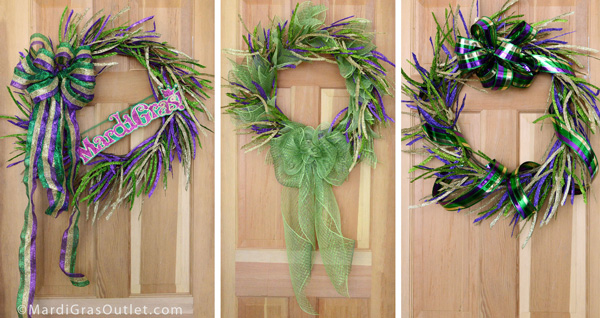
One basic glitter leaf wreath transformed into three different wreaths.

February 13, 2012

Masquerade Mask Favor Centerpiece: Tutorial

mardi gras party favors centerpiece ideas how to make tutorial making mask masquerade
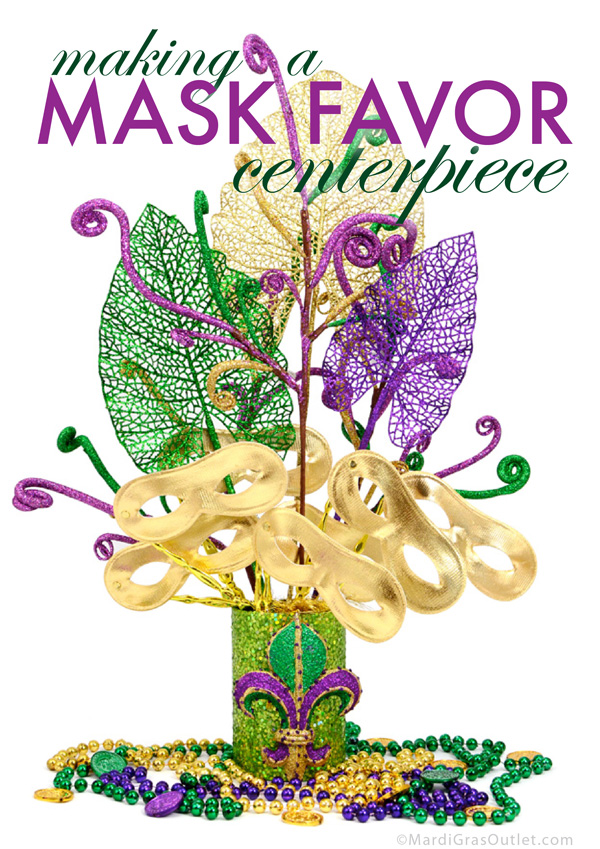
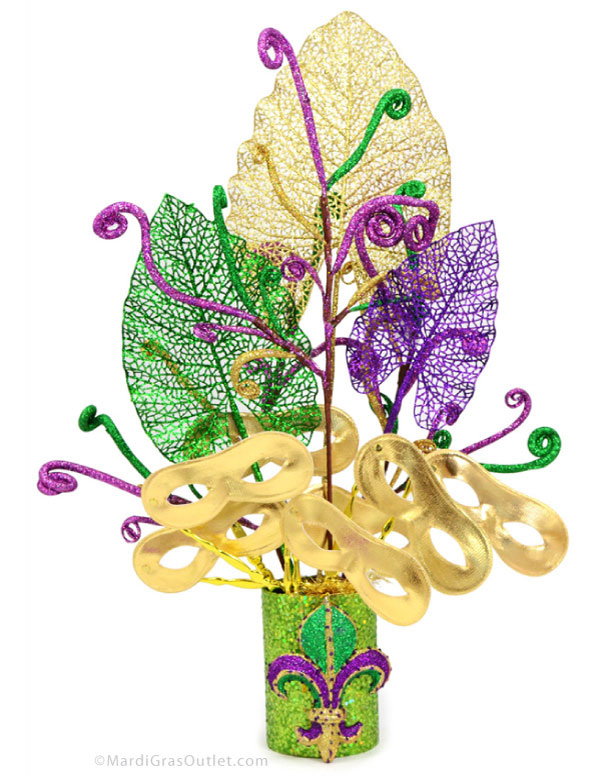
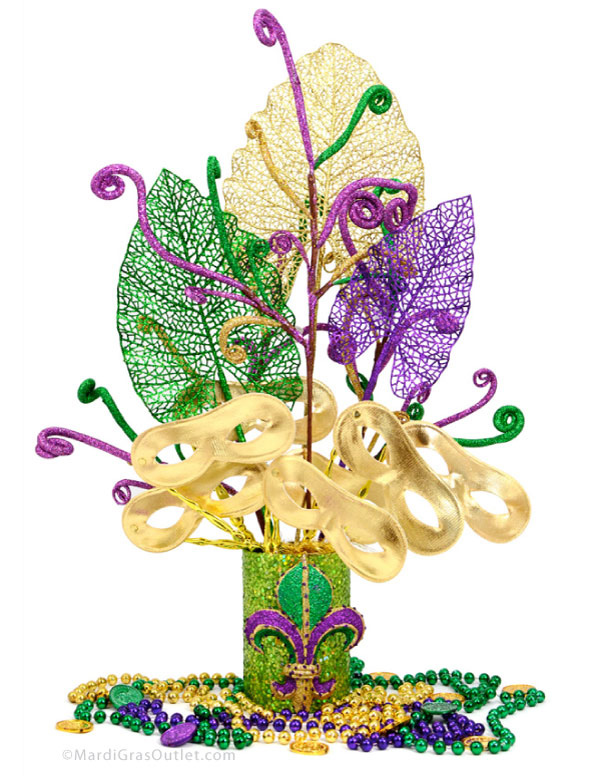
Party favors act as a memento of a celebration for guests. For a Mardi Gras or Masquerade party idea, combine mask favors and the centerpiece for a festive and impressive decoration. This whimsical Mardi Gras centerpiece uses glittery floral sprays and accents in purple, green and gold colors.
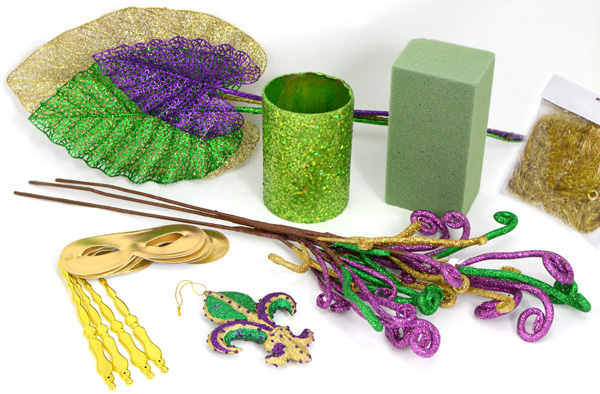
SUPPLIES
(8) Metallic Gold Domino Stick Masks - enough for your guests
Hot Glue
Scissors

All of the centerpiece supplies can be purchased at www.mardigrasoutlet.com. 

This will cost about $43 total if you use 8 masks, and not including Mardi Gras beads and doubloons. Many of these items have quantity discounts when you order over a certain number.
STEP 1: INSERT THE FLORAL FOAM
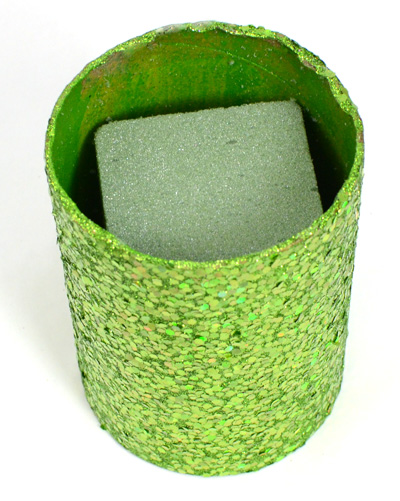
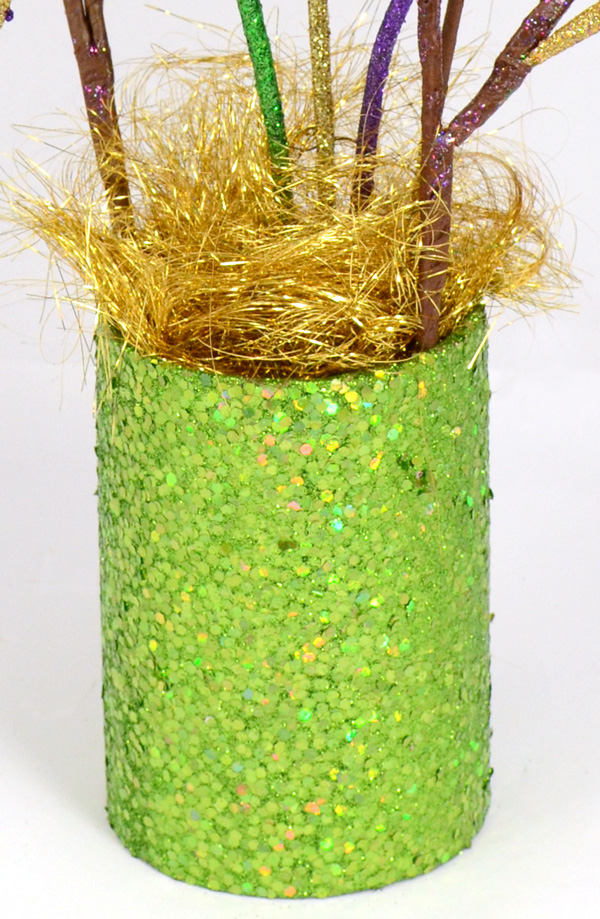
Using scissors, cut a piece of the dry floral foam brick that fits snugly inside the green centerpiece cylinder. You may want to place a weight underneath the foam brick to make the centerpiece more stable.

STEP 2: UNTIE THE PHILODENDRON SPRAY
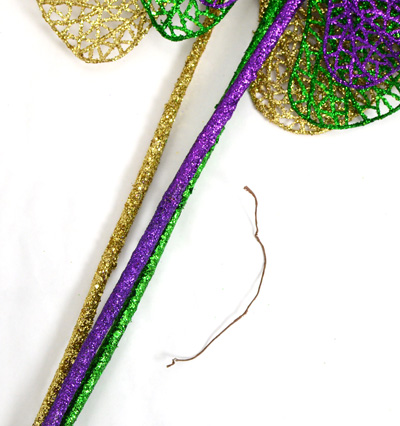
The purple, green and gold Philodendron Leaf Bundle is held together by 2 brown wire ties. To separate the 3 leaf sprays, untwist the ties or cut the ties off.

STEP 3: ADD THE PHILODENDRON LEAVES
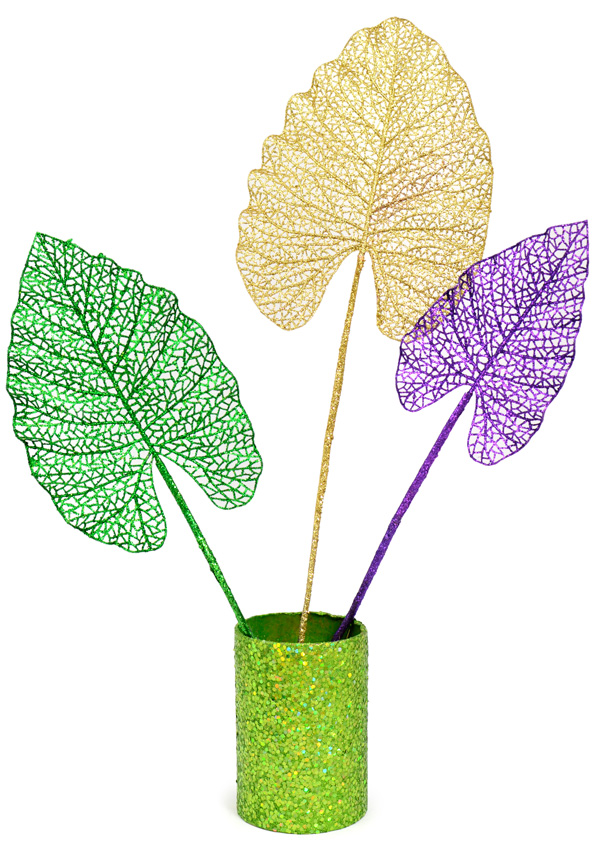
Trim the stick ends of the green and purple leaves by a few inches to lower and vary the height of each leaf. Insert the Philodendron Leaf sprays securely into the floral foam brick, all the way down. The gold leaf should be at the center and the green and purple leaves to either side.

STEP 4: ADD THE THREE SPIRAL CURLS SPRAYS
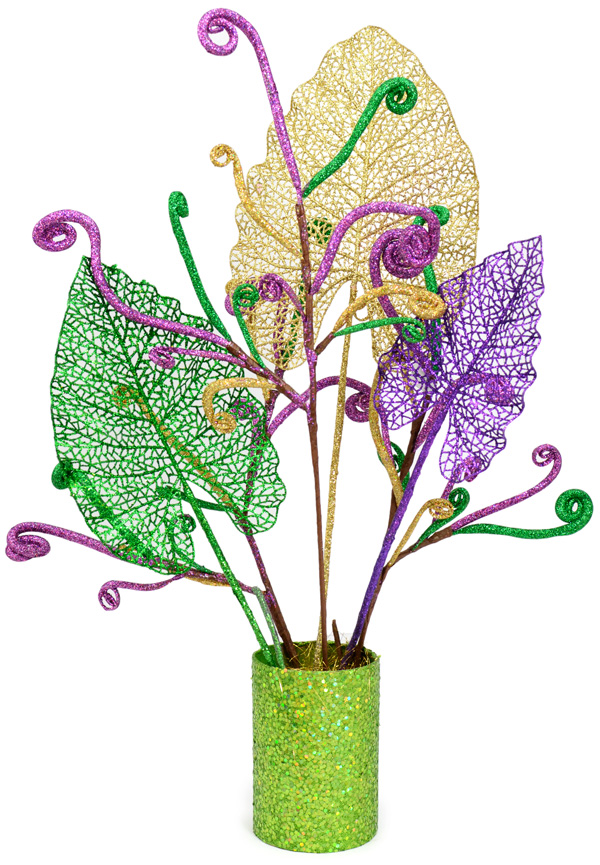
Again, trim the stick ends of two of the spiral curls sprays so that they are a few inches shorter. Secure and insert the three floral sprays into the foam brick so that they fill the spaces between the philodendron leaves.

STEP 5: ADD A FILLER
Gold Angel Grass Shred covers and hides the floral foam at the opening of the vase.

STEP 6: ADD MASKS
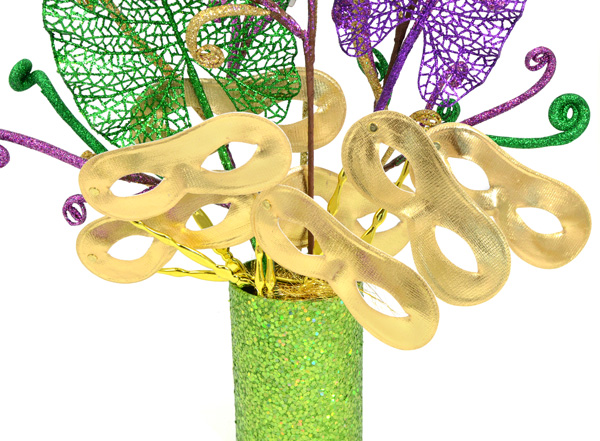
Insert the metallic gold domino stick masks into the vase opening. 8 masks were used here.

STEP 7: ADD THE FLEUR DE LIS ACCENT
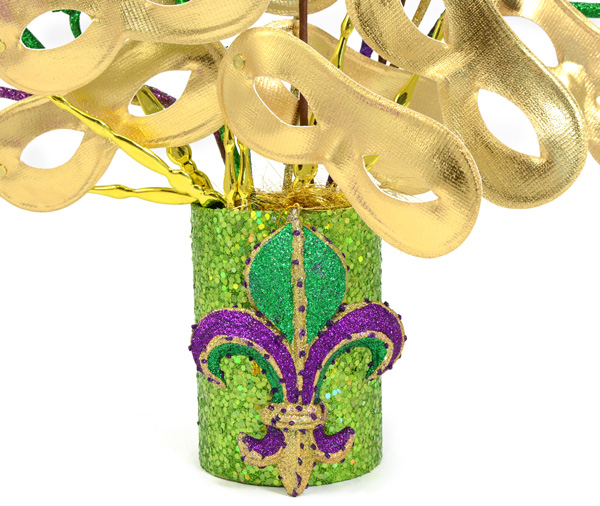
Using hot glue, attach the Mardi Gras Fleur de Lis Ornament on the front and center of the green cylinder base. Trim the ornament tie off at the top.

You're Finished!

OPTIONAL
You can also scatter Mardi Gras beads and Mardi Gras doubloons around and underneath the masquerade centerpiece for additional party favors and decoration.

February 9, 2012

Paper Jester Hat Pattern: Mardi Gras Crafts for Kids

jester hat pattern template mardi gras kids crafts free
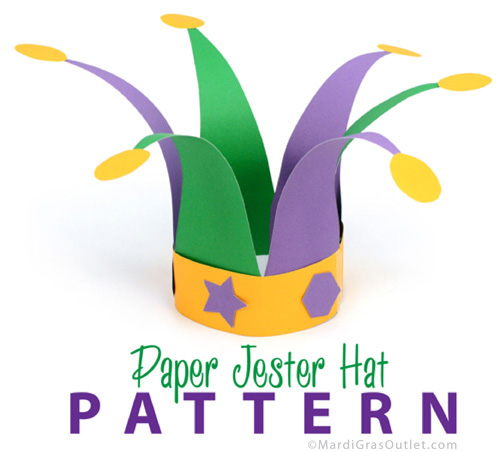
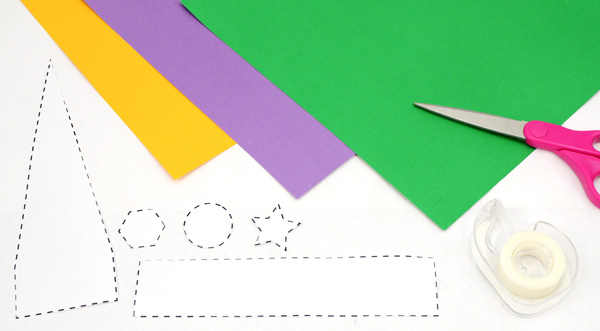
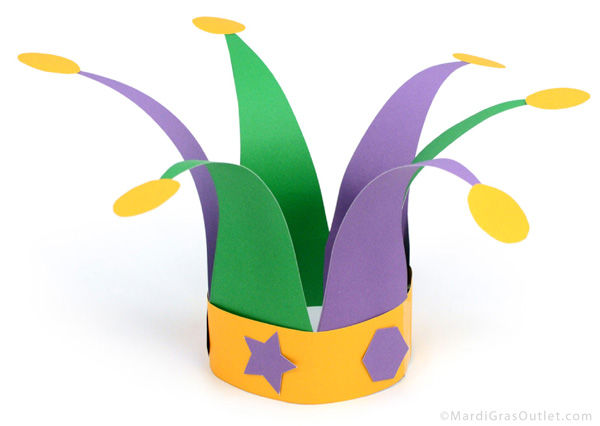
Mardi Gras paper crafts are a fun creative activity for children. This three-dimensional jester hat can be made with some colorful construction paper and this free printable template. All you will need are some scissors, a pencil and some tape or glue. See below for instructions. 

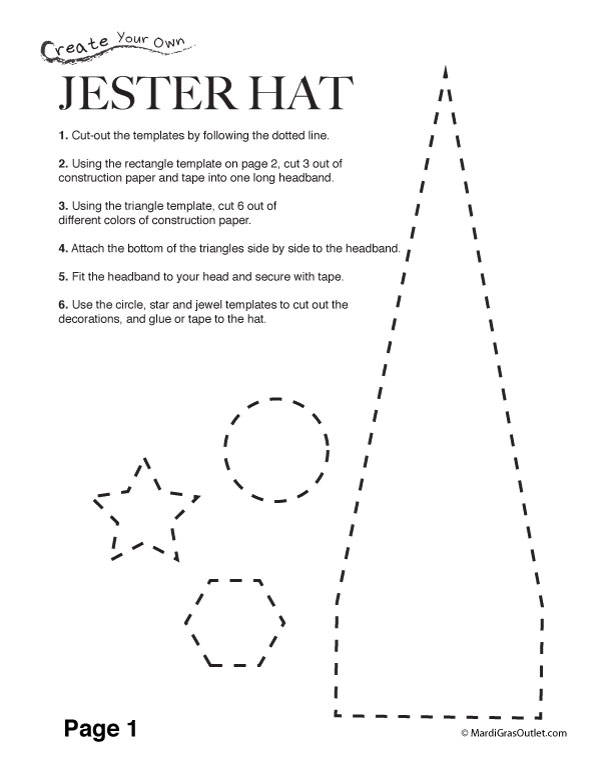
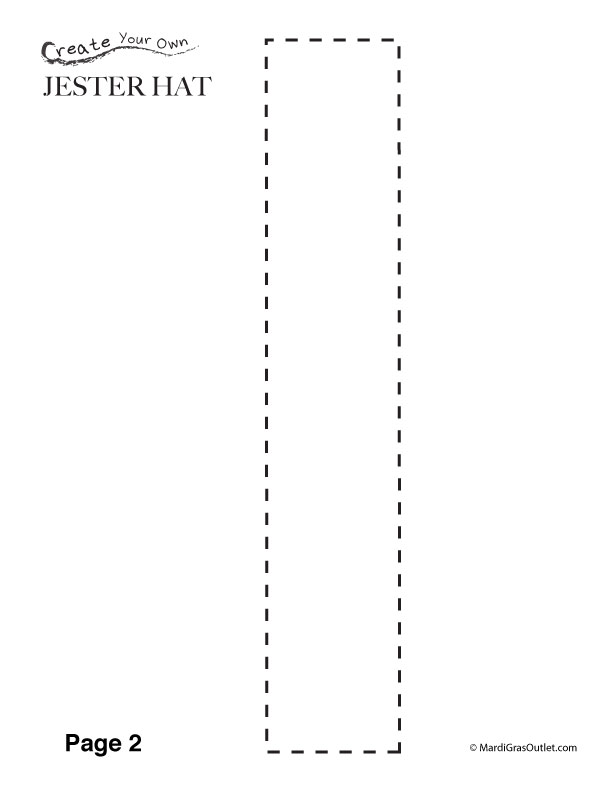
Click on the link above to download and print the Mardi Gras jester hat pattern on your printer. You will need to have a PDF reader to open it (free at this website). The hat instructions are also on the template page.

STEP 1: CUT OUT THE TEMPLATES
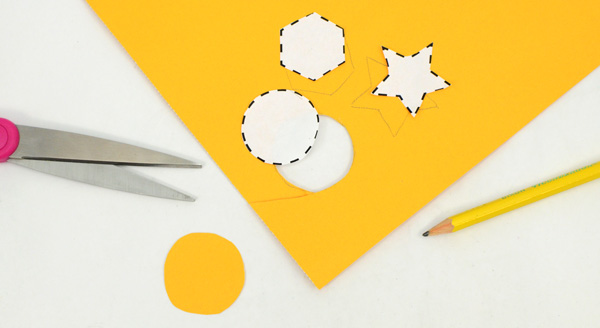
Print out both pages of the free download jester hat patterns. Follow the dotted line and cut-out each shape with scissors.

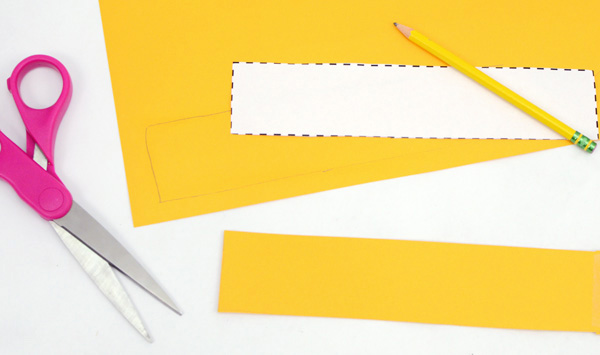
STEP 2: MAKE THE HEADBAND
Using the rectangular template on page 2, cut-out 3 pieces from construction paper. For this hat, you can use purple, green and gold, the colors of Mardi Gras, or any other colors you want. Tape the pieces end to end into one long head band.

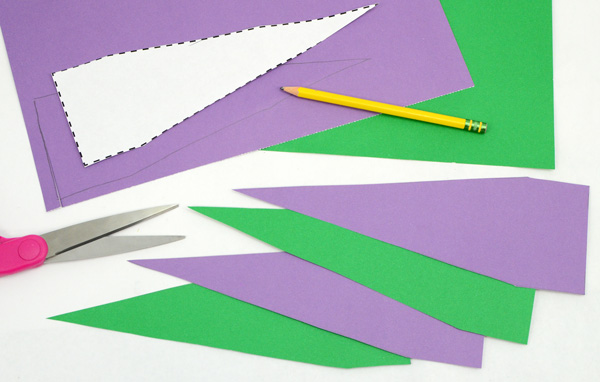
STEP 3: CUT THE JESTER SPIKES
Using the triangle pattern, cut out 6-8 pieces out of different colors of construction paper. The number of triangles you need depend on head size.

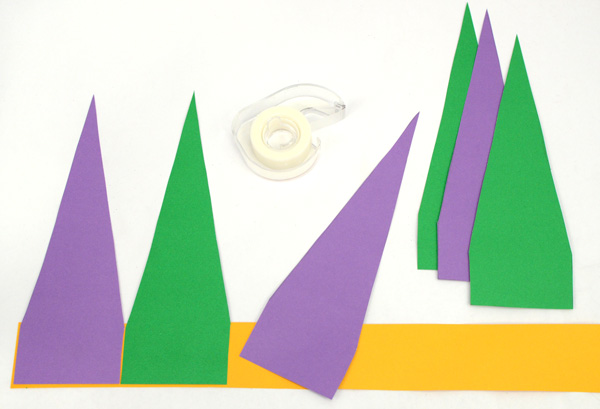
STEP 4 & 5: CONSTRUCT THE HAT
Using glue or tape, secure the triangle bottoms side by side to the head band. Now, fit the headband to your head and secure with tape.

STEP 6: ADD ACCENTS
Use the circle, star and jewel templates on page 1 to cut out decorations for your jester hat. Glue or tape them to the hat. 

jester hat paper craft pattern mardi gras children's
Happy Crafting!

For more free coloring page downloads and other printables, click below:
FREE PRINTABLES

February 6, 2012

Curled Paper Bow Gift Wrap with Mardi Gras Paper

curly wrapping paper bow how to diy tutorial
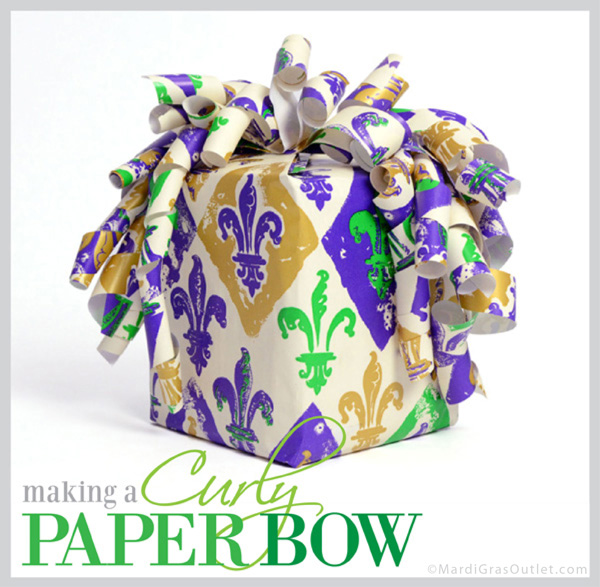
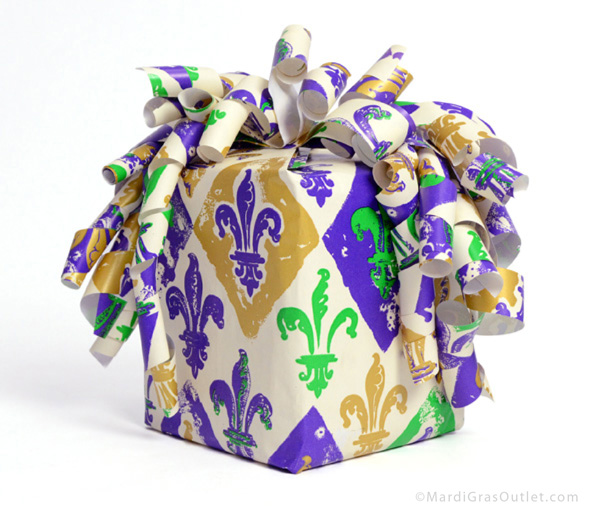
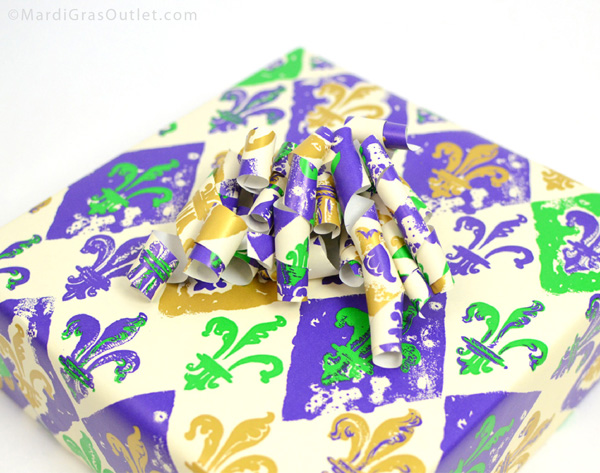
If you find yourself without a bow for your gift wrap, don't worry, making your own is simple with leftover wrapping paper. This present was wrapped with Fleur de Lis Mardi Gras gift wrap ($29.95) but it needed a festive top to match. Here's a short tutorial on how to make your own curly paper bow. 
STEP 1:
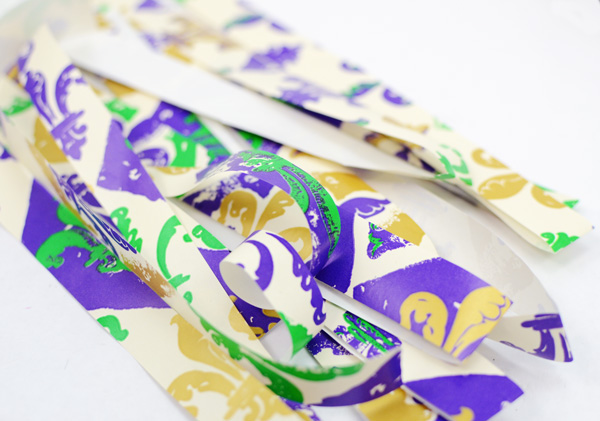
Cut about 15 strips of gift wrapping paper that are about 1/2" to 3/4" wide, and 10" to 15" long. They don't need to be exact because different lengths make a fuller looking bow. 

You also should adjust the lengths according to the size of the present and how big you want the bow. Longer strips makes a bigger bow and vice versa. Our gift box was 4 in. x 4 in. x 5 in and we made the curly bow over sized, so that it would cascade down the sides.
STEP 2:
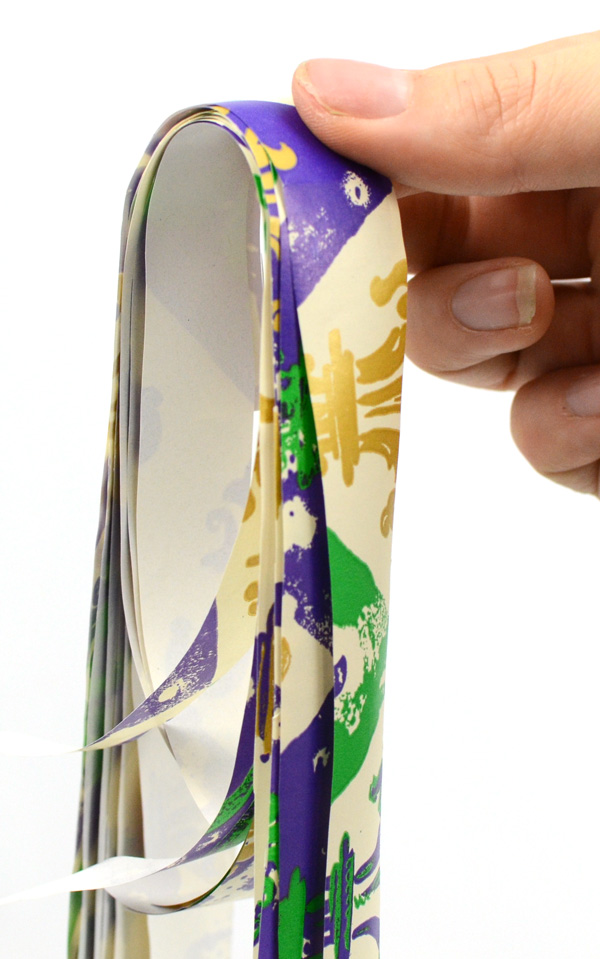
Gather all of the strips evenly and hold the stack at the middle.
STEP 3:
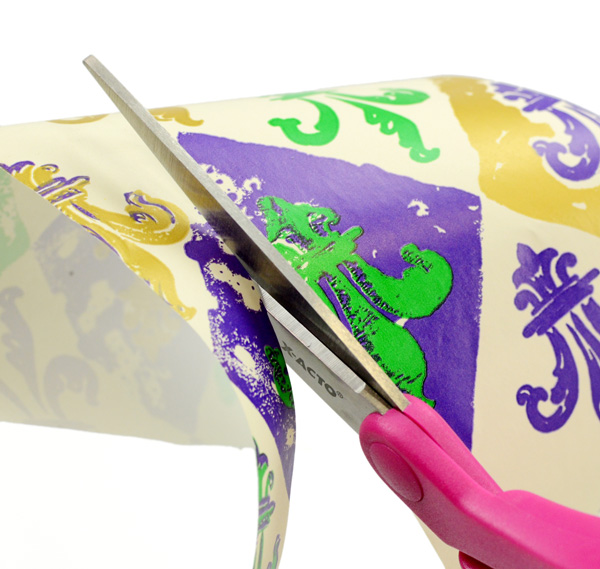
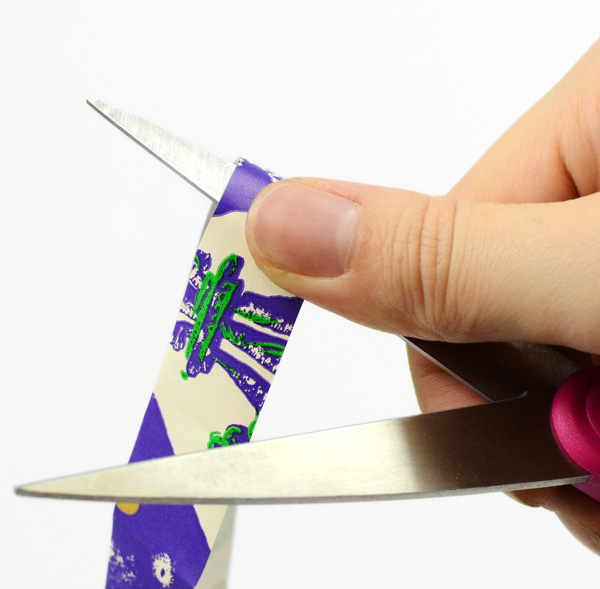
Curl them! This is just like curling ribbon: open up your scissors and put the paper between your thumb and the scissors edge at an angle. Pull going towards the end of the paper strip. 

Curl both sides of each strip from the middle where you are holding the bow. It is okay to have tighter and looser curls for this whimsical type of bow.

STEP 4:
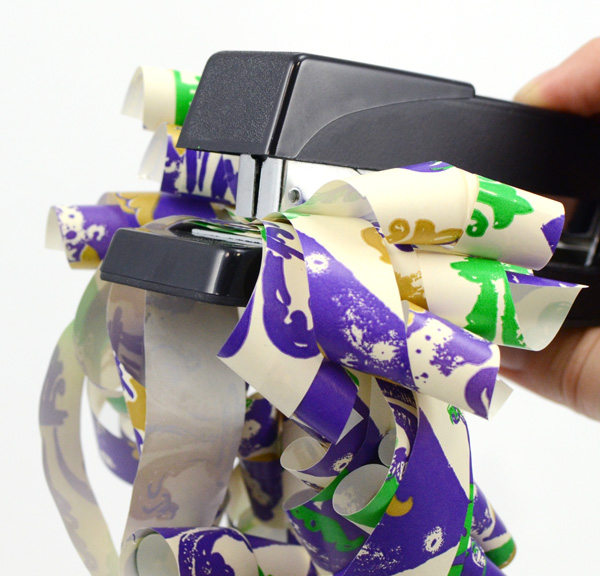
Staple or tape around at the center where you have been holding the bow. 
Finally, attach your bow with tape or a glue dot to the top of the present.
We also made a curly paper bow for a larger sized gift.

And there you go! An easy, fun and inexpensive way to decorate your presents.

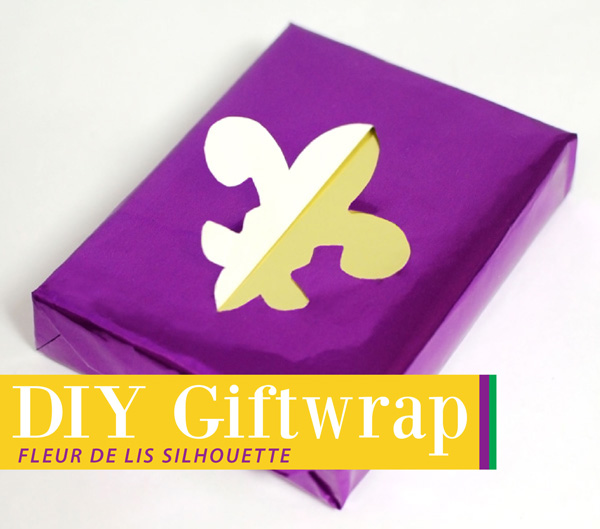
Looking for more Mardi Gras or Louisiana gift wrap ideas? Click here to see our previous blog post on how to make this fleur de lis cut-out wrapping. Template provided for free!


February 2, 2012

Free Mardi Gras Printable Stickers and Labels


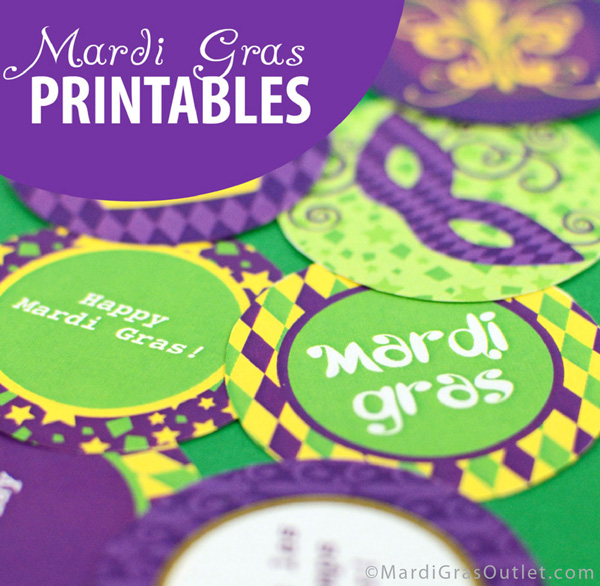
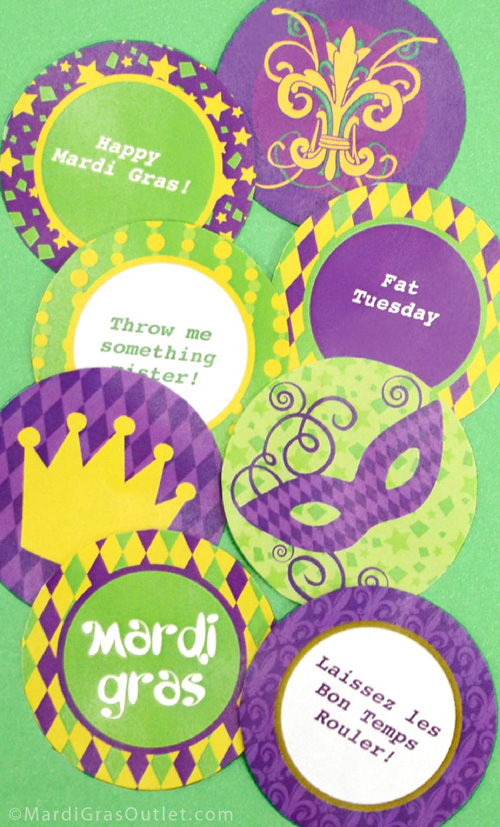
Create custom Mardi Gras Beads, party favors or decorate gift packaging with our free printable stickers and labels. These Mardi Gras graphics include a crown, mask, scrolled fleur-de-lis and harlequin patterns. Similar to our other downloadable designs, you can personalize and customize the labels for a special event, party or parade.


Click on the links above to download each page. You will need Adobe Acrobat Reader, which is free here if you don't have it. To customize the Mardi Gras Labels, open the file in Acrobat Reader. You should see some highlighted boxes where you can click and type your text before printing. Or, you can simply print out the labels and write on them by hand. Only the "labels" page has customizable text.

Print these out onto 8.5"x11" sticker paper or cardstock (Avery is a good brand) with your inkjet or laser printer. Any office supply store sells both types of paper. Use a 2" circle cutter or scissors to cut out each circular design. 

We have tons of ideas on how to use our Mardi Gras labels, so here are images of what we did.

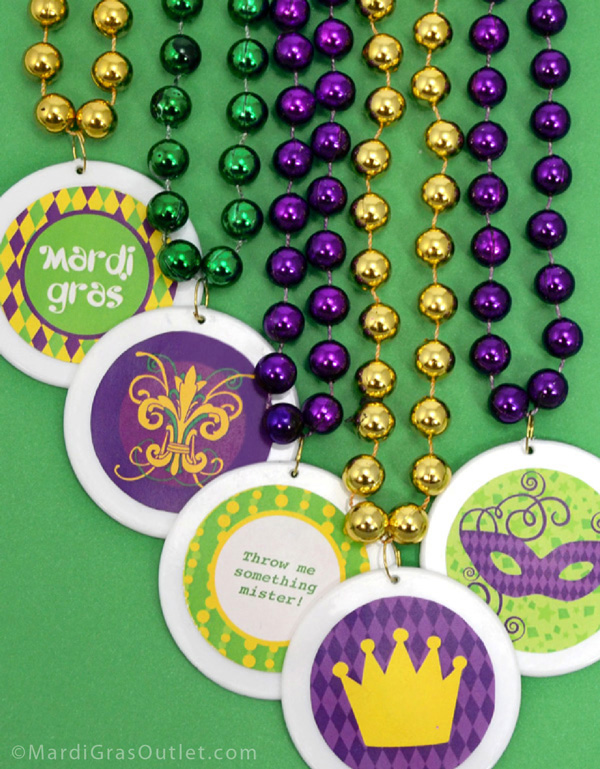
Easily personalize Mardi Gras beads with these designs! They fit perfectly onto blank discs, which you can buy separately or already attached to a bead necklace at a really affordable price (12 necklaces for only $3.40!). Available at MardiGrasOutlet.com, we used the traditional Mardi Gras colors of gold, green and purple for the beads with white blank discs. If you need more bead colors, click here

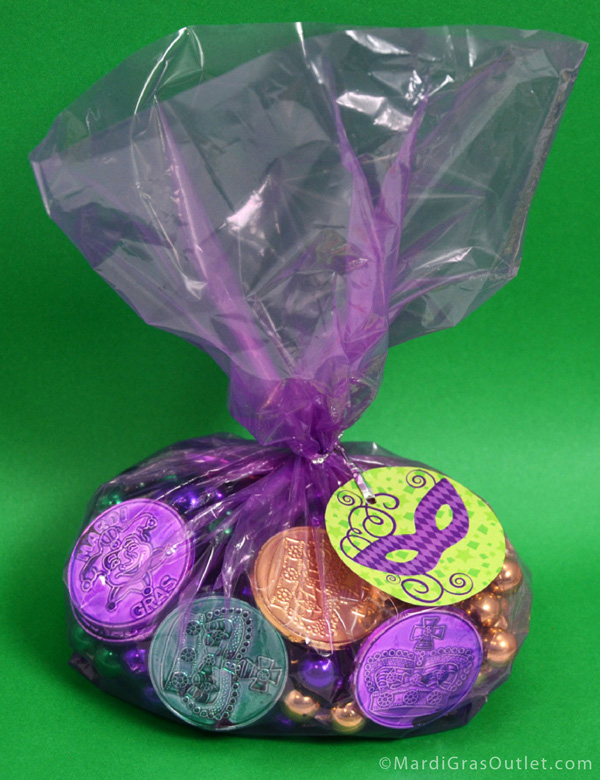
Printed onto stiff cardstock, these also make easy and festive gift tags. Use a hole-punch to make a place to thread ribbon or string through, and tie around a gift bag. We filled a purple cello bag with Mardi Gras doubloons and purple, green and gold Mardi Gras beads for a party favor that everyone can enjoy. The cello treat bags come with twist ties that you can use.

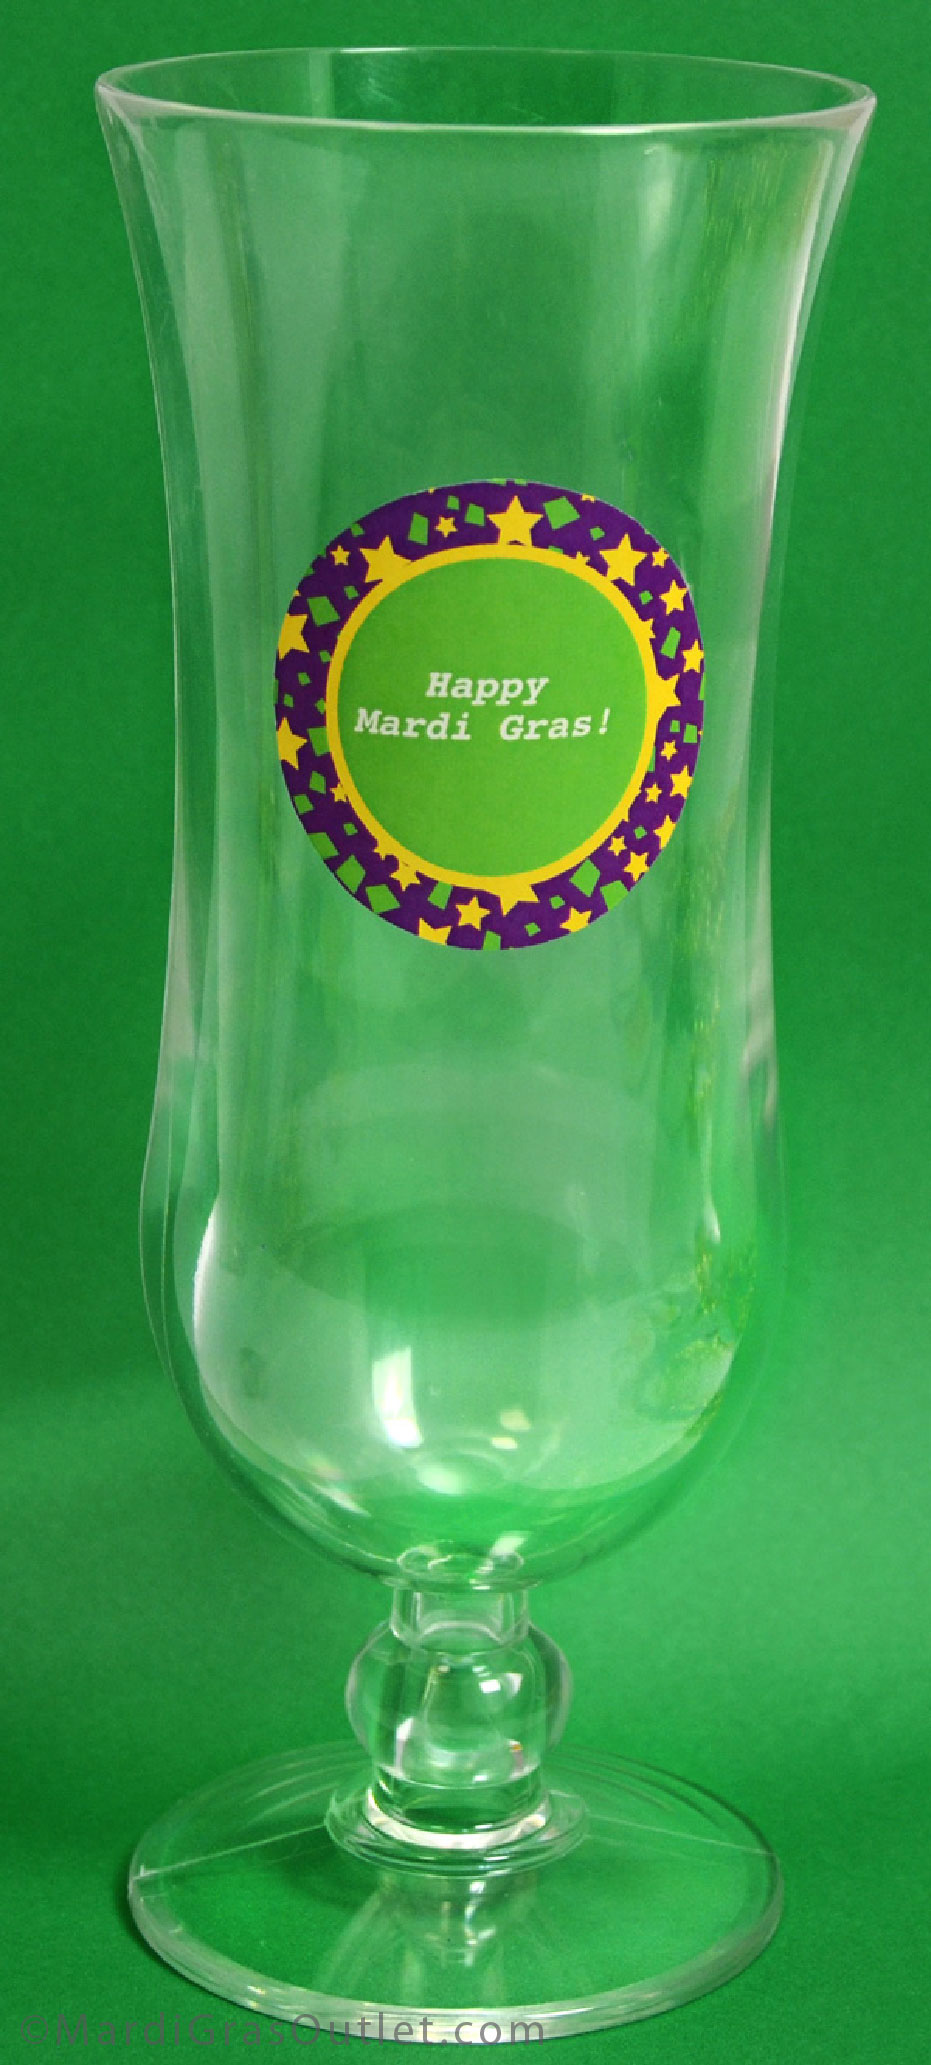
Last but not least, customizable stickers are great for drink labels. We put ours on a clear plastic hurricane glass, but this idea works for plastic party cups and glasses as well. Give your guests sharpie markers to write their name on their glass, or use the type-your-own text feature to customize for the special event.

Here are even more possibilities: 
Scrapbooking and scrapbook pages
Candy, cookie or praline packaging (click here for a DIY tutorial) 
Name tags or seating cards
Cupcake toppers by gluing to toothpicks (see examples here, and Mardi Gras cupcake recipe here)
Appetizer or buffet signs


LinkWithin

Related Posts with Thumbnails