These over sized DIY bows are great for decorating doors, walls and porches for Christmas and holidays. Making large bows from 21-inch wide deco mesh is surprisingly easy! Just follow our tutorial on how to make your own.
SUPPLIES (click on the product name to purchase at www.mardigrasoutlet.com)
Scissors
The total cost for this bow will be around $4. You can make about 2 to 3 bow from one roll of deco mesh, depending on how full you make the bow top and how long the bow tails. The bow shown here is about 20"x40"!
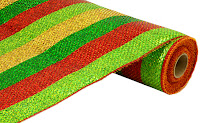
Deco Poly Mesh is a type of soft plastic netting that holds a full shape, allowing you to easily make wreaths, bows, garlands and more (see our tutorials page for more ideas). Deco Mesh also comes in many colors, patterns and styles. One roll of deco mesh will make about 2- 3 large bows.
You can follow these same steps, but use different colors of Deco Mesh to make a custom bow for any holiday or occasion. Click here to see more deco mesh colors.
Here is the tutorial:
STEP 1: Make a tail
Make a tail for the bow by cutting a length of deco mesh that is about 5 or 6 feet long. Hold the mesh piece at the middle and straighten out the tails. Deco mesh naturally wants to curl. Set this tail piece aside.
STEP 2: Make the Bow Top
To make the bow top, grab the end of the roll of deco mesh at the center. Start gathering the mesh into one hand down the center. Fold as you gather for a fuller bow, and keep going until you are satisfied with the bow size. This bow used about 6 or 7 feet of deco mesh.
STEP 3: Trim
Once you have made the bow top, cut the mesh at the bottom.
STEP 4: Attach the tails
Take the other piece of deco mesh that you cut in the first step (the tail), and use it to tie around the bow top. The bow tails should wrap around where you have been holding. Tie a simple knot at the back to secure. Straighten out the bow tails.
Making this same bow in a striped patterned looks great as well! Check out our first version of this bow in red, white and blue for the 4th of July, HERE.
If you are looking to make a Christmas bow, we suggest some of our Christmas patterns like these. Click HERE for the whole selection.


I made some of these last night and used a candy cane wire ribbon bow in the middle. I love it! I placed one on each outside window of my house! Thanks!!
ReplyDeleteThanks for the feedback! Your bows with striped ribbon sound cute.
ReplyDeleteBoe
ReplyDeleteThanks for sharing! Going to make one tonight.
ReplyDeleteI like this...and its so simple for such a great look!
ReplyDelete