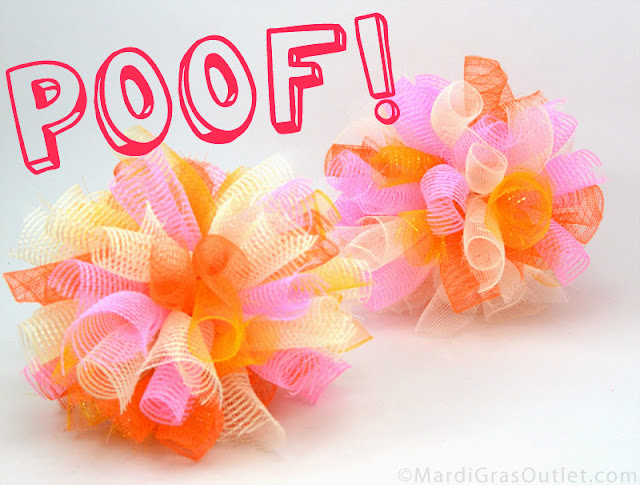
Precious puffs for your summer festivities. These easy-to-make curly Poly Deco Mesh poofs or puffs make any gathering festive! Choose the deco mesh that matches your color scheme or theme. We've created a whole series of decorations in this yummy pink, orange and cream color way.
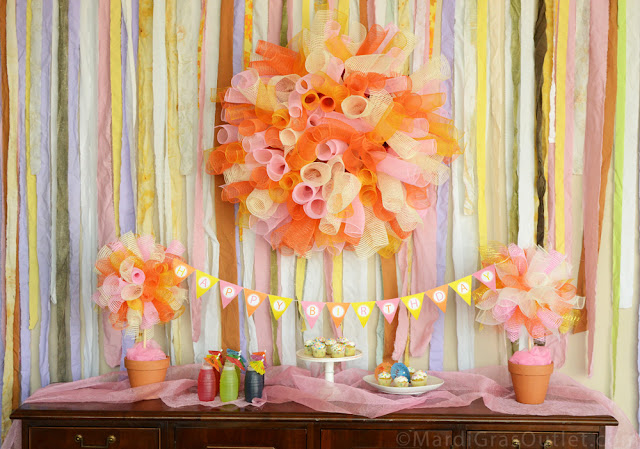
These festive puffs hanging above our sweet summer birthday buffet. Here is how we made them.
SUPPLIES
To
purchase these products from www.mardigrasoutlet.com, click
on the individual product link below.
- 1 roll 21-inch Poly Mesh Roll: Vertical Line Cream OR 1 21-inch Poly Mesh Roll: Metallic Cream and Gold
- 1 roll 21-inch Poly Mesh Roll: Metallic Orange
- 1 roll 21-inch Poly Mesh Roll: Vertical Line Pink OR 1 21-inch Poly Mesh Roll: Light Pink
- 1 roll 21-inch Poly Mesh Roll: Metallic Gold
- 1 package 3-inch Wire Balls (any color works)
- 1 package 24 Gauge Paddle Floral Wire (any color works)
- Scissors
- Wire Cutters
You can use any number and combination of colors you desire! We have a great selection of metallic, patterned mesh, solids, vertical lines and more! Each poof takes about half a roll of 21" mesh to create, so feel free to try out several different color combinations. Check out our extensive collection here: Poly Deco Mesh.
Cut 7-inch wide strips of each color of mesh you would like to use. If you are using 21 inch mesh rolls, then you will need to cut each strip/curl in half. If you are using rolls of 10 inch deco mesh ribbon, you do not need to cut the strips in half.
We cut about 5 strips of each color mesh to get started and then cut more of each color as needed. The exact number of strips you need will depend on the width of your strips and how tightly you curl them. We used about 30 to 40 strips total in our poofs. This means that if you create a 4 color poof, you will need about 5 to 6 strips of each color that you will then cut in half to create 1 poof (approx. 1 yard of each color.)
STEP TWO
Using wire cutters, cut strips of paddle wire about 3 to 4 inches in length. You will need one piece of paddle wire for each strip of mesh you wish to attach to your poof (approx 30-40.) Feel free to cut the wire strips a few at a time as you go.
STEP THREE
STEP FOUR
Pinch the curl in the center, creating a V shape.
STEP FIVE
Use a strip of paddle wire to attach the curl to your wire ball.
REPEAT!
Continue to add curls of each of your colors to the ball in the same fashion. Keep working the ball form from all sides with mesh curls until it is full and fluffy, and the central wire ball form is no longer visible.
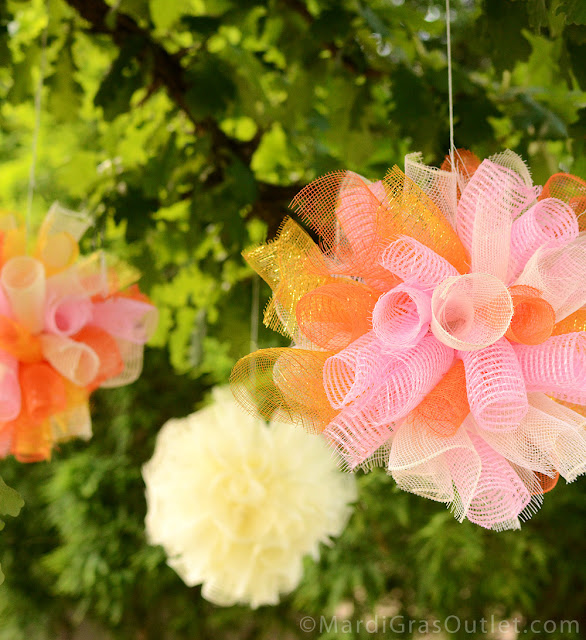
Once complete, there are numerous ways to install these poofs for your next get-together. You can hang them on string from the trees for a festive garden party, hang a cluster of poofs indoors to light up a corner, or create topiaries to frame a dessert table like we did for our summer Sweets Birthday Party Buffet!
DIY DECO MESH POOF TOPIARIES!
Wow! Two tutorials in one! To turn your curly poofs into topiaries, you will need the following additional supplies:
Click the links below to purchase at www.Mardigrasoutlet.com, where applicable.
- 1 Small/Medium Terracotta Pot per topiary
- 12" Wooden Dowel per topiary
- Scissors
- Matt knife or other knife
- 1 roll Crinkle Sheer Fabric: Pink
- 1/2 a Dry Floral Foam Brick per topiary
STEP ONE
Trim down a floral foam brick using a knife until it stands in your terracotta pot with the top just reaching the rim. Place the floral foam into the pot. Trim down the sides if it is too wide, or use scrap pieces of floral foam to shore up the sides if the brick has too much wiggle room. You don't want it wobbling around on you!
STEP TWO
Insert a dowel into the center of your floral foam 1-2 inches. Make sure it is secure. If it starts to wobble, you can always add a bit of glue to keep it firmly in place.
STEP THREE
Attach your poof to the top of the dowel through the wire ball form. Again, secure with glue if necessary.
STEP FOUR
Cut a small piece of pink crinkle sheer fabric and bunch it around the bottom of the dowel to cover the floral foam brick. Tuck in loose ends and fluff the fabric until it looks just right.
The finished puff topiary on our dessert buffet!
If you wish to hang your poofs instead, just tie a length of string into the wire ball form, and you're ready to go! Try positioning them at various heights to add some pizazz to your display. Deco Mesh Poofs are great for the Indoors or Outdoors, as mesh holds up well to the elements. See a few more images below for ideas on how to install your poofs.


Made 5 of these for a party and I have to say IF I did them again I would order the 10 inch rather than cute the 21 inch mesh. I'm not used to using paddle wire and it is a lot of wiring to do (sore fingers) so I would suggest someone doesn't leave it to the last minute to assemble these either. Love the overall effect though!
ReplyDeleteHey Kristen, we are glad you could use the tutorial! If anyone else out there loves designing with flowers, silk flowers, or deco mesh, and you just don't like using wire, (sore hands, fingers, arthritis, etc), then simply use chenille stems instead. You could even use cute colored ones as design elements if you didn't wish to hide them.
Delete