Pages

May 31, 2011

DIY Mardi Gras Pinwheels

Need a unique touch to your Mardi Gras party? Easily customize place cards, cupcakes, beads, drink stirrers and everything else with these whimsical DIY pinwheels. 


Mardi Gras Pinwheels

Supplies:
Scissors
Removable Party Mount or Glue
PGG Foil Streamer (2" x 25ft)

MG Pinwheel supplies

1. First, cut out a square of the foil streamer. You can make sure the square is even by folding up one corner to make a diagonal, and using the straight edge as a guide.
2. Fold the other diagonal, and unfold the square.
3. Cut along each of the folds 3/4 of the way from corner to the center.
4. Place a small square of party mount (I cut one into 4 pieces for the right size) or a dab of glue in the center.
5. Bring one corner edge to the center, and press firmly. Repeat with the same corner edge all the way around.
6. Make more and start decorating!


MG Pinwheel Placecards

Glue your pinwheels onto these basic green border placecards for a festive touch.


Mardi Gras Pinwheel on cupcakes

Create Mardi Gras cupcakes! These pinwheels make for cute food picks to top cupcakes; simply glue a pinwheel to the top of a toothpick.


Pinwheels on Mardi Gras beads
Easily customize your own Mardi Gras Beads. Adhere a few pinwheels onto these blank disc beads.


Mardi Gras Pinwheel drink stirrer
Make fun Mardi Gras drink stirrers by attaching a pinwheel to the tops of some wooden paddle stirrers.

May 20, 2011

Crawfish Phyllo Triangles Appetizer


Crawfish Phyllo Triangles is a great crawfish recipe that I wanted to share with you. This recipe would be perfect to use with left-over crawfish from a crawfish boil. Spicy leftover crawfish tails are wonderful in recipes because they add a rich layer of seasoning and spice. In addition to the the crawfish, you could add in leftover andouille sausage or onions from the crawfish boil. C'est bon!

Doesn't the crawfish filling look yummy?

The food photography is beautiful. Thank you to the food blog, The Way The Cookie Crumbles for sharing the wonderful photograph and tutorial for this recipe.

I made a few changes to this recipe, adding in some creole seasonings. Here is my Louisiana version of this Crawfish appetizer recipe. Both versions are adapted from Emeril Lagasse's,  Cocktail Crawfish Turnovers.

Crawfish Phyllo Triangles Recipe

Ingredients
3 tablespoons unsalted butter
1/4 cup chopped onions
2 tablespoons chopped green bell peppers
2 tablespoons chopped celery
1 1/2 teaspoons creole seasoning (Slap Ya Mama or Tony Chachere)
1/2 teaspoon chopped garlic
2 tablespoons all-purpose flour
3/4 cup whole milk
1/2 pound cooked, peeled crawfish tails (coarsely chopped if large)
1/4 cup grated Pepper Jack cheese
2 tablespoons chopped green onions
2 teaspoons chopped fresh parsley leaves
1 (17.3-ounce) package frozen puff pastry/phyllo (2 sheets), thawed in the refrigerator
2 egg yolks, beaten with 2 teaspoons water

Directions

Make filling: Heat the butter in a skillet over medium-high heat. Saute the onions, bell peppers, and celery in the butter. Season with creole seasoning. Cook, stirring, until the vegetables are slightly soft, about 2 minutes. Add the garlic and cook for about 30 seconds. Add the flour and stir until the mixture is lightly golden, about 3 minutes. Add the milk, and continue stirring until the mixture is smooth, about 3 minutes. Turn off the heat. Add the crawfish tails, cheese, green onions, and parsley. Stir to mix well. Remove from the heat and let cool to room temperature.

Preheat the oven to 425 degrees F.

Phyllo dough. To make each crawfish appetizer triangle, set one sheet of phyllo on a clean lightly floured work surface and brush melted butter on half of the sheet lengthwise. Fold the phyllo on its long axis in half. Brush melted butter on half of the phyllo lengthwise again, and fold on the long axis once more. You should have a long narrow strip of phyllo with 4 layers.

Triangle Filing. Place a tablespoon of crawfish filling on the bottom corner of the strip and begin folding the dough over the filling. Continue folding until the dough is completely wrapped around the filling. Brush a little butter on the end to seal it down. Repeat with remaining phyllo and filling. Brush the top of each crawfish triangle with egg yolk for a pretty shine when baked.

BAKE. Line a baking sheet with aluminum foil or parchment paper. Place the triangles about 1- inch apart on the sheet and bake until golden, 12 to 15 minutes. Remove from the oven and let cool for 5 minutes before serving. Makes about 24 triangles.

Crawfish Cooking Tip- When cooking with crawfish tails- brighten up the flavor by tossing the crawfish tails in a splash of fresh lemon juice before you add them to a recipe.

We have even more crawfish, cajun and creole recipes to inspire you! Click here to see all of them


May 17, 2011

Create a Crawfish Balloon Decoration


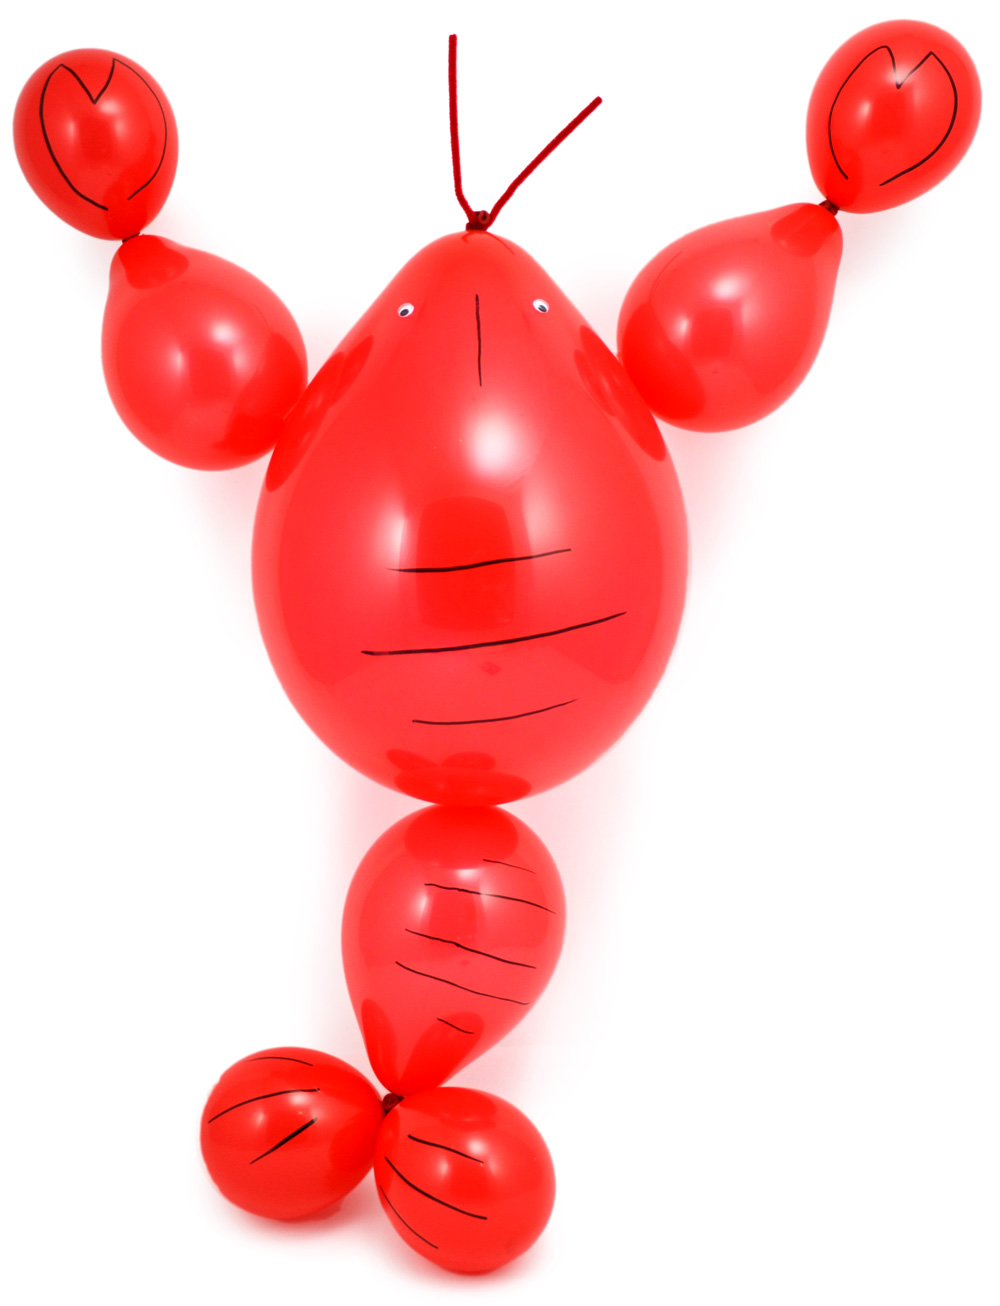
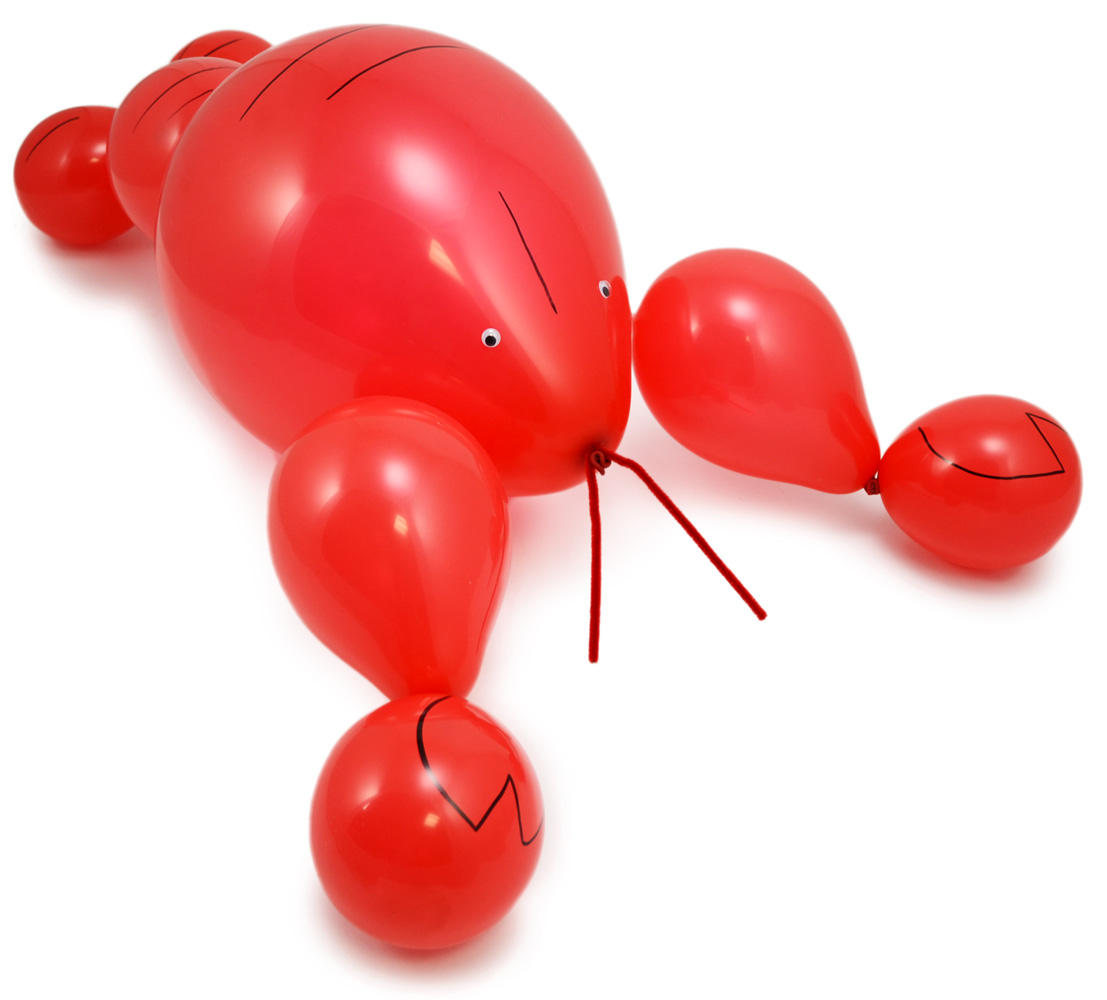
What's hot right now in Louisiana- Crawfish Boils! It is the perfect way to celebrate a graduation, engagement or birthday!  Create your own crawfish decorations out of inexpensive air-filled red latex balloons in two sizes. This creative crawfish balloon decoration is quick and easy to make.
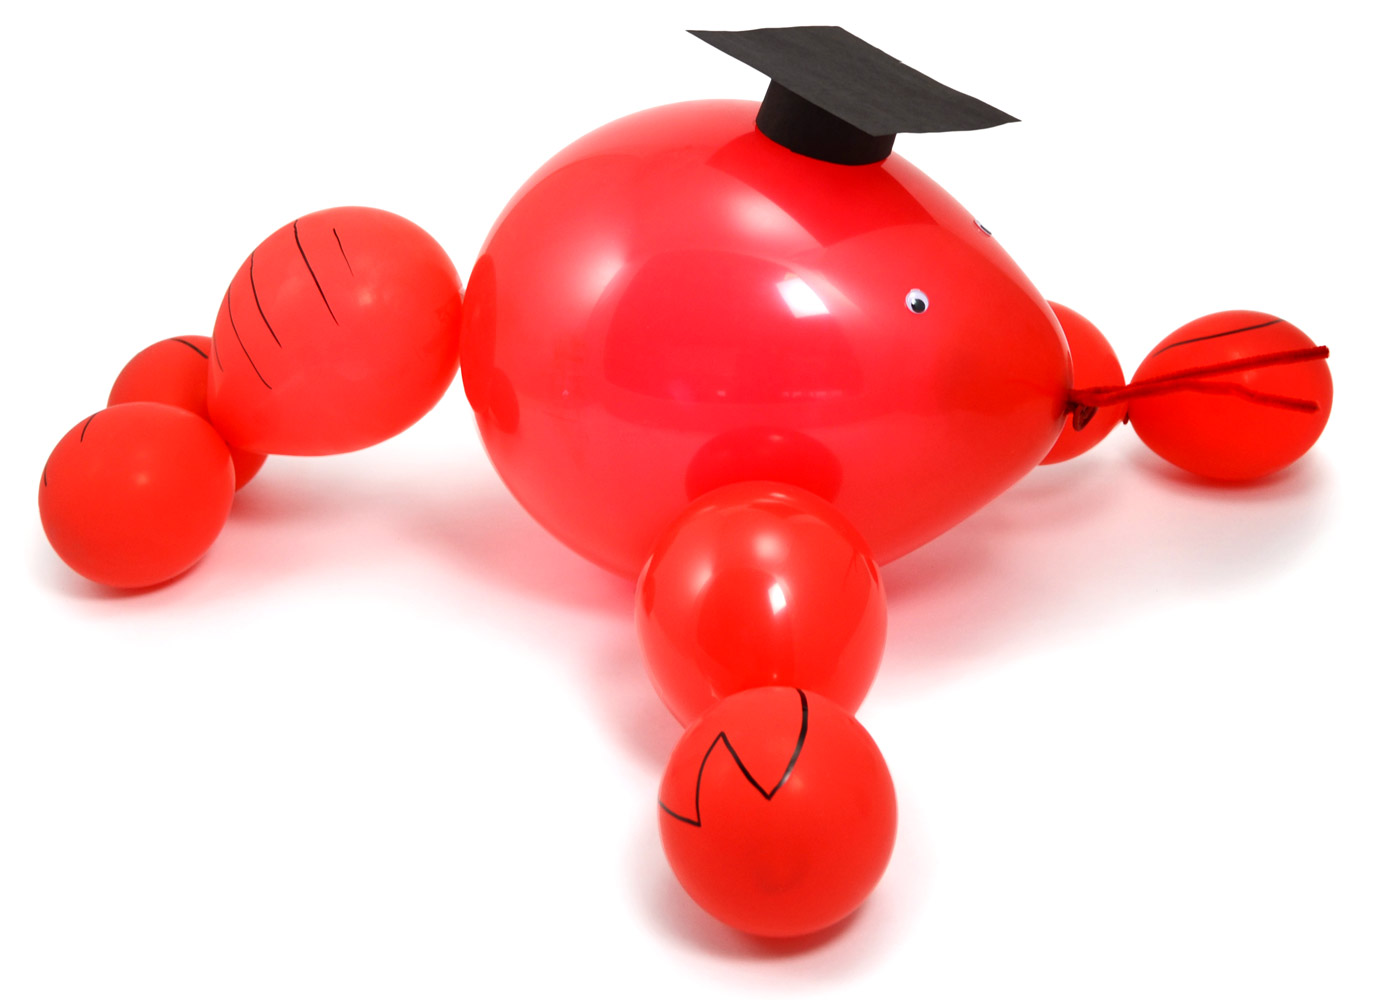
Graduation crawfish balloon

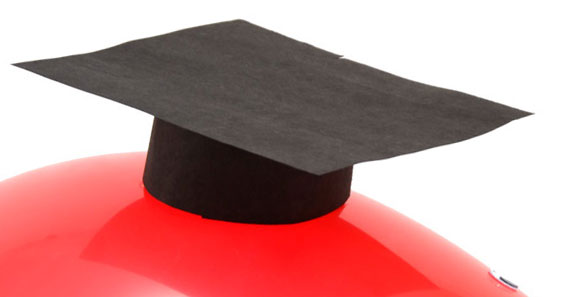
Paper graduation cap
Customize your crawfish balloon creation with added accessories fit for your theme. Add a veil and tiny top hat to two crawfish for a bride/groom pair or a festive party hat for a birthday crawfish boil.


 Attach a small mortar board/graduation cap for a graduation party. This crawfish sized graduation cap was easily created out of black construction paper.

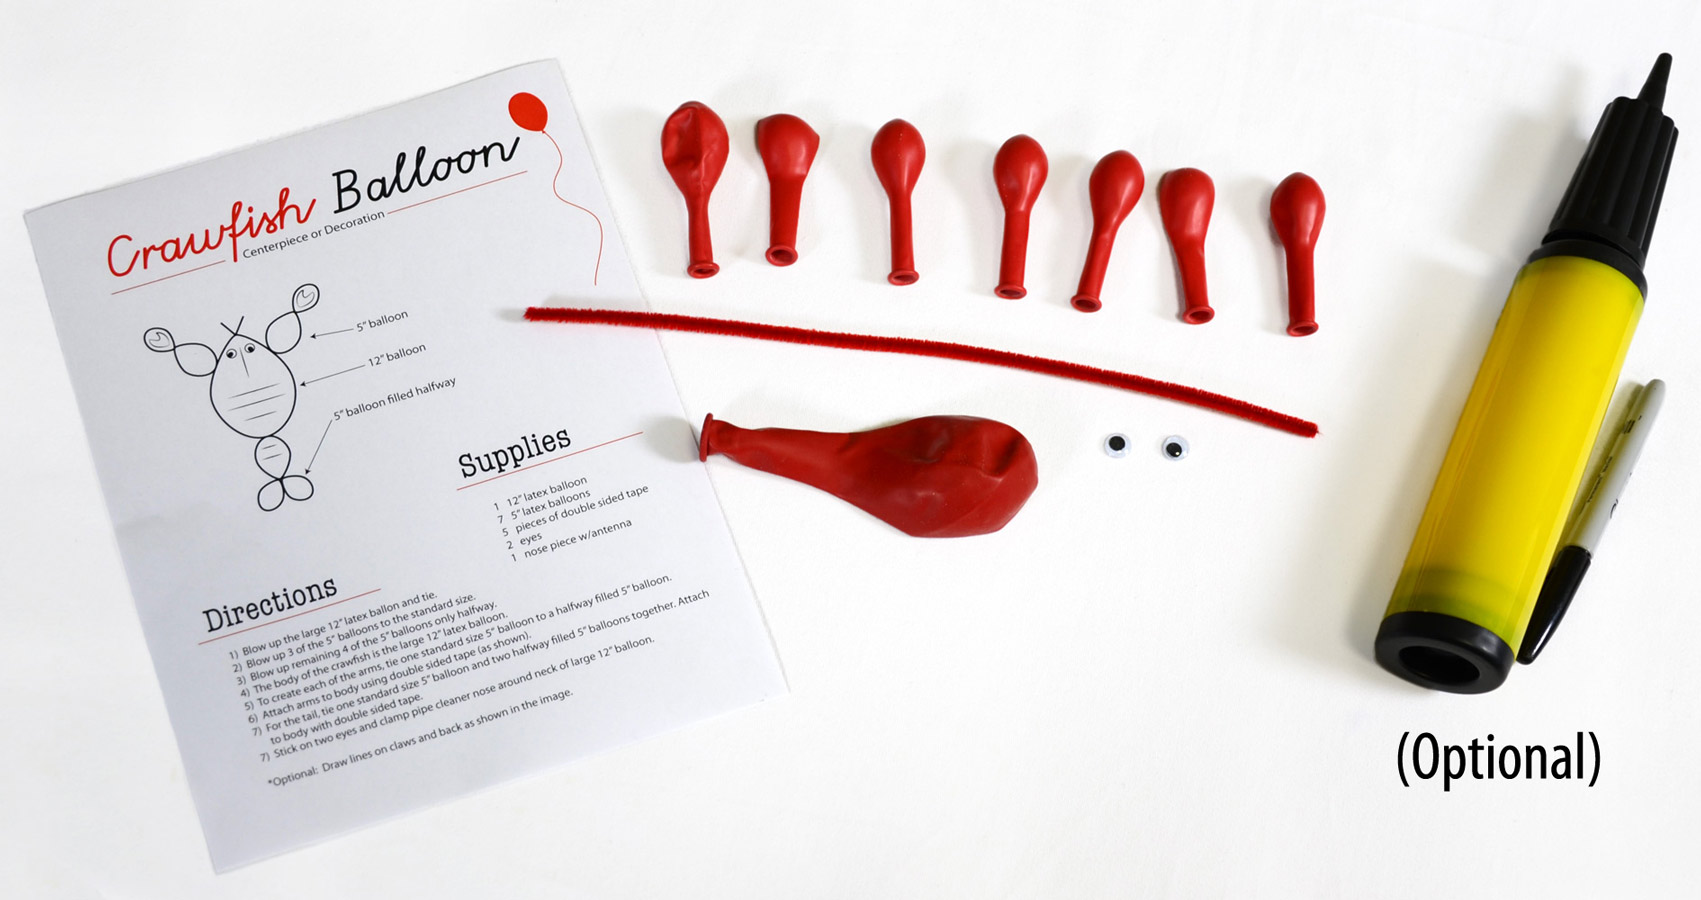
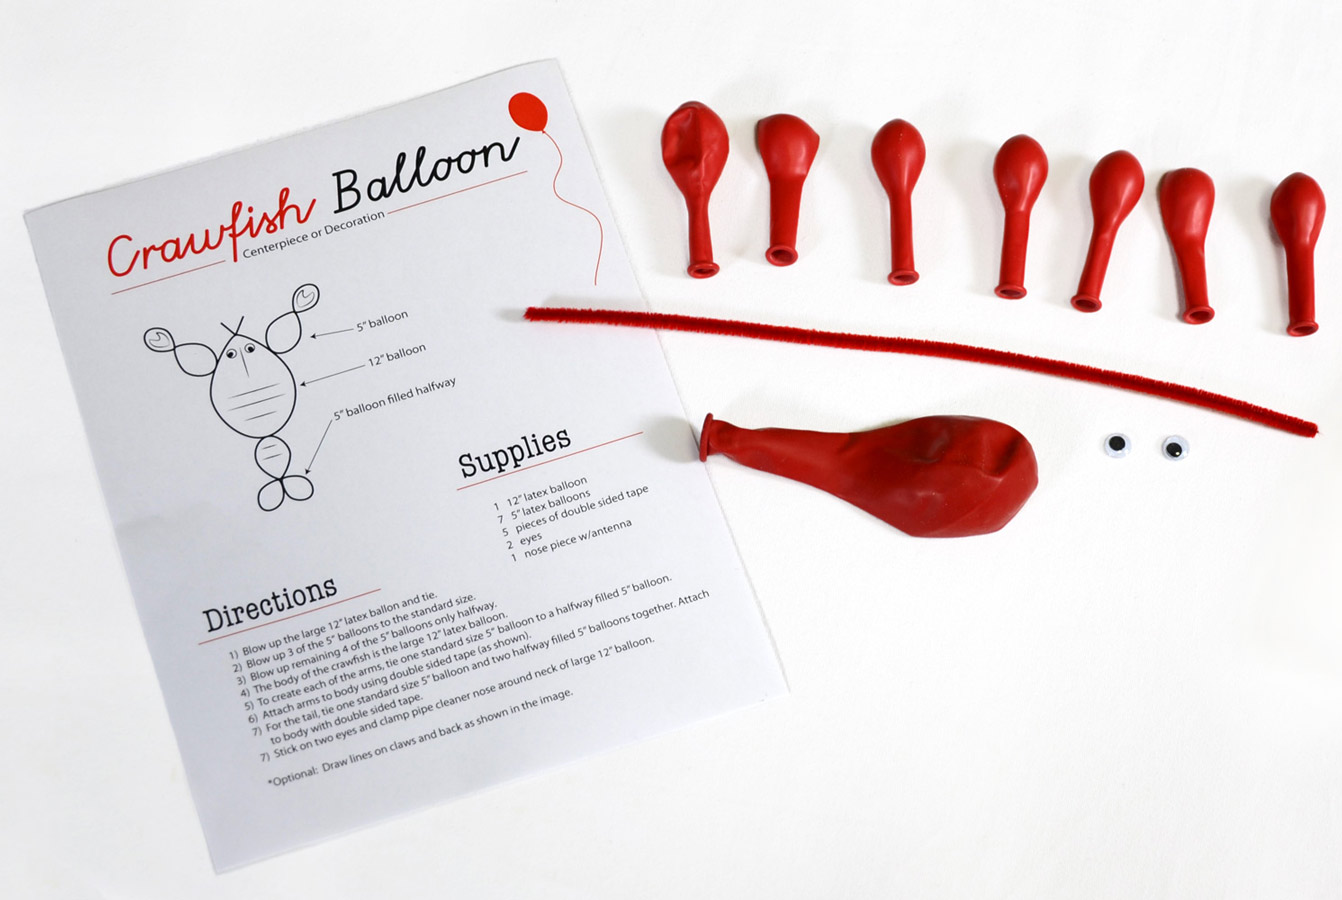
Crawfish Balloon supplies
Supplies:
one (1) red 12" latex balloon
seven (7) red 5" balloons
red pipe cleaner
2 googly eyes
double stick tape
balloon air pump (optional)
black marker (optional)

Basic supplies and an instruction sheet  are available in the
Create a crawfish balloon decoration

Tutorial: How to create a crawfish balloon decoration

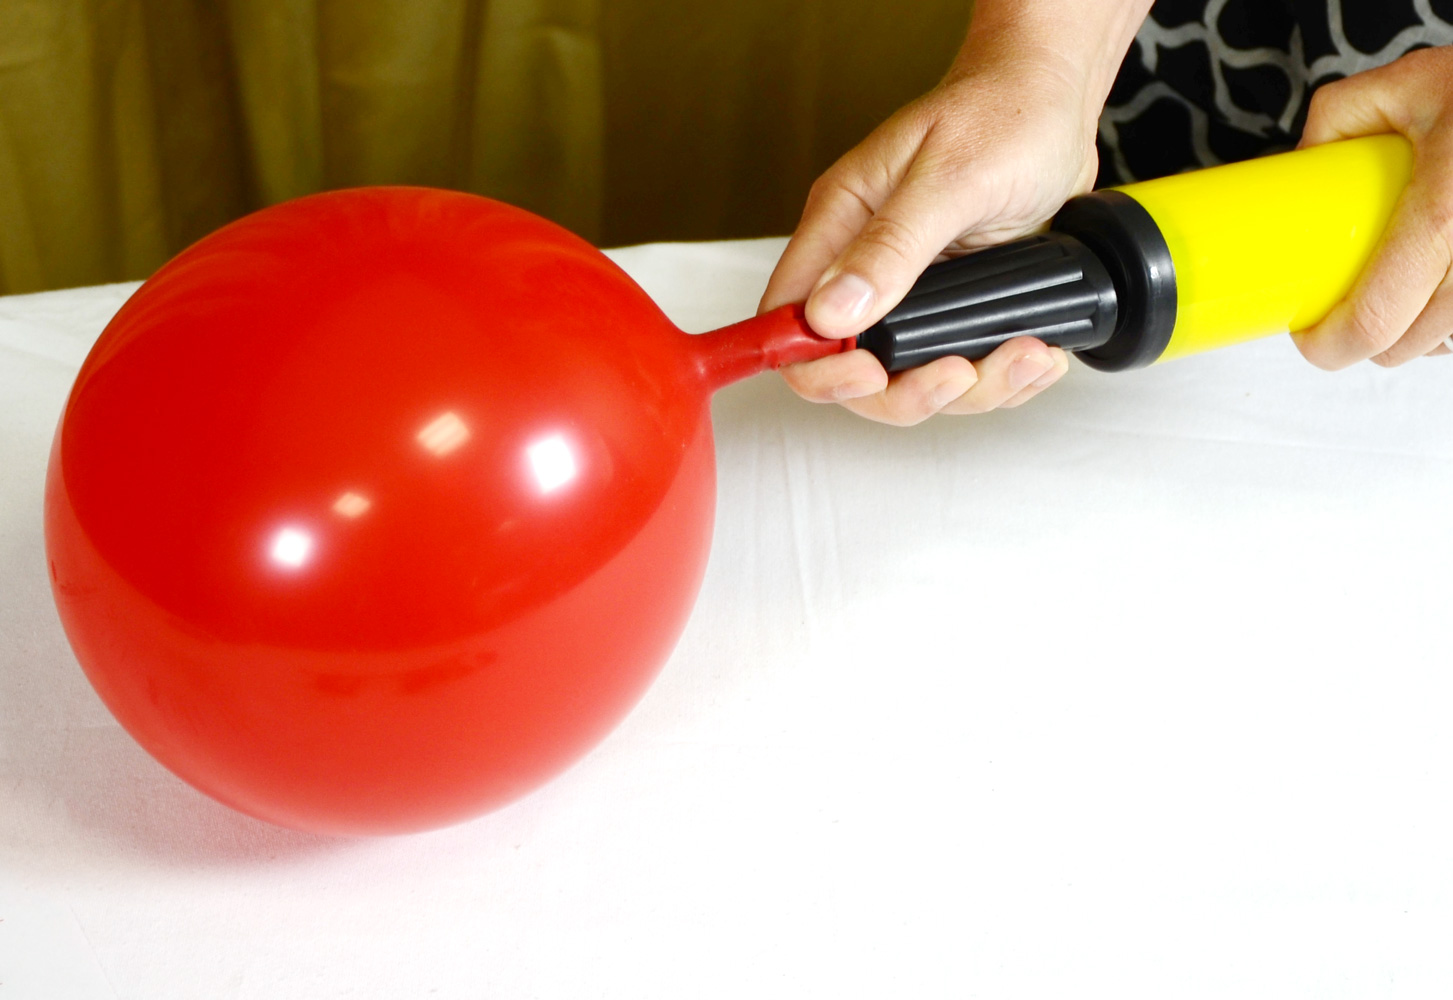
Inflate balloon
  Fill the larger 12" red latex balloon with air. Tie

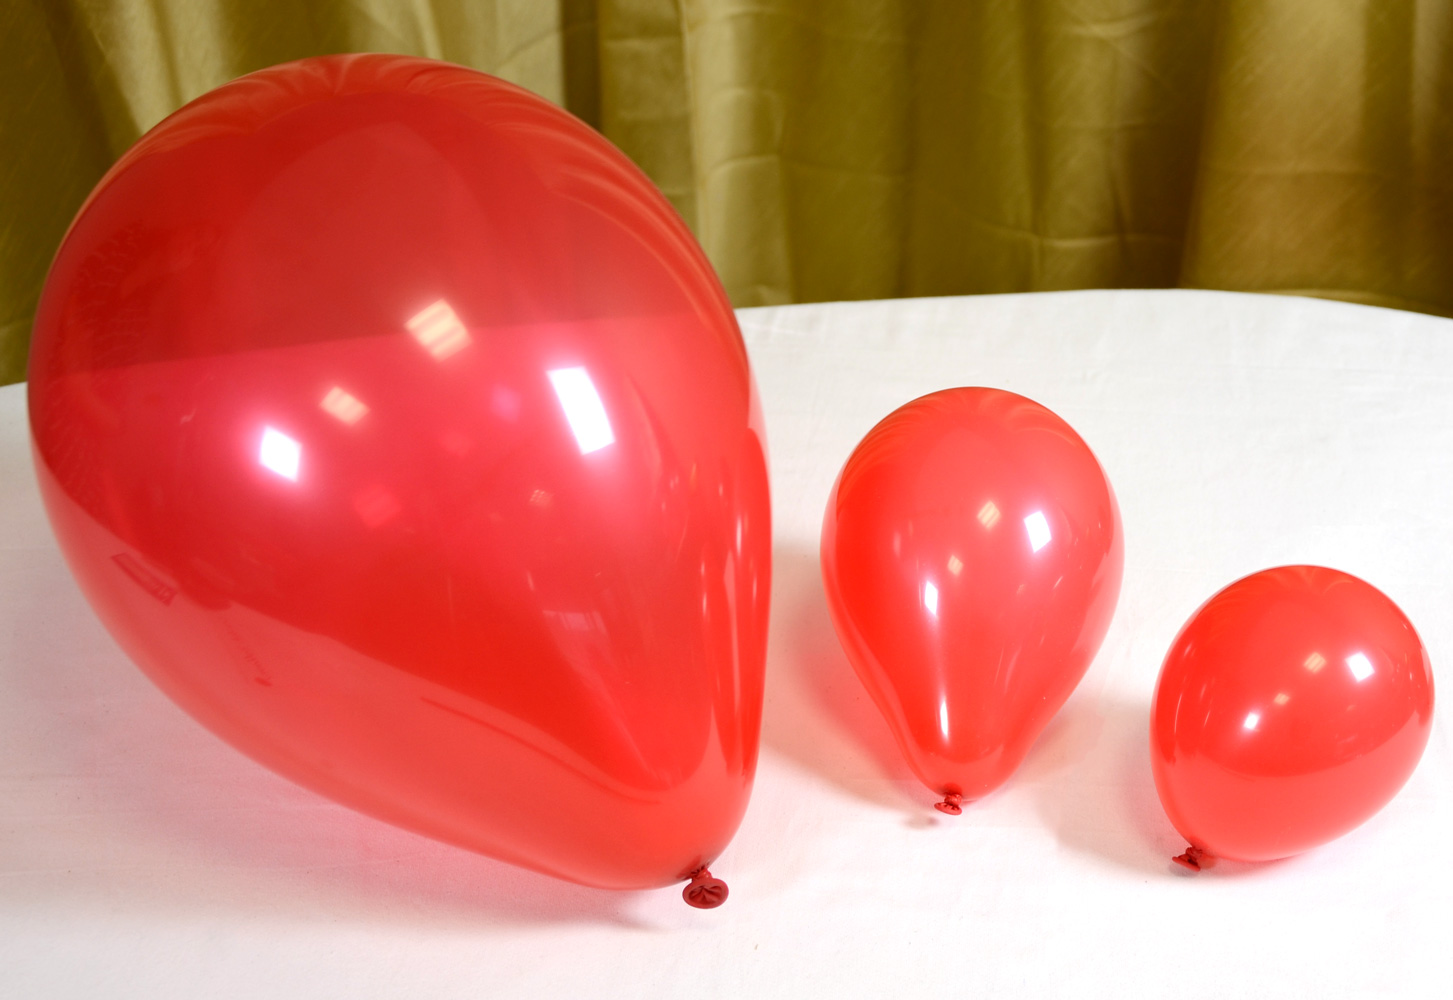
Three balloon sizes

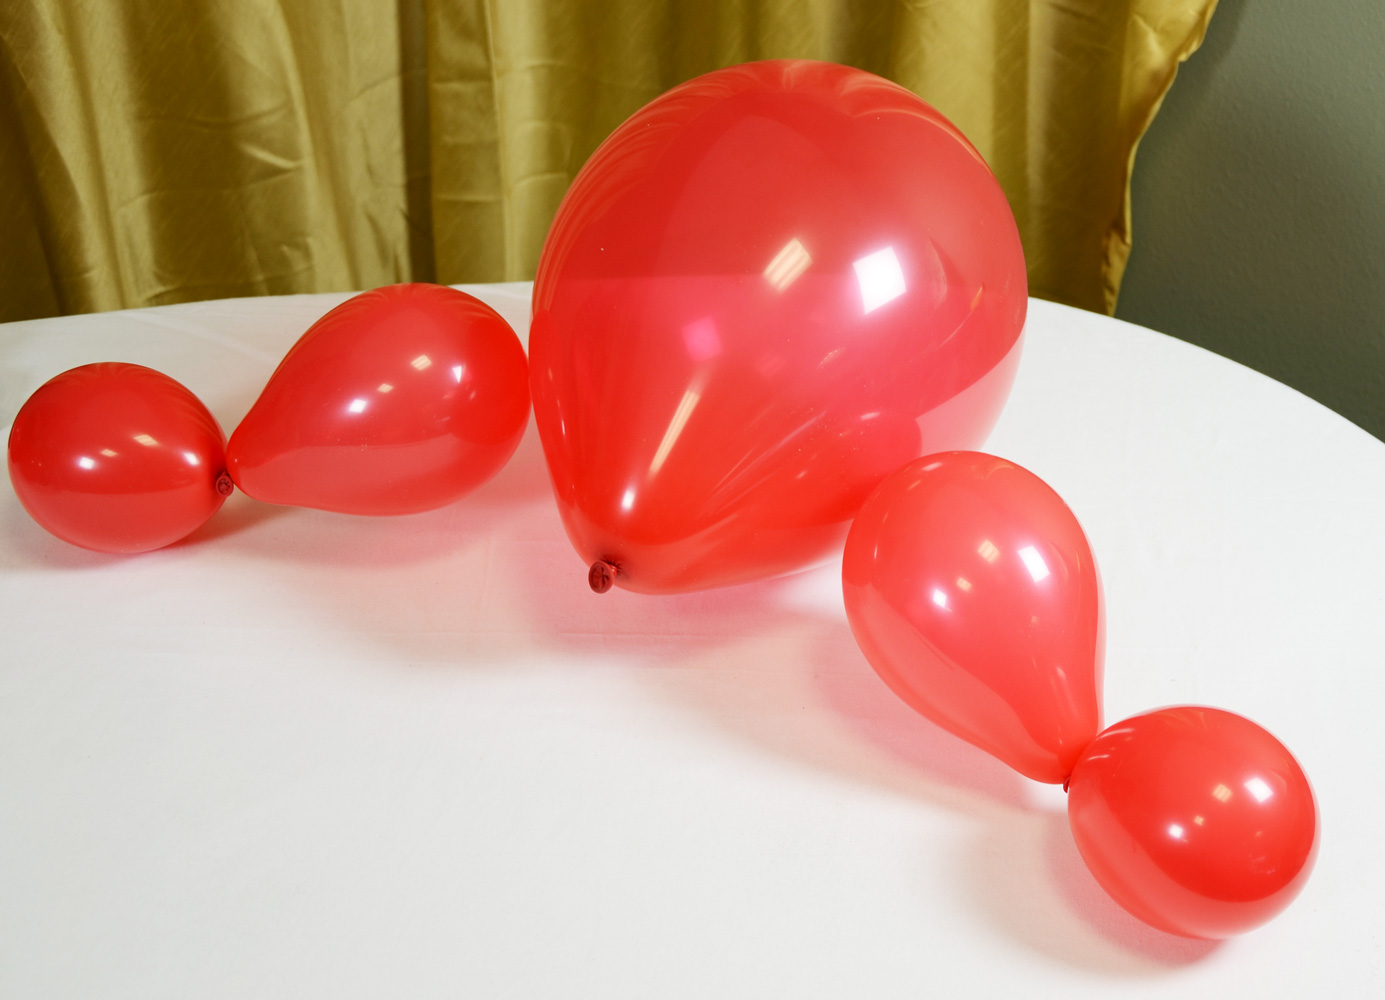
 Inflate three (3) of the 5" balloons to the standard uniform size. They are fully inflated when they start to get a pear shape. Inflate the remaining four (4) 5" red latex balloons about half way (size of the balloon on the far right).

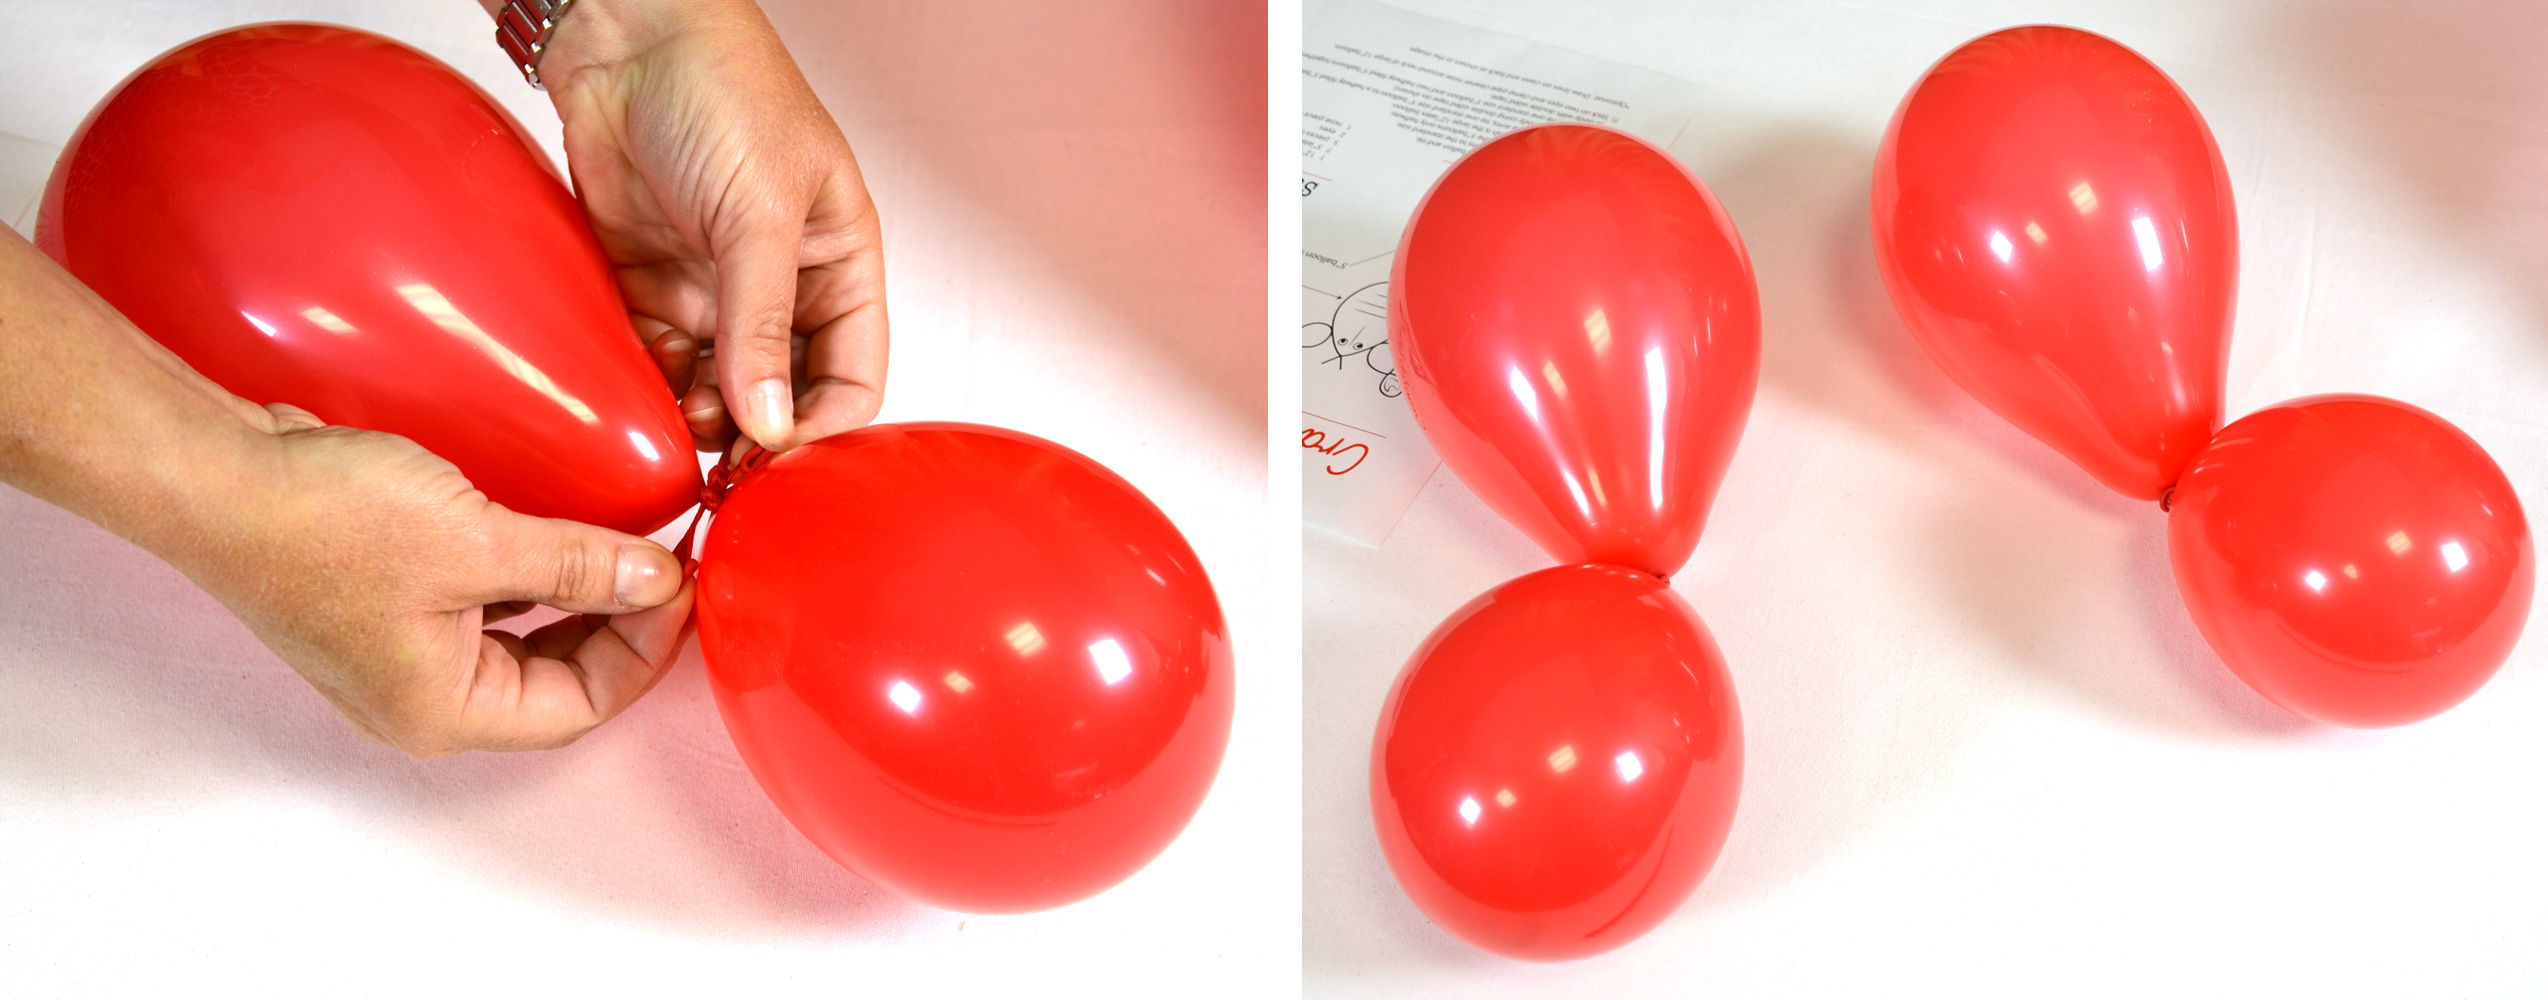
Crawfish balloon arms

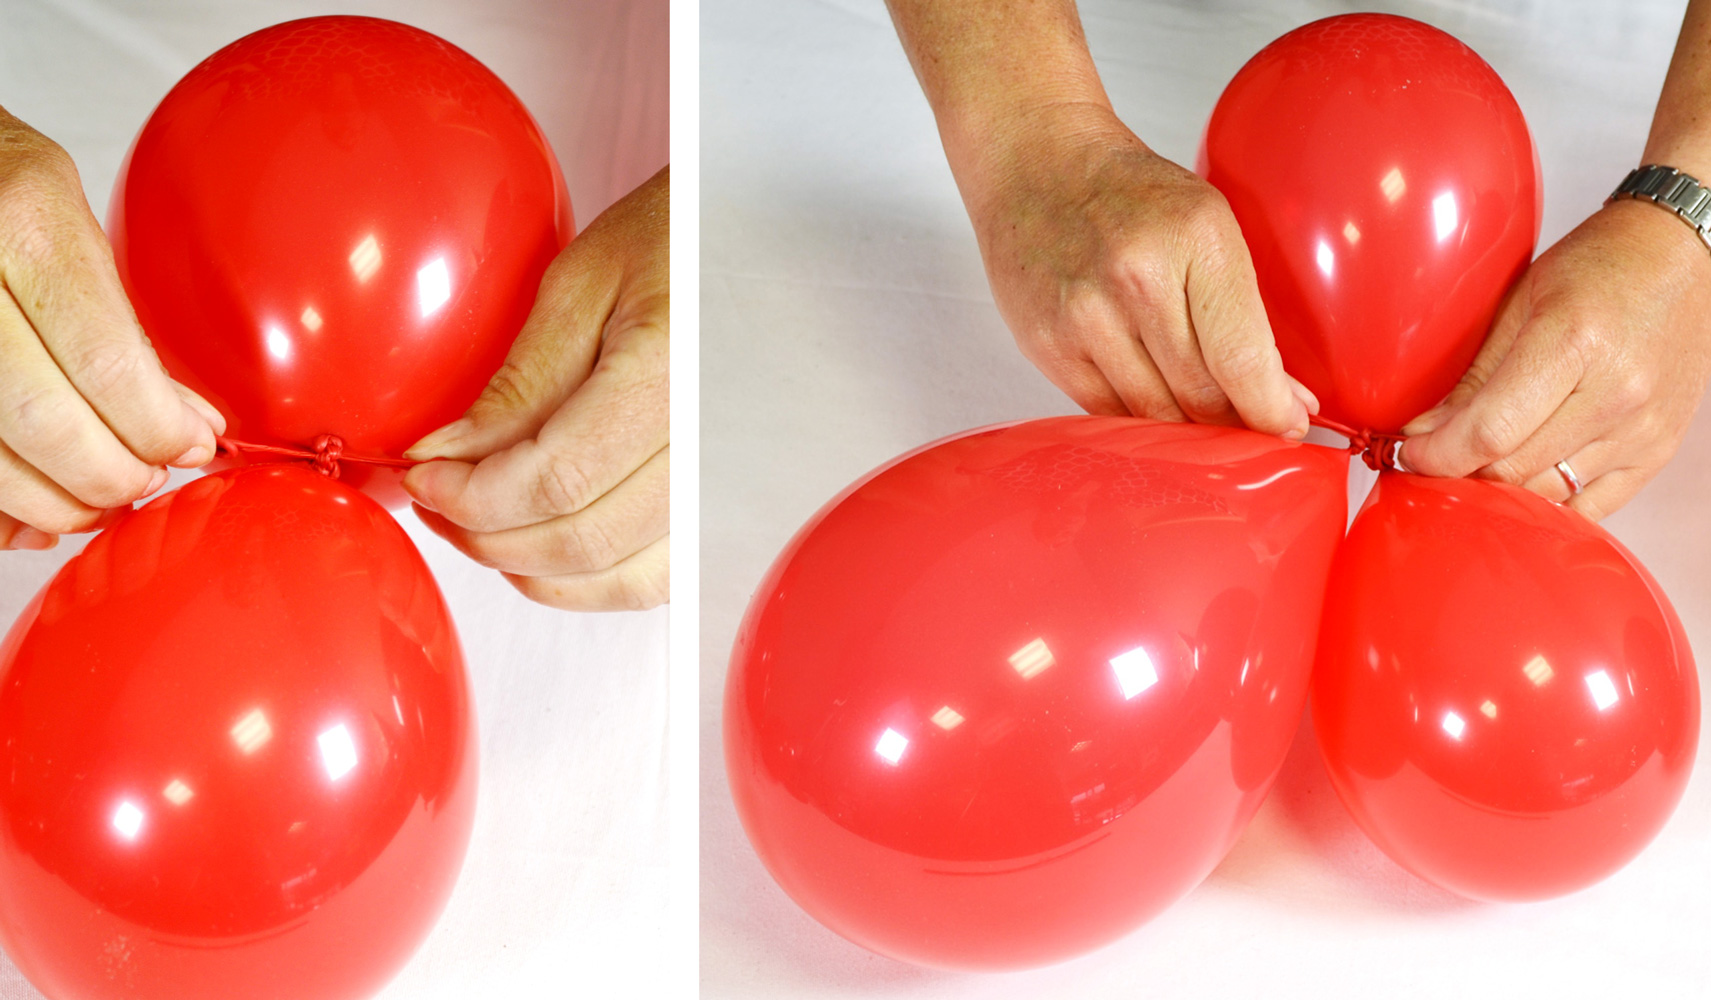
Create each arm out of one (1) 5" balloon filled to standard size and one filled half-way. Tie the necks of these two balloons together for each arm.

Attach arms/claws
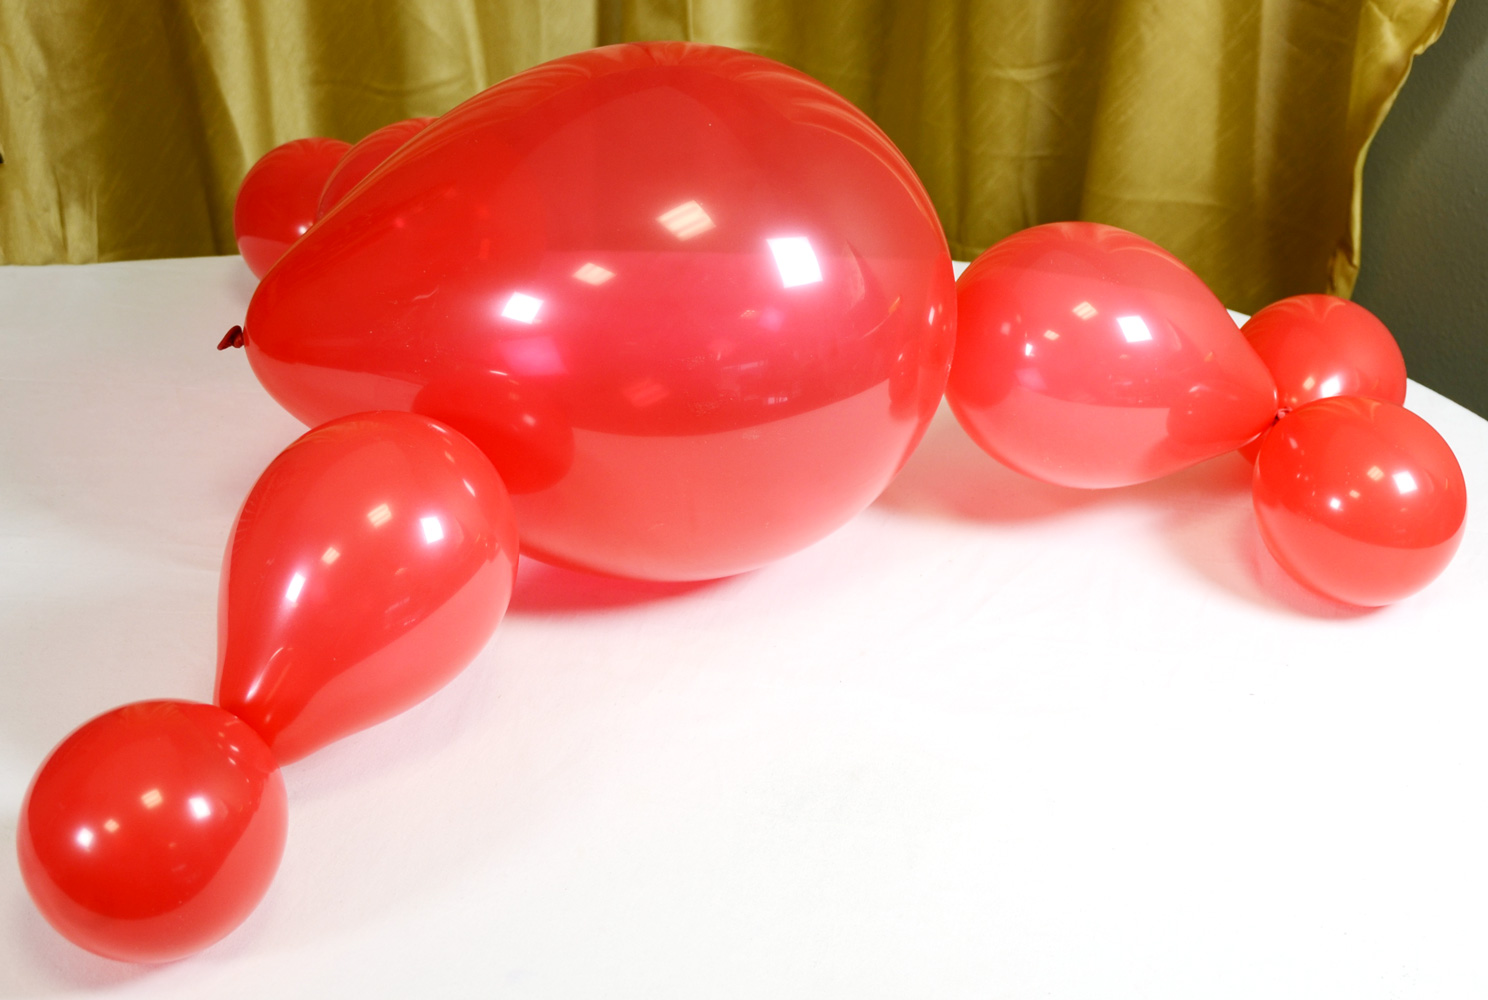
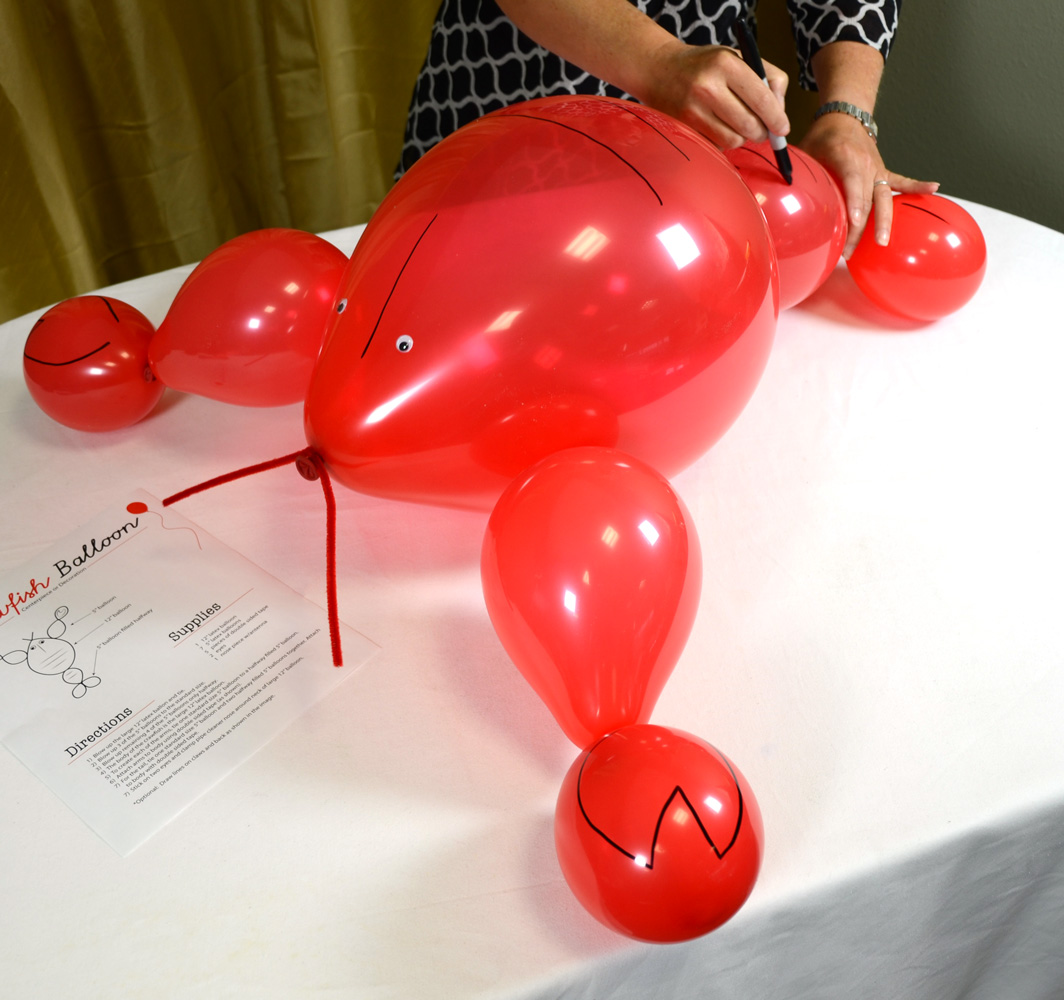
Using double sided tape, attach each of the arms/claws to the body of the crawfish. Position the arms as shown. Neck of the large balloon faces forward.


Create crawfish balloon tail
Create the tail out of one regular size 5" red latex balloon and two smaller 5" balloons. Tie the balloons together at the neck of the balloons as shown.


Attach tail

Attach the tail to the rear of the large balloon with a piece of double stick tape as shown.

Create crawfish face
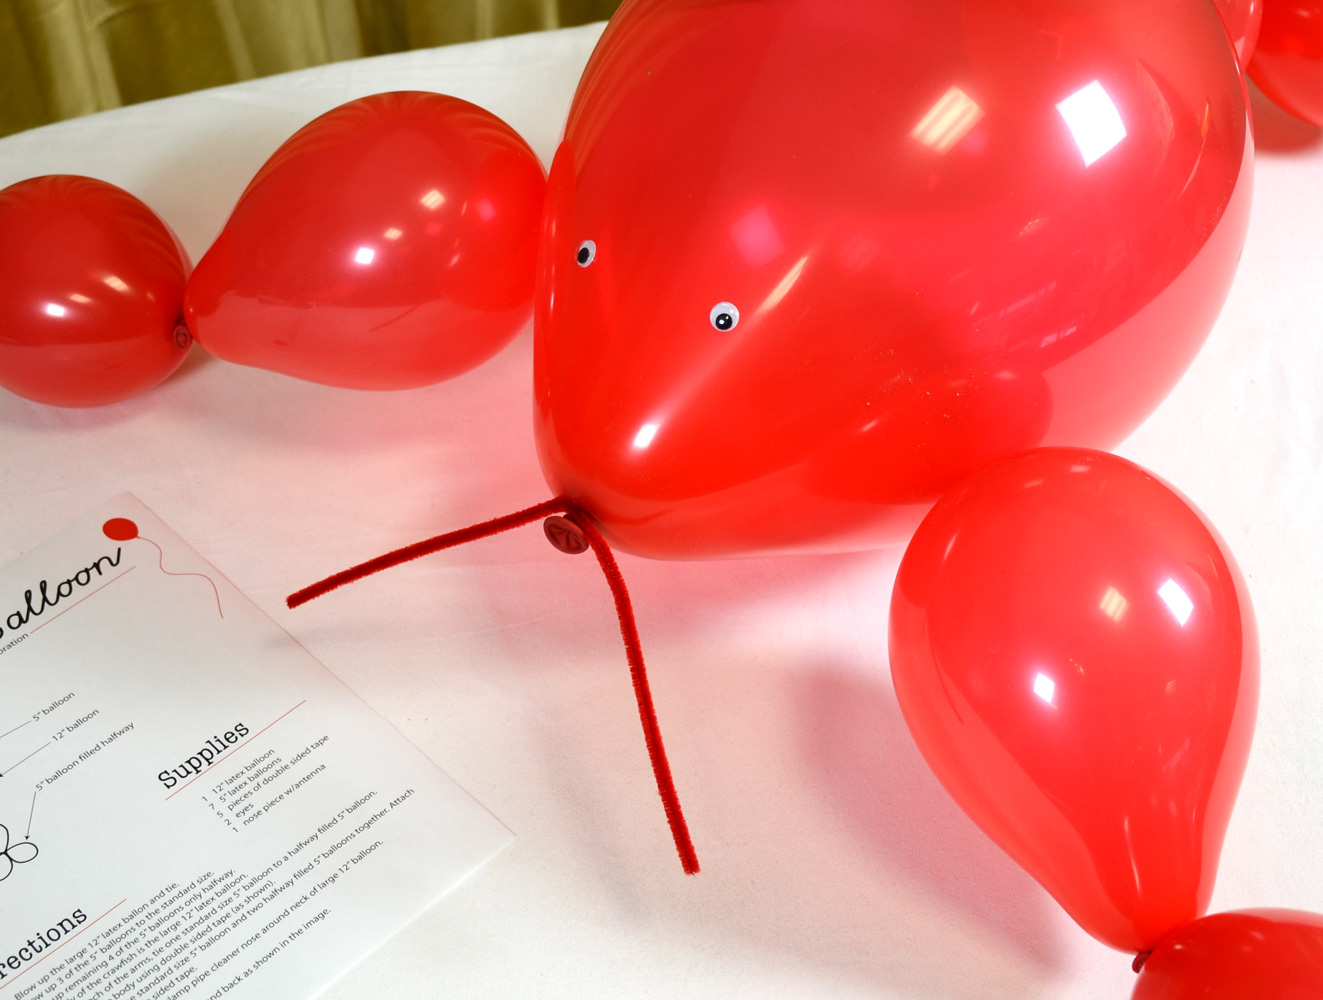
Add two googly eyes above the neck of the 12" balloon body. Wrap the red pipe cleaner around the neck of the balloon to form an antenna.

Draw in crawfish features
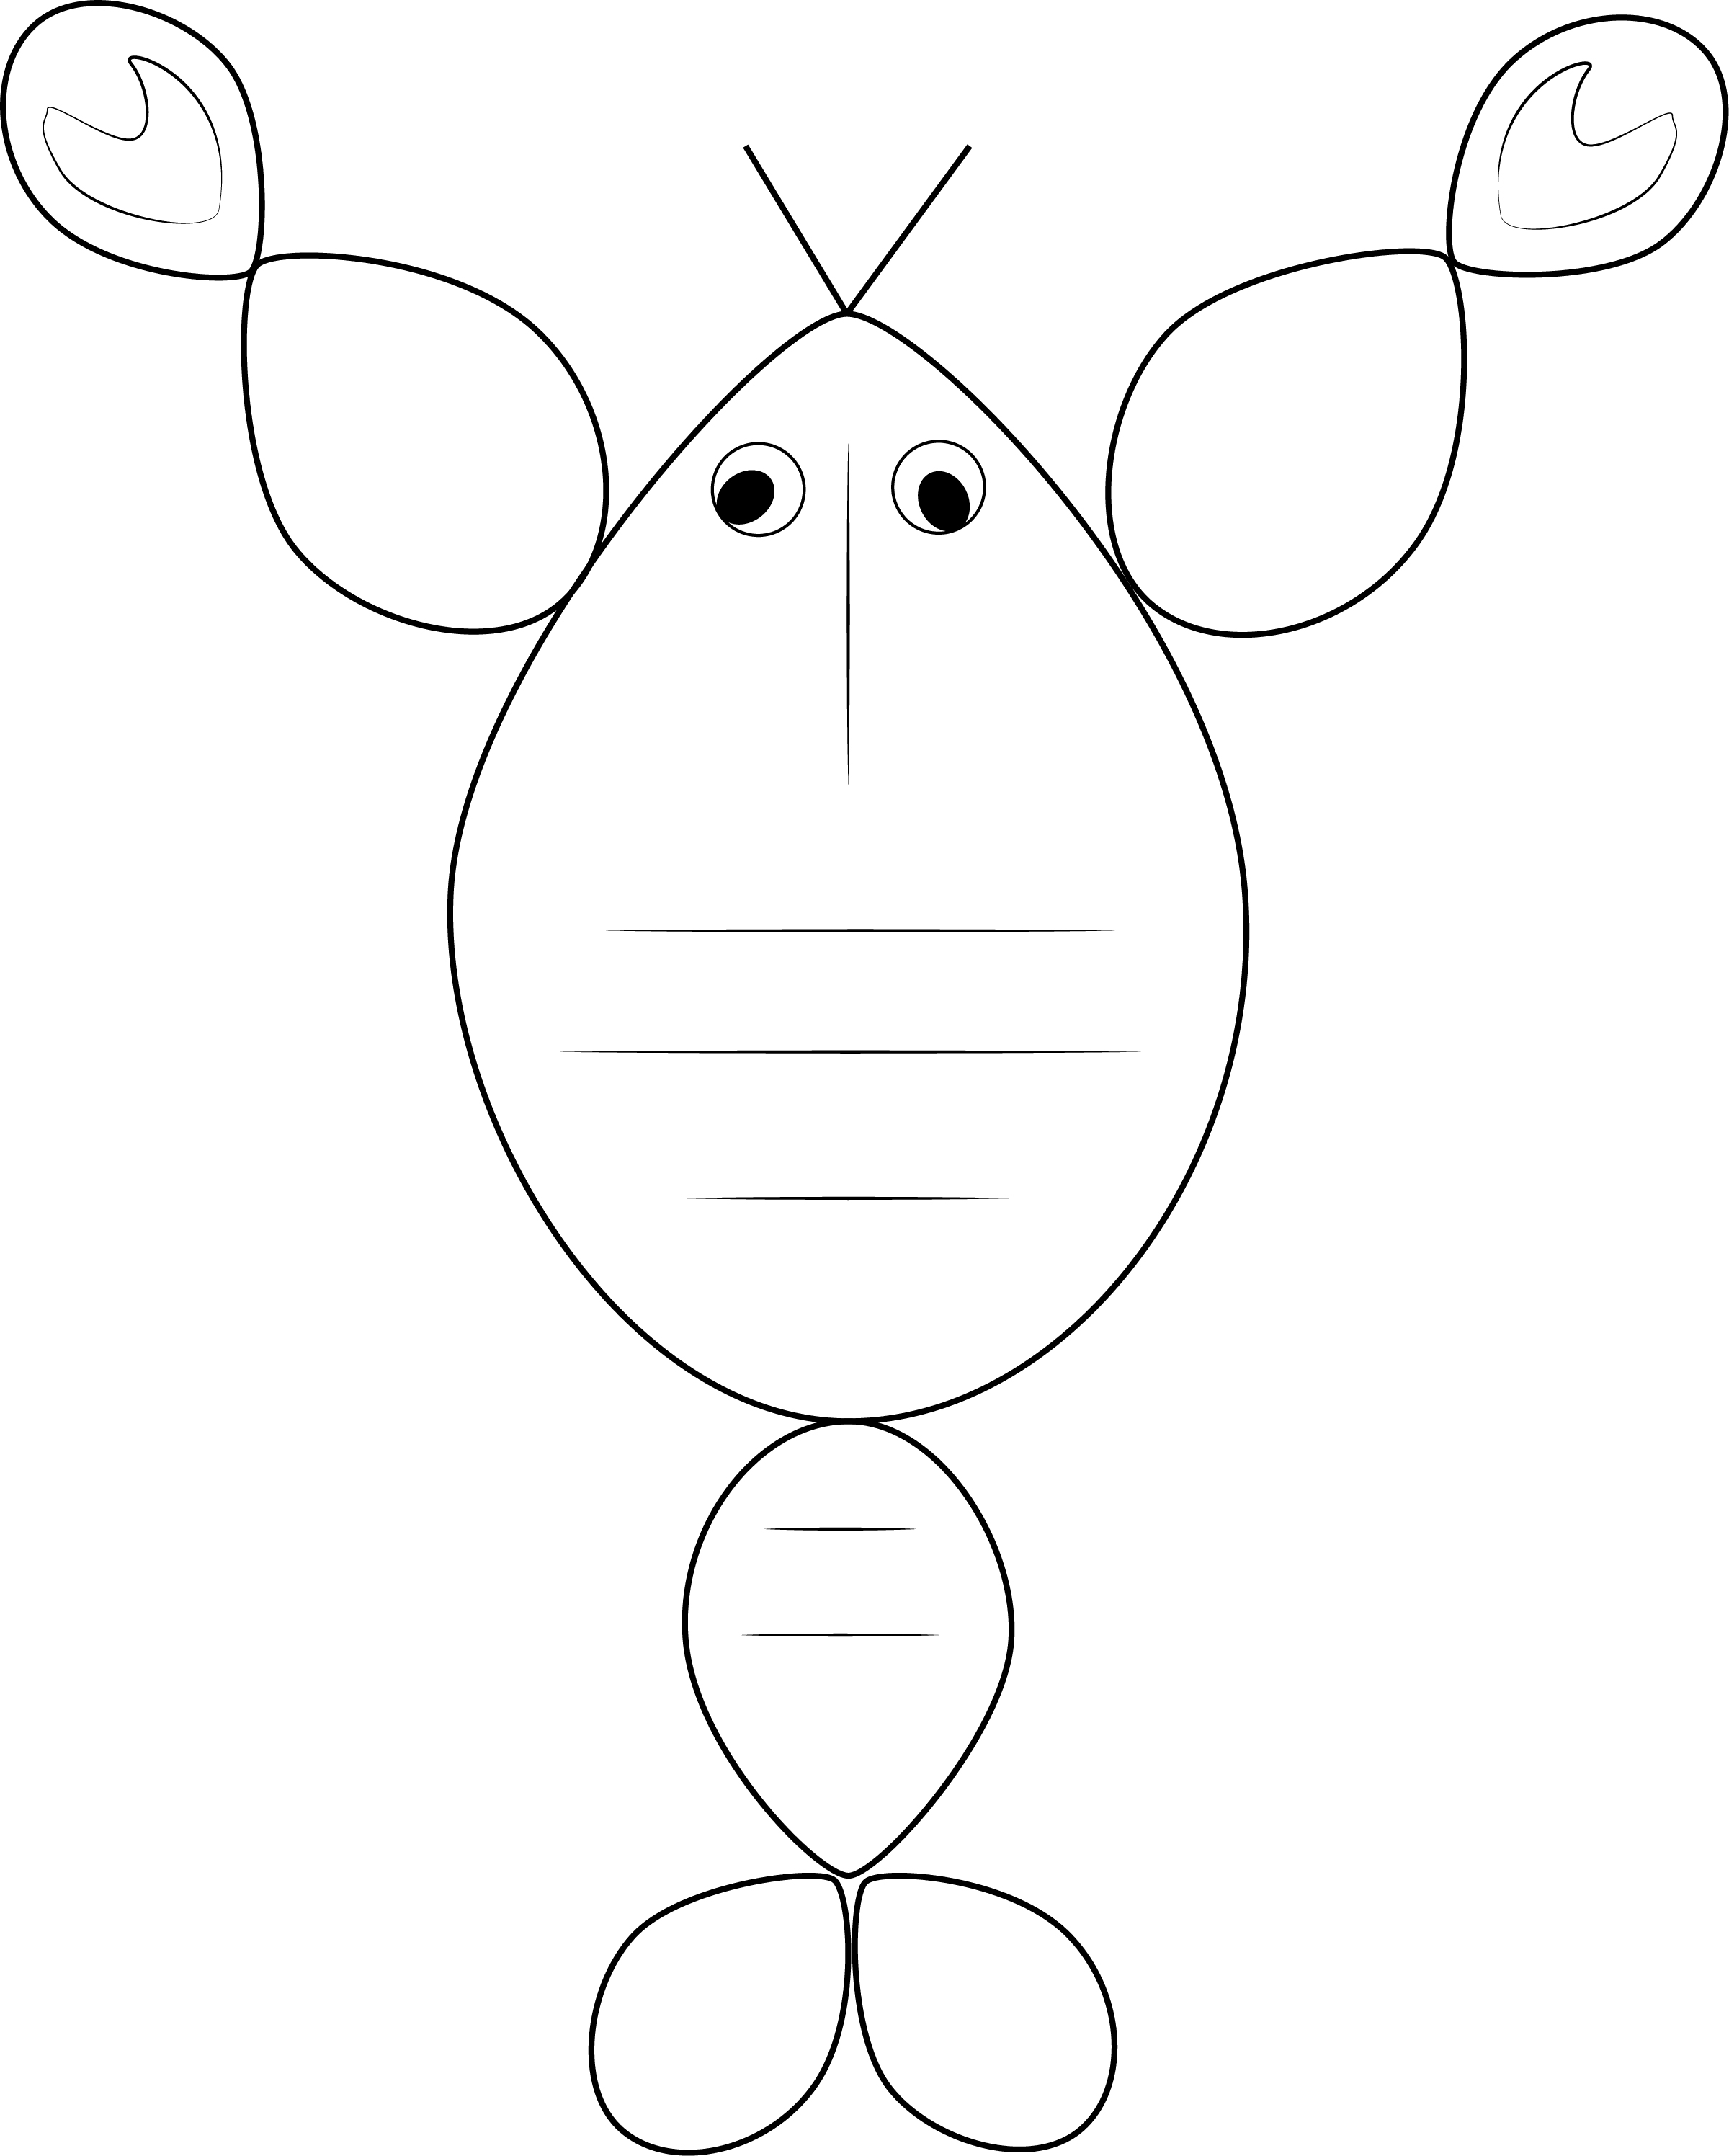
Draw lines on body, tail and claws as shown on the illustration below.

Crawfish details


Complete crawfish balloon
Your custom Create-a -Crawfish balloon decoration is complete


*Air-filled balloon tip*
A small amount of water in the main air-filled balloon will help to weight down the centerpiece if you are using the crawfish as a decoration outside or  in a windy location. Or you can anchor the crawfish to the table with double sided tape.


Create a Crawfish balloon kit
A kit with the basic supplies and instruction sheet is available:

May 10, 2011

Crawfish Boil Coloring Page


Create your own Crawfish Boil with this fun Crawfish Coloring page. A great way to keep the kids occupied while you wait for the mud bugs to boil!

Down load the full sized image of this Crawfish coloring page, by clicking the link below. You will need a PDF reader to open the file.
Crawfish Boil Coloring Page

For more free coloring page downloads, see the whole collections:

May 6, 2011

Air-filled Balloon Centerpieces: Ideas & Tutorials

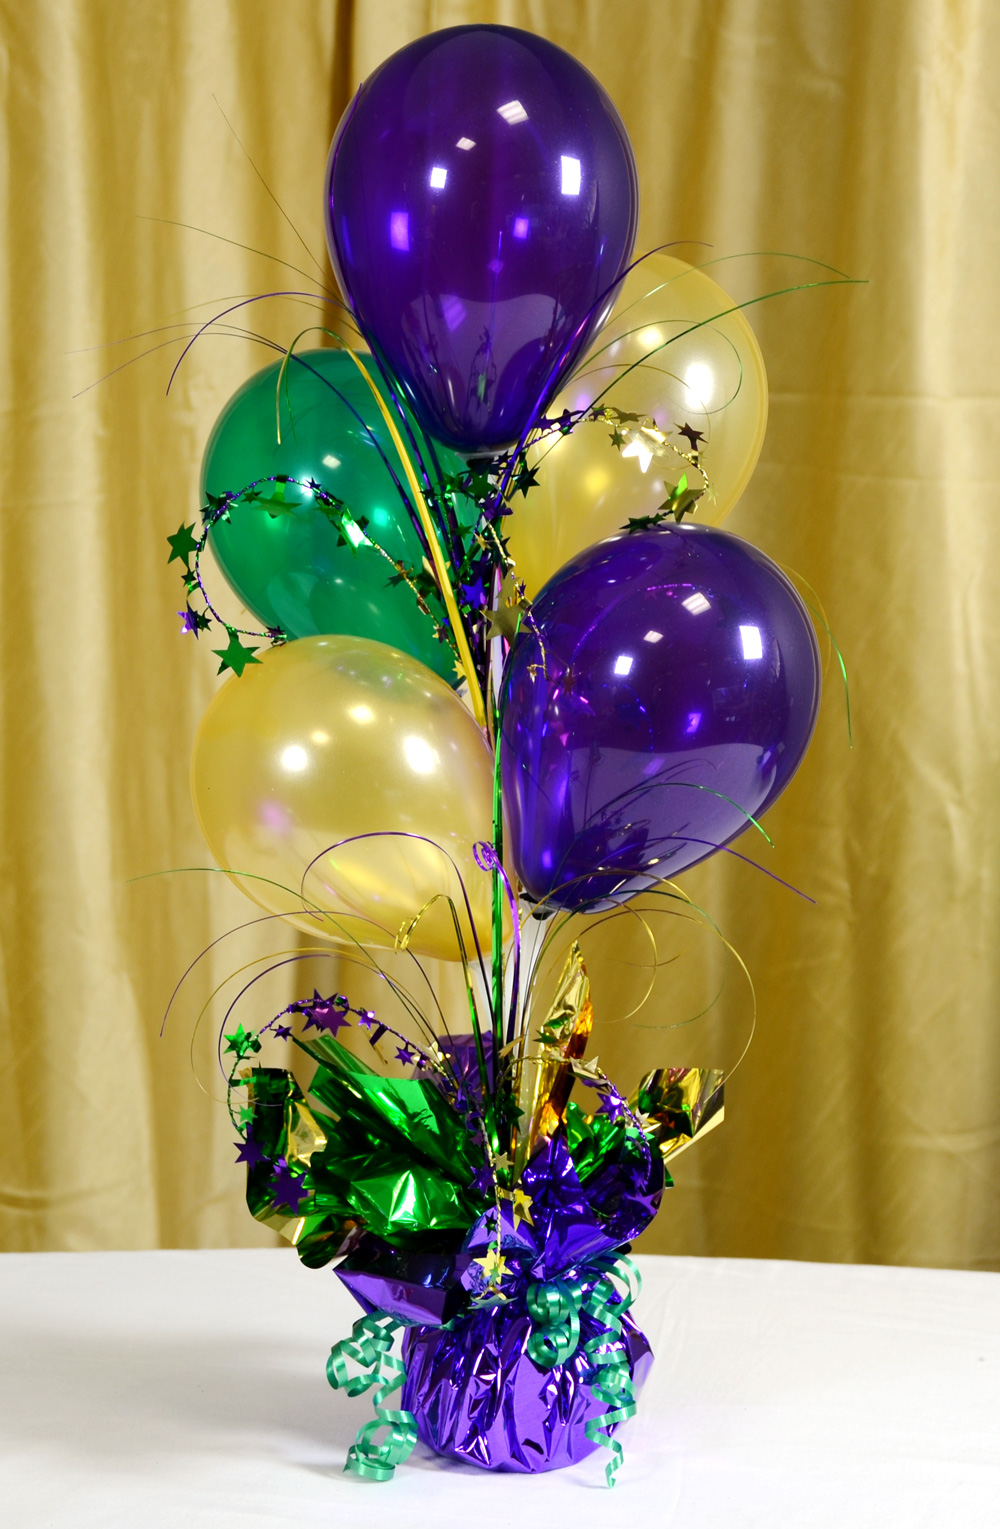
Mardi Gras Balloon Centerpiece

Looking for the perfect centerpiece? Inexpensive and easy-to-make air filled balloon centerpieces are the answer! Air filled balloons make festive centerpieces with the added bonus that they can be created days in advance of an event. While standard helium balloons only last a few days, air filled balloons last for weeks. This type of balloon centerpieces is also well suited for outdoor events where helium balloons can get blown around by the wind.

Five inch air filled balloons
When creating a table top centerpiece of air filled balloons, the smaller 5” balloon is the perfect choice. To keep the air filled balloons upright like helium filled balloons use plastic balloon sticks and cups. The air filled balloon is inflated and the stem / knot of the balloon is inserting into a small plastic cup that sits on a 12’ plastic stick.

balloon cup

Creating an air filled balloon centerpieces is easy and quick. Here are tutorials for two different versions of a Mardi Gras balloon centerpieces using these 5” air-filled balloons.Air-filled Balloon centerpiece

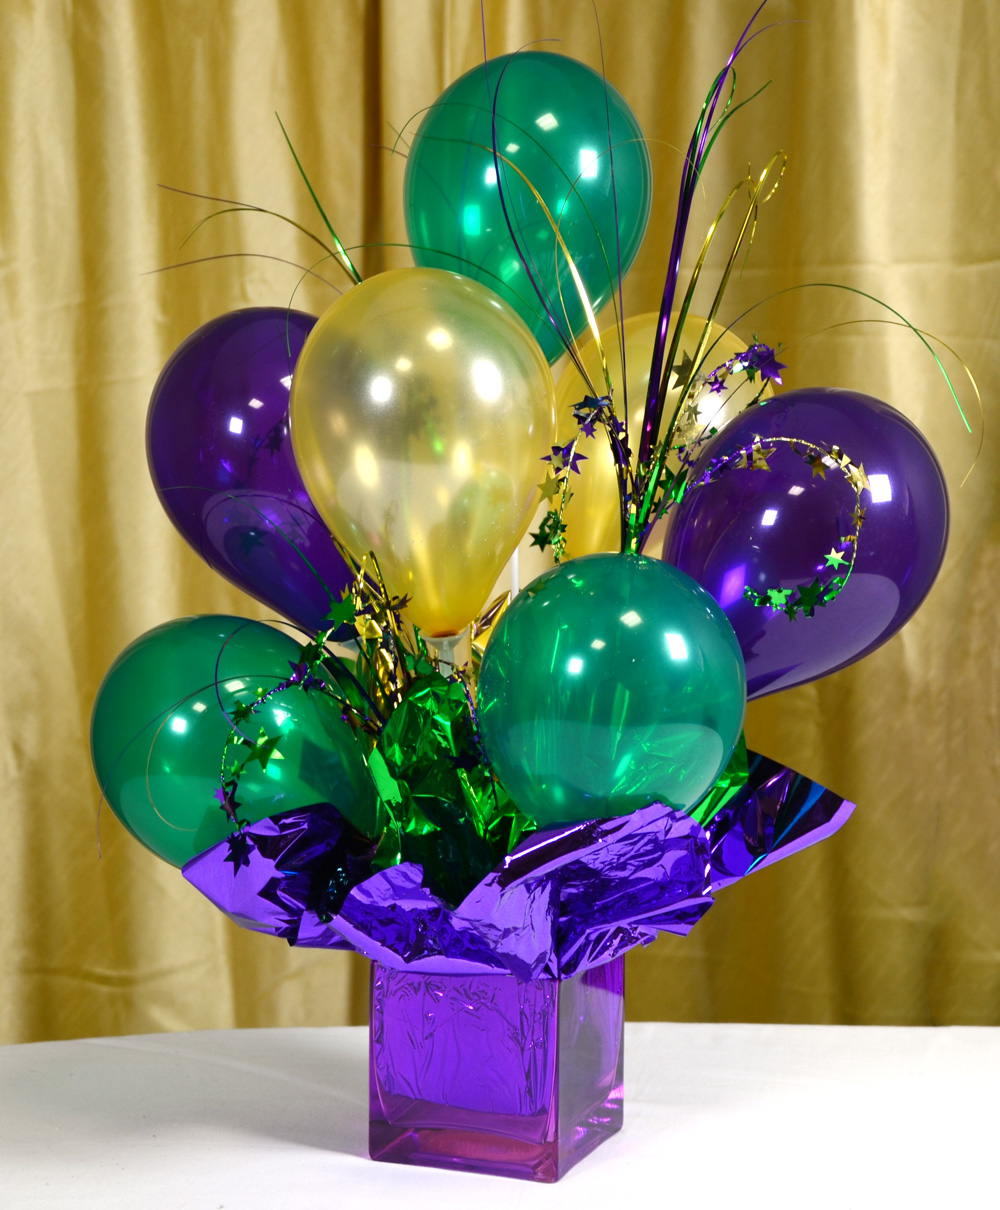
This arrangement made with five balloons is anchored in a Mylar foil covered bag weighted with sand. The larger seven balloon centerpiece (shown above) uses a purple glass vase with Mylar tissue as a base.

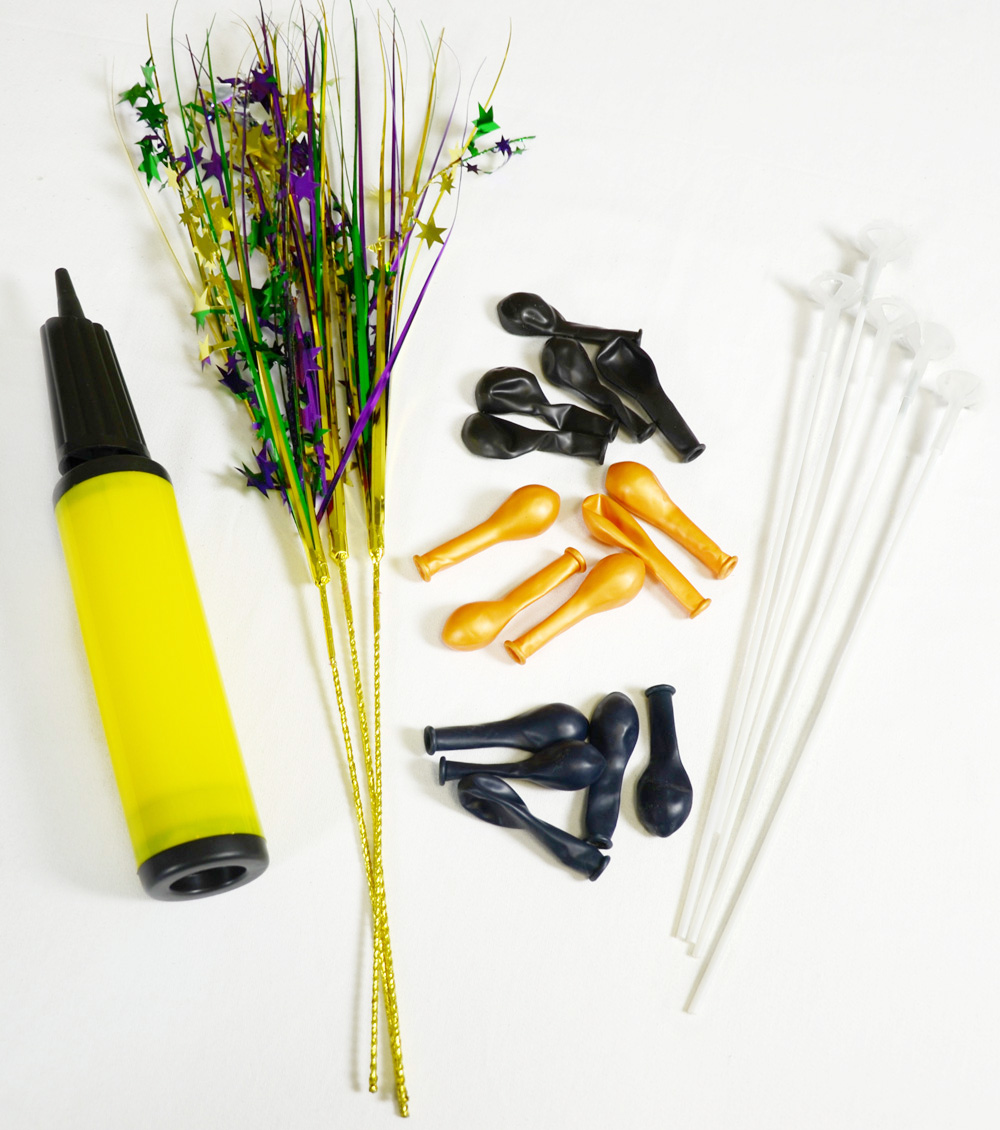
Balloon centerpiece supplies
Supplies:

5” latex balloons (in purple, green and gold)
Plastic stick and cups sets (sized for 5’ balloons)
Air pump (optional)
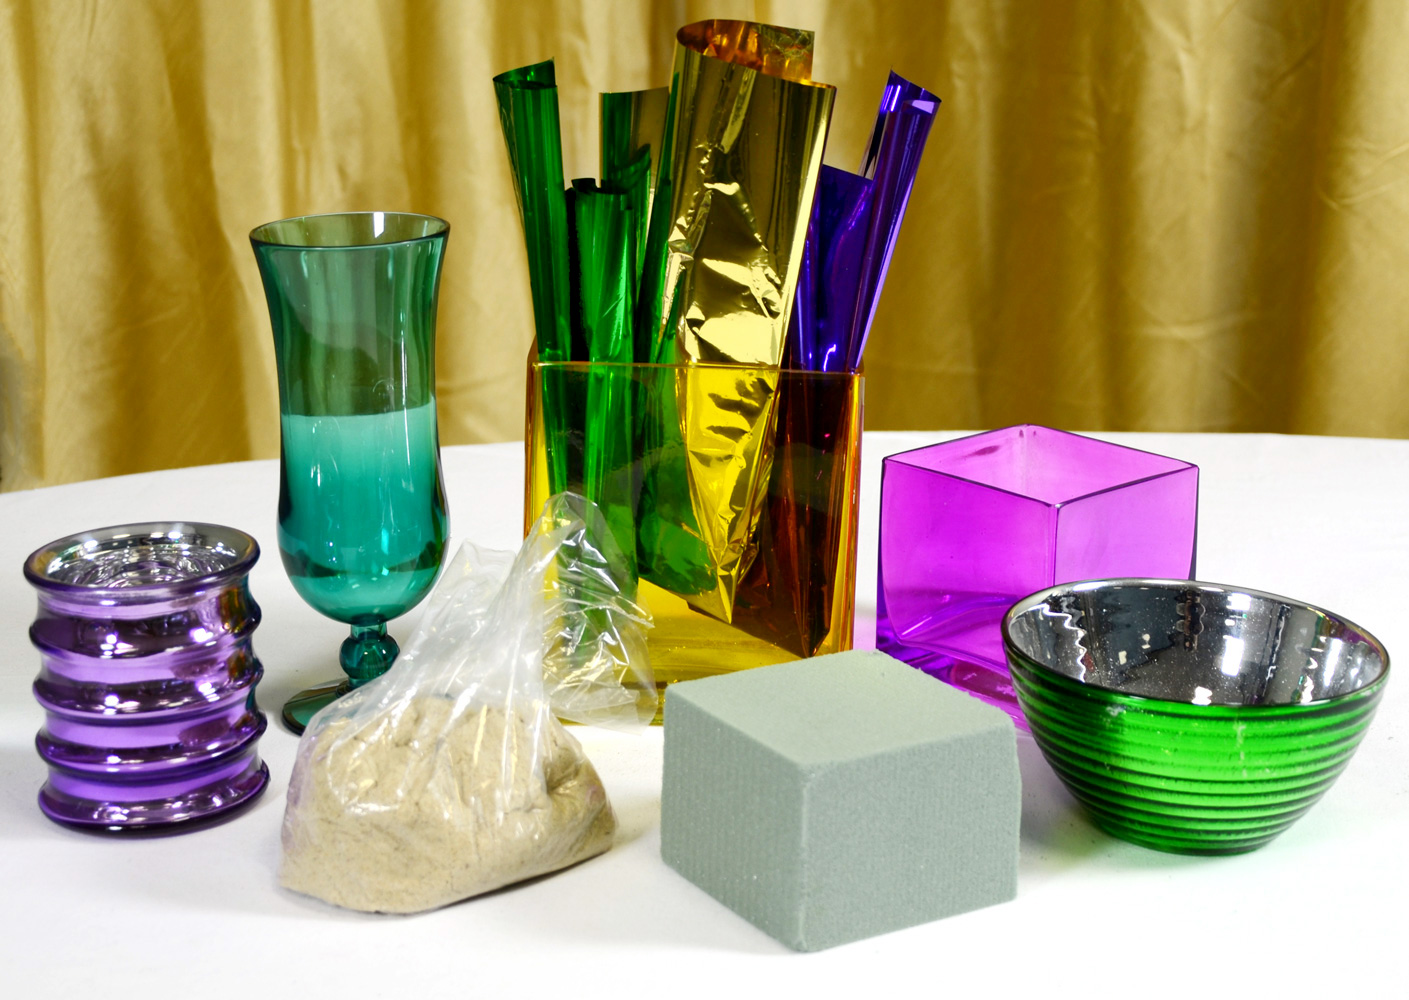
Base options:

Bag filled with sand for weight/stability or Floral foam
Mylar tissue
Purple cube glass vase
Yellow rectangle glass vase
Plastic hurricane glass
Ribbed metallic glass votive holder


Balloon centerpiece base options
Centerpiece base
The options for a centerpiece base are only limited by your imagination. Vases, bowls, boxes or glasses will all work. Here are a few different options from Mardi Gras Outlet. A simple bag filled with sand provides an inexpensive weight for the arrangement. Fancier clear and metallic glass vases add a touch of sparkle and weight to the centerpiece. With the vases you will need to use floral foam to anchor the balloon sticks. Mylar tissue is used to cover the floral foam, adding another layer of sparkle as well.

Tutorial: Air-filled Balloons with sticks/cups.

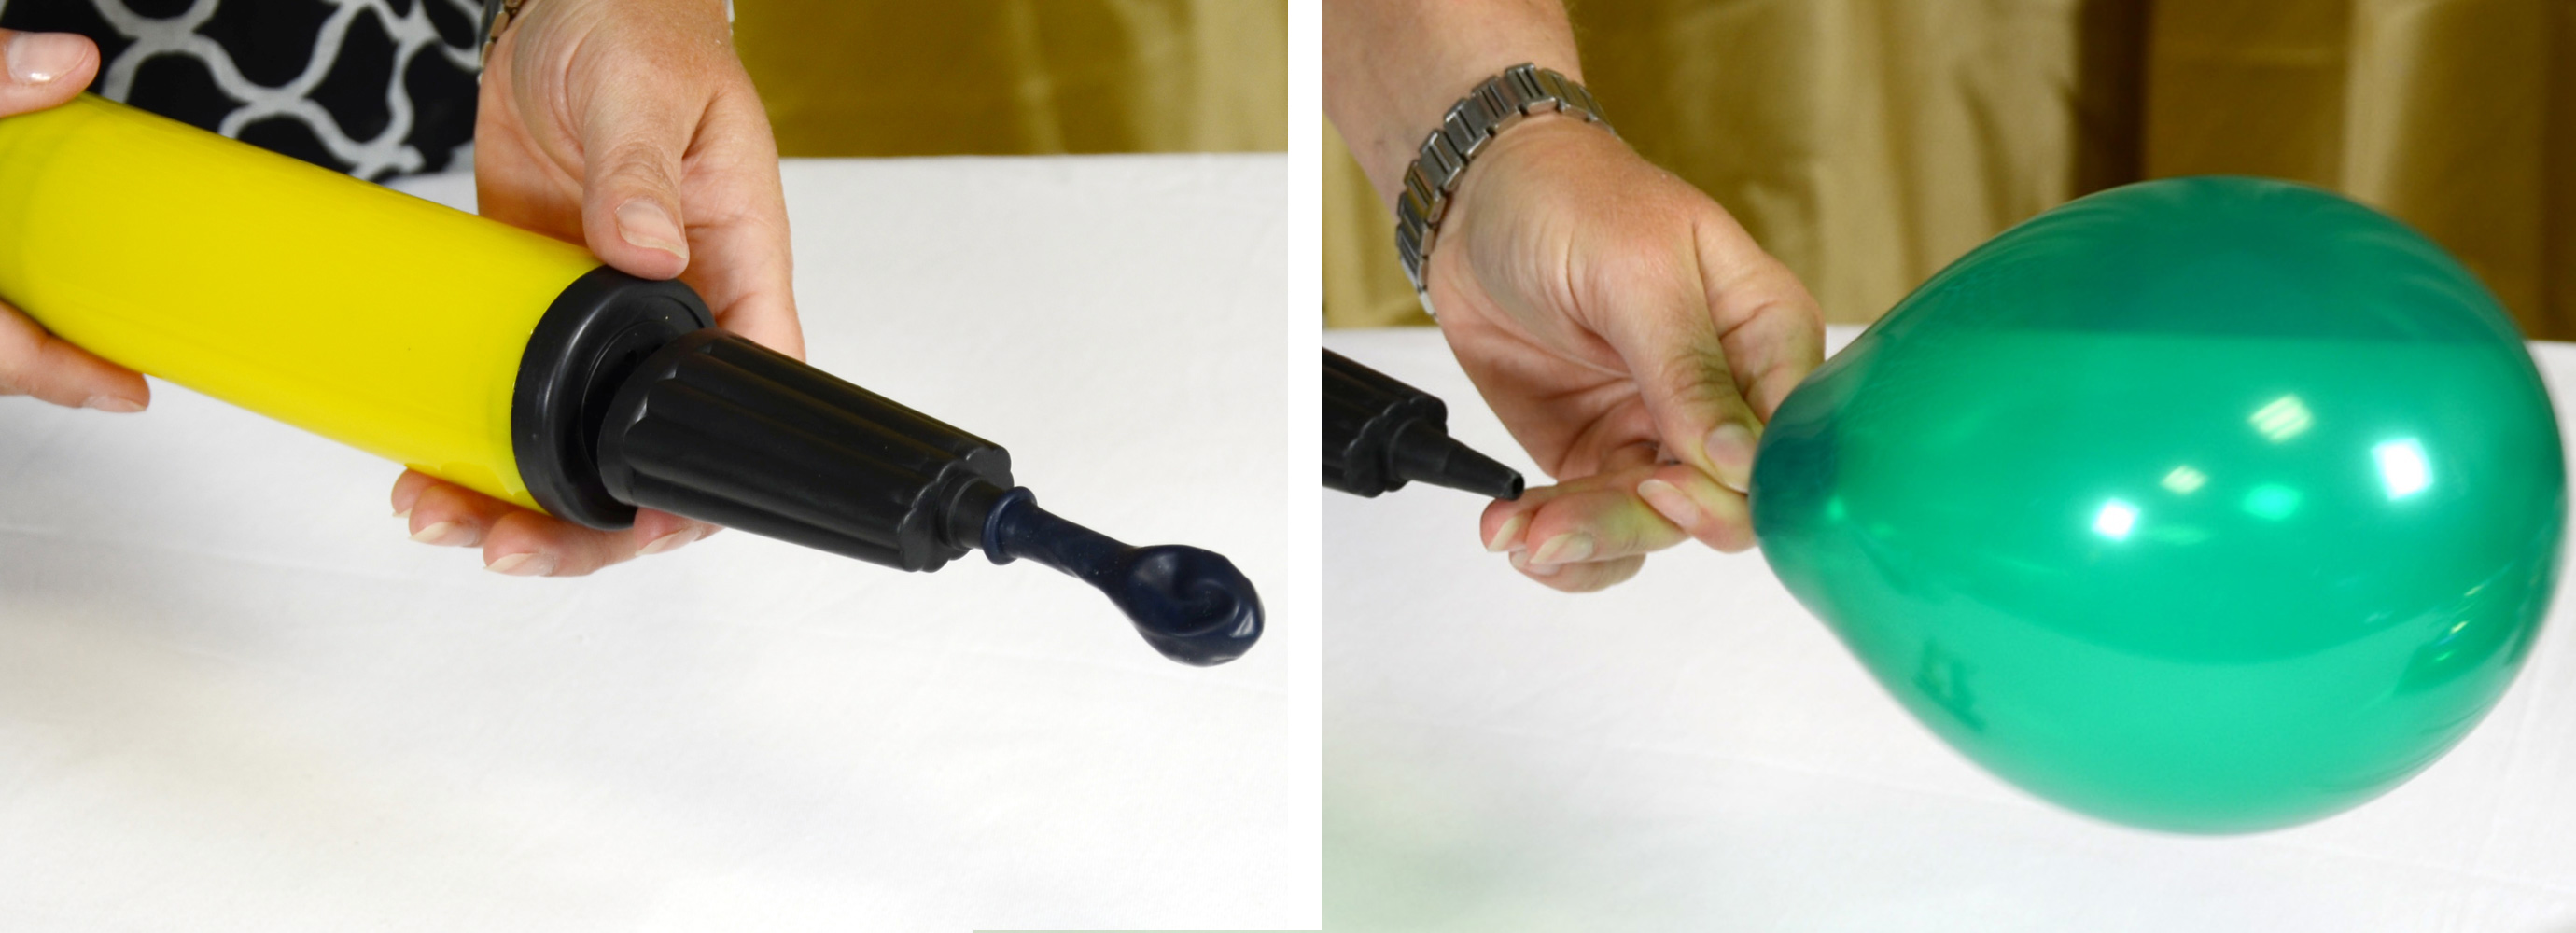
Inflate balloons with air
Inflate the 5” balloon until it begins to form a pear shape (apx 5” long).
Seal the balloon by tying a knot in the neck of the balloon.

Insert balloon into cup
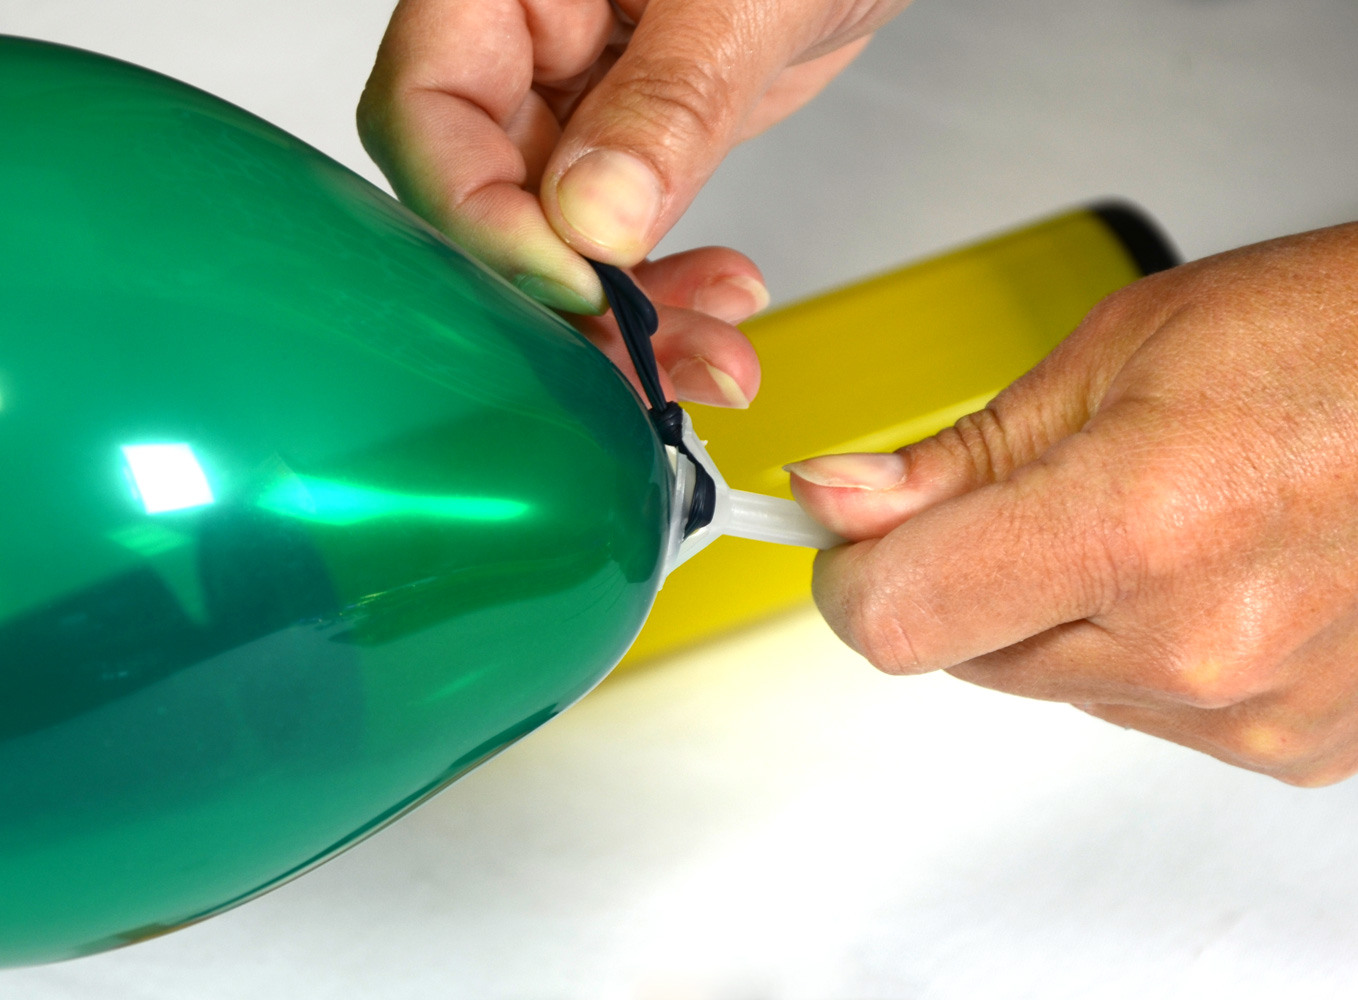
Insert the knot of the balloon into the center of the cup, pushing it back out the side of the plastic cup. Insert the knot into the slit in the cup to secure the balloon in place.

Balloons on sticks and cups
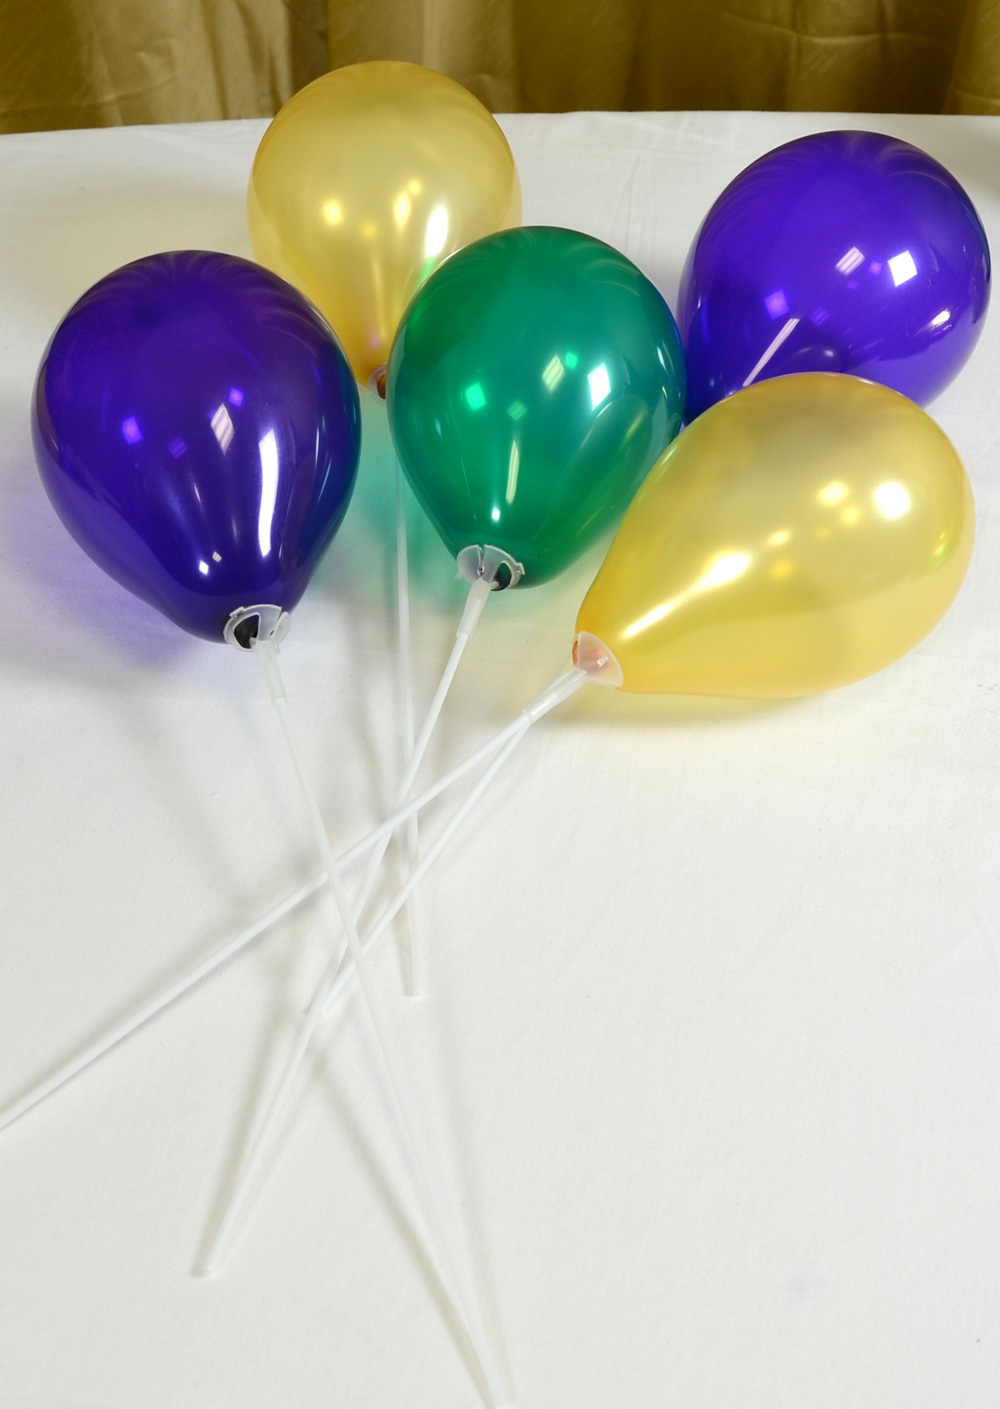
Place the plastic cup onto the 12” long plastic stick. Repeat for each of the balloons you will need.


Tutorial: Basic five balloon centerpiece

Arrange balloons
With all five of the balloons attached to the cups and sticks, arrange them into a pleasing shape.
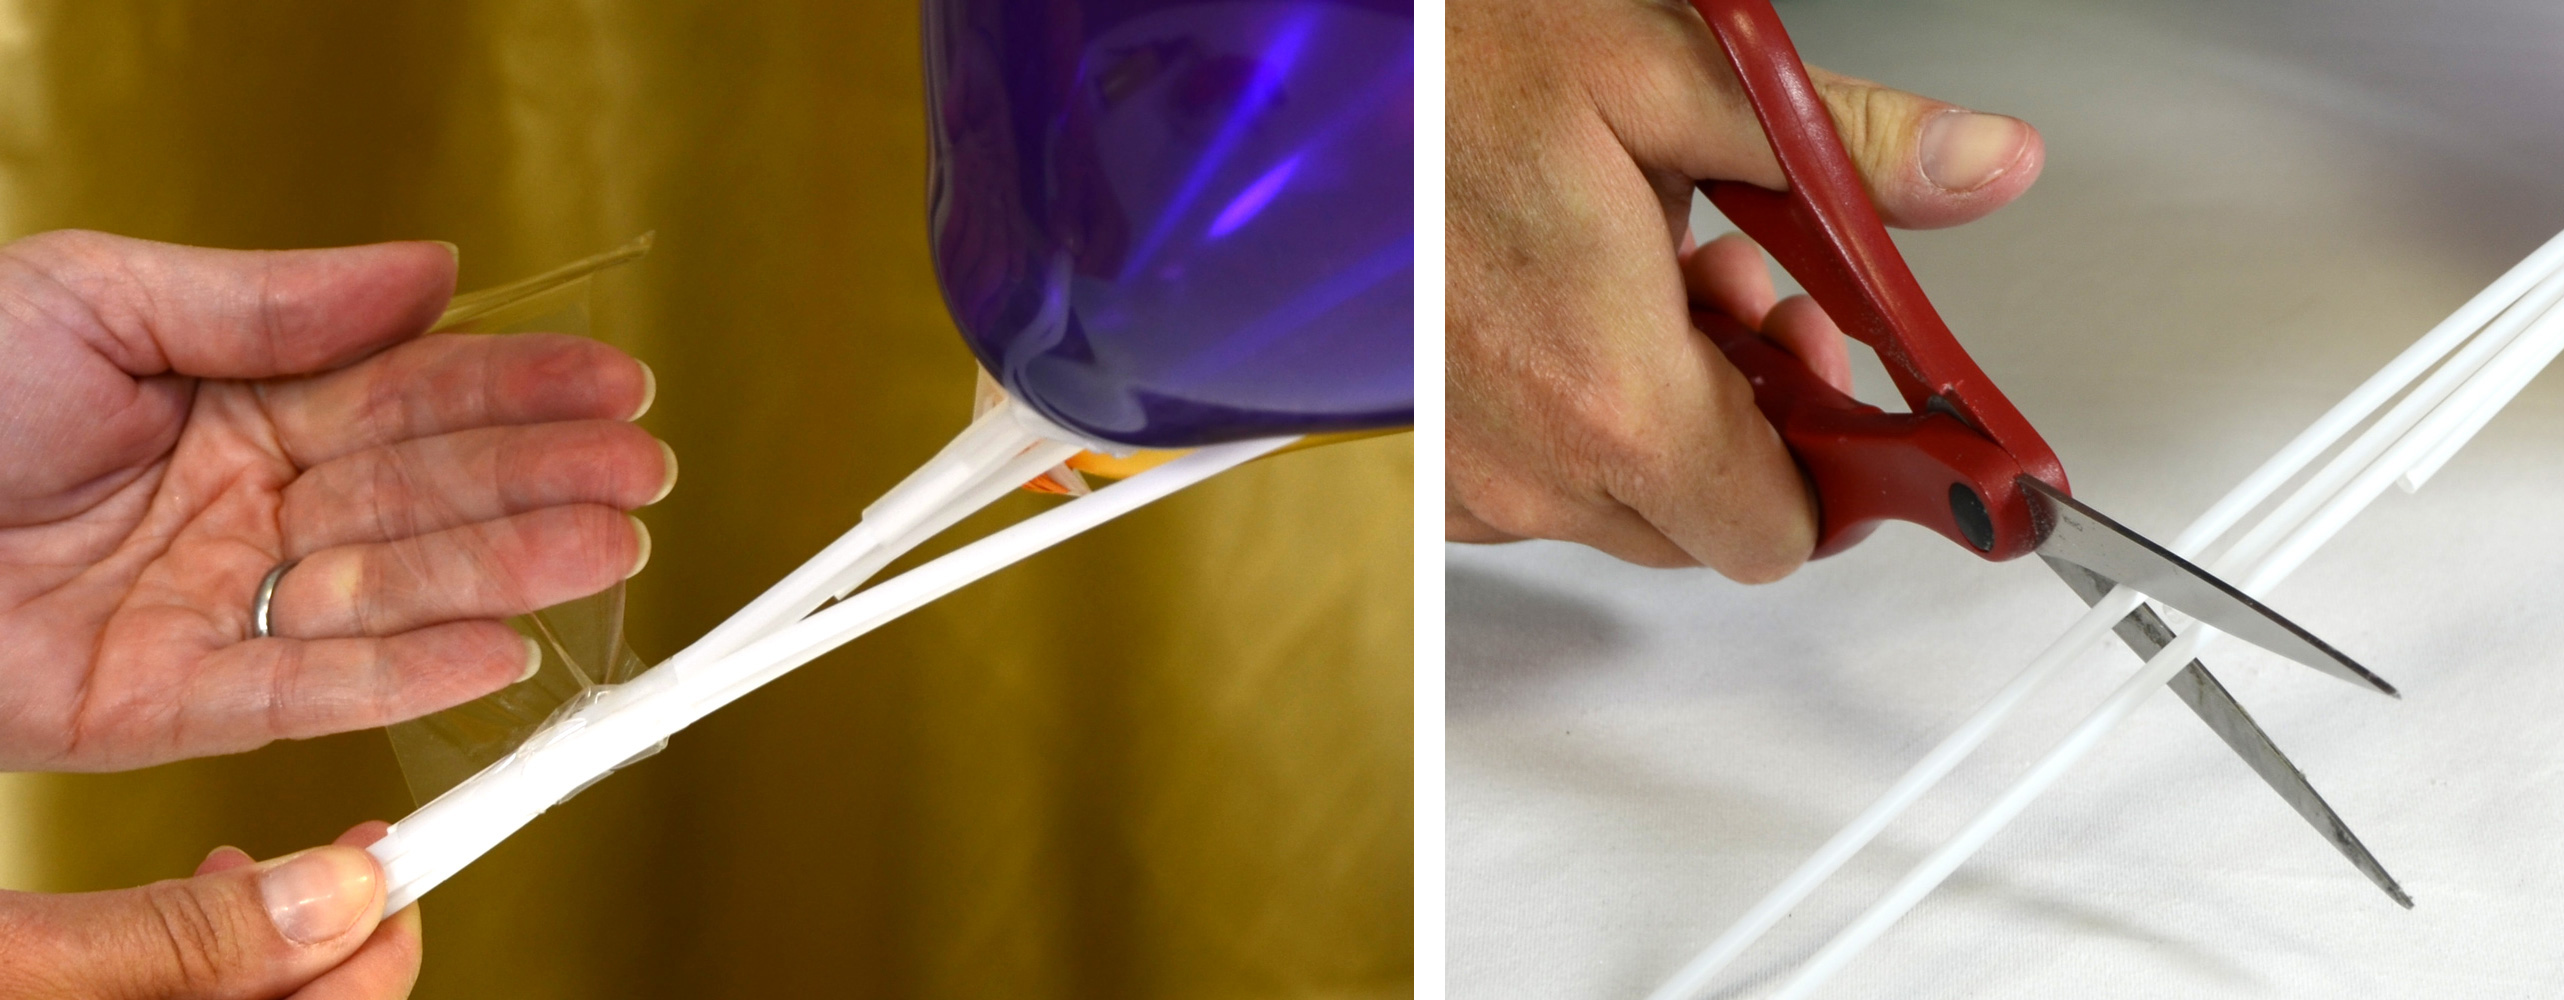
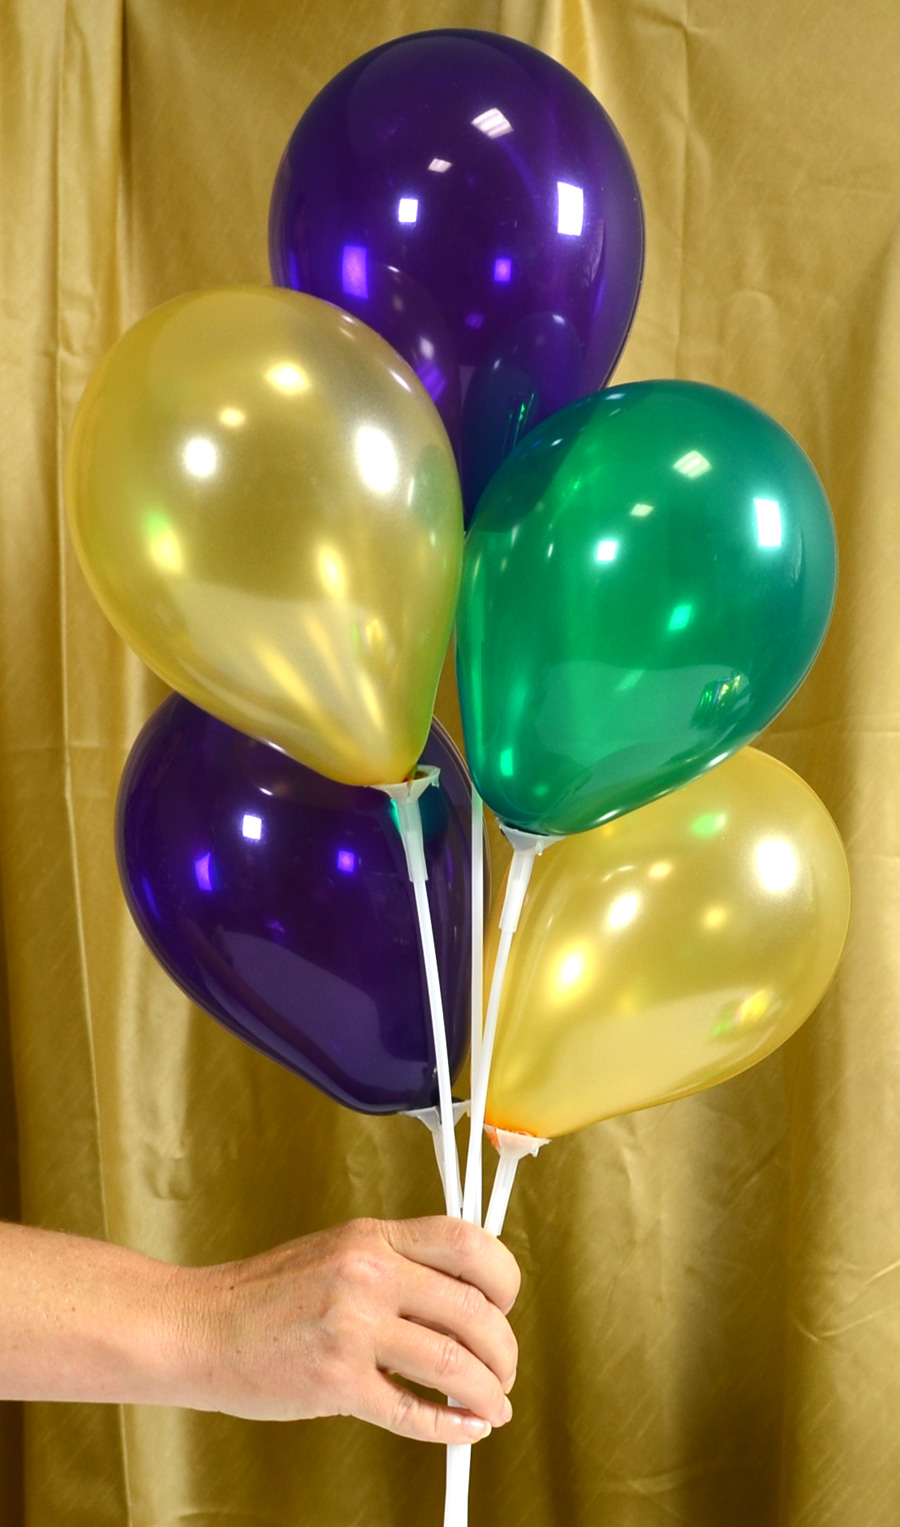
Tape the balloon sticks together
Once arranged, use a piece of clear tape to secure the sticks together at the base.
Cut off any extra long pieces of balloon stick.

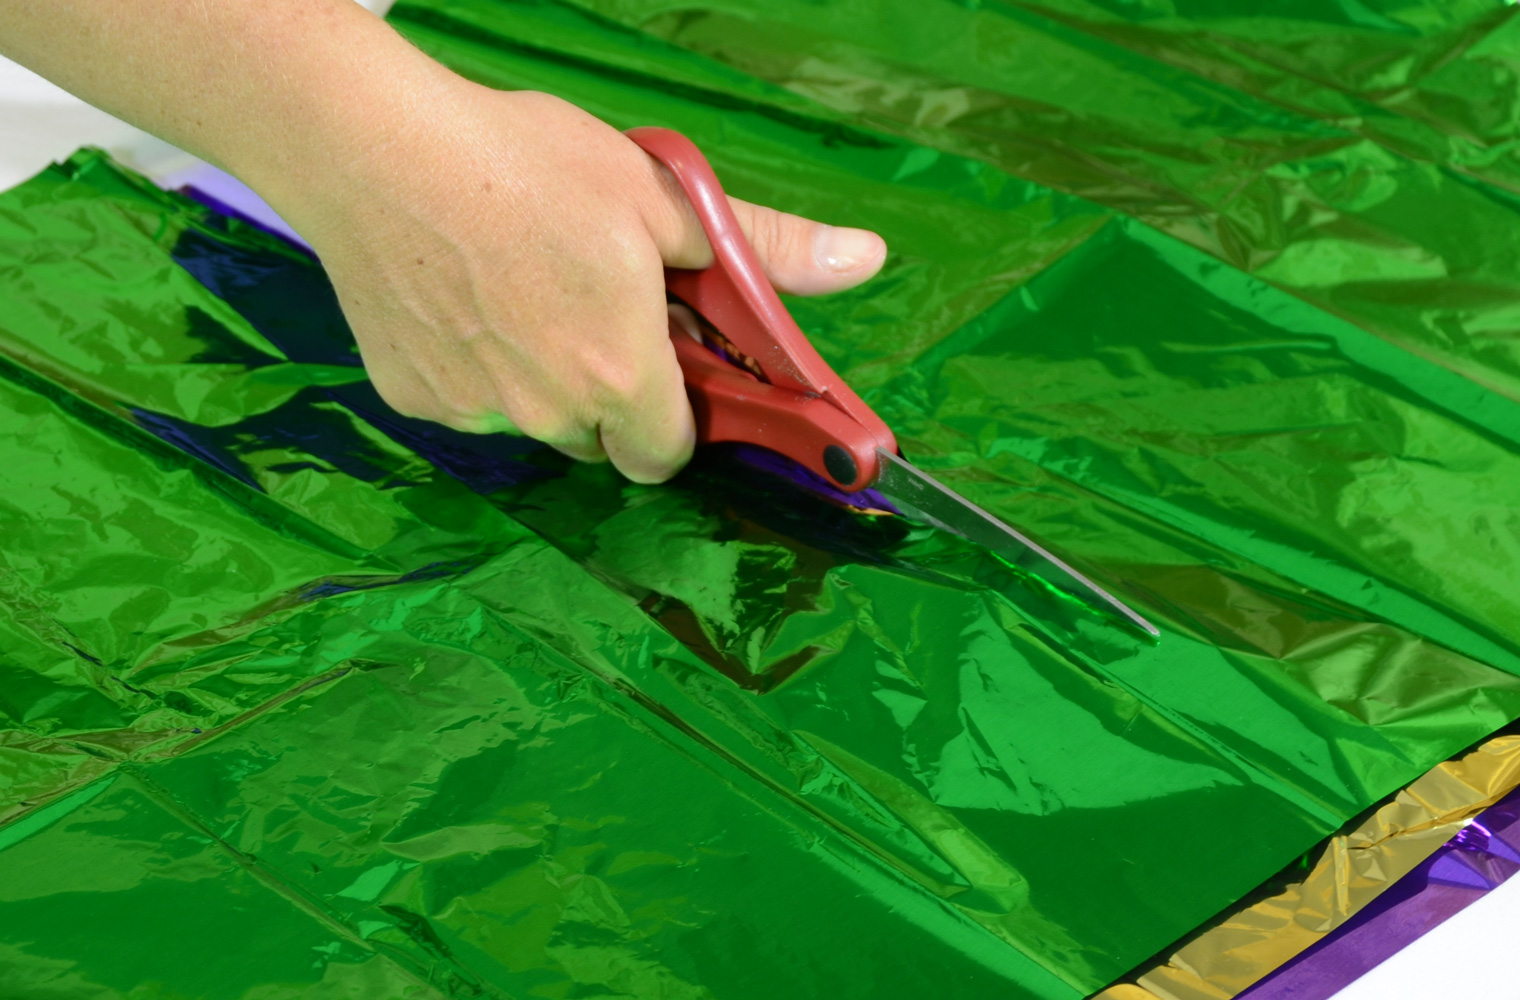
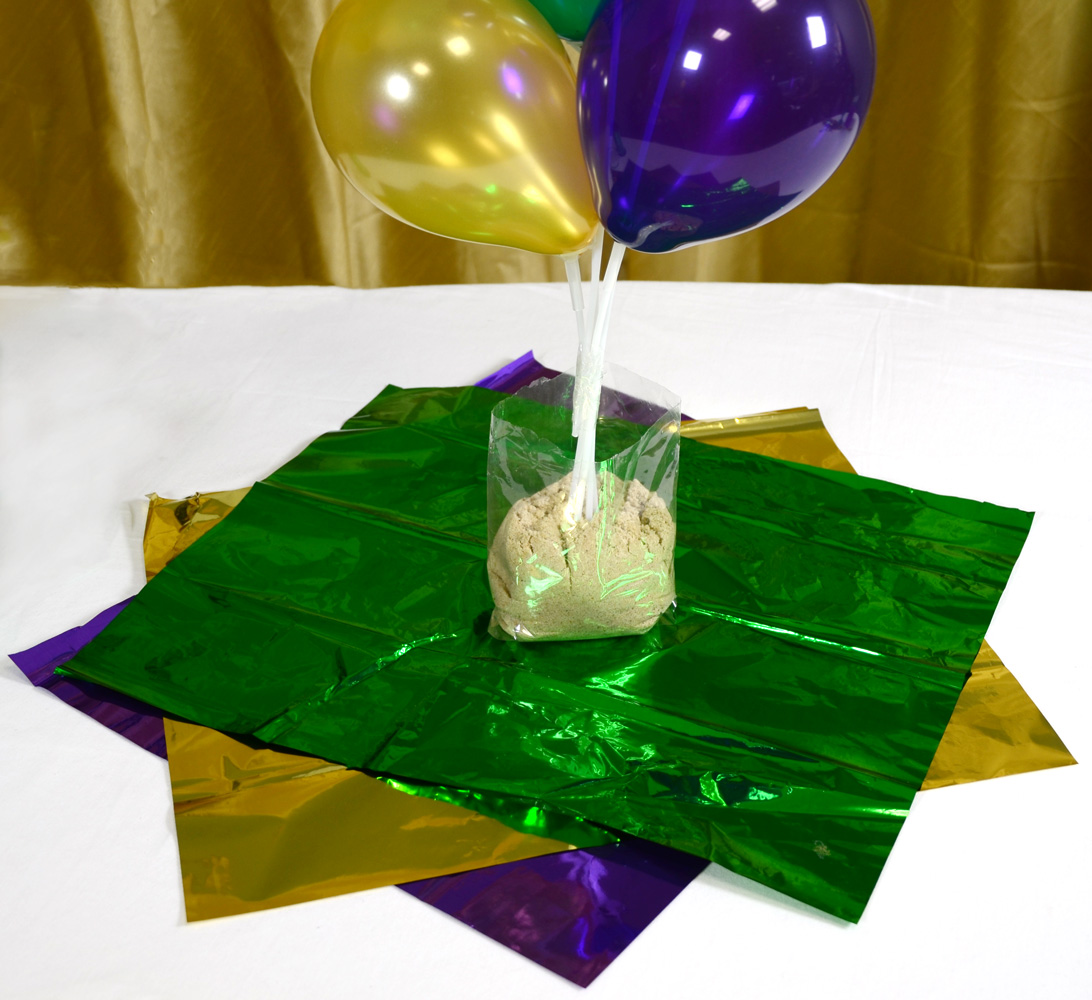
Cut the mylar tissue in half
Cut the mylar tissue sheets in half. We used one of each of the traditional colors of Mardi Gras (purple, green and gold). Layer the three (3) half sheets of tissue on top of each other.

Insert sticks into sand
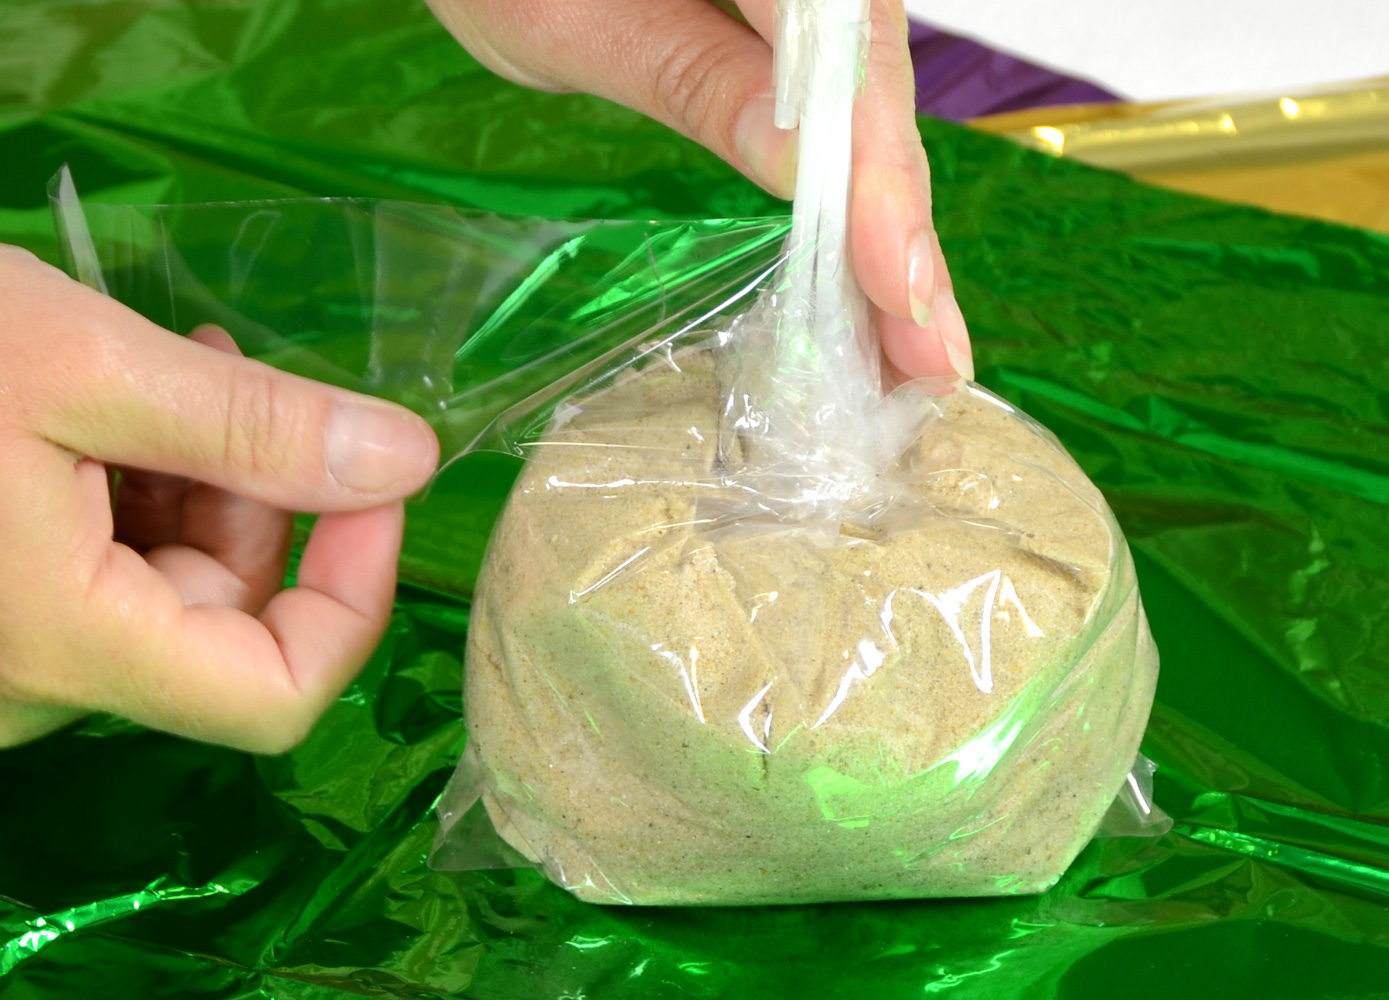
Put the balloon sand bag on top of the mylar tissue. Insert the sticks into the sand bag.

Seal the sand bag with tape
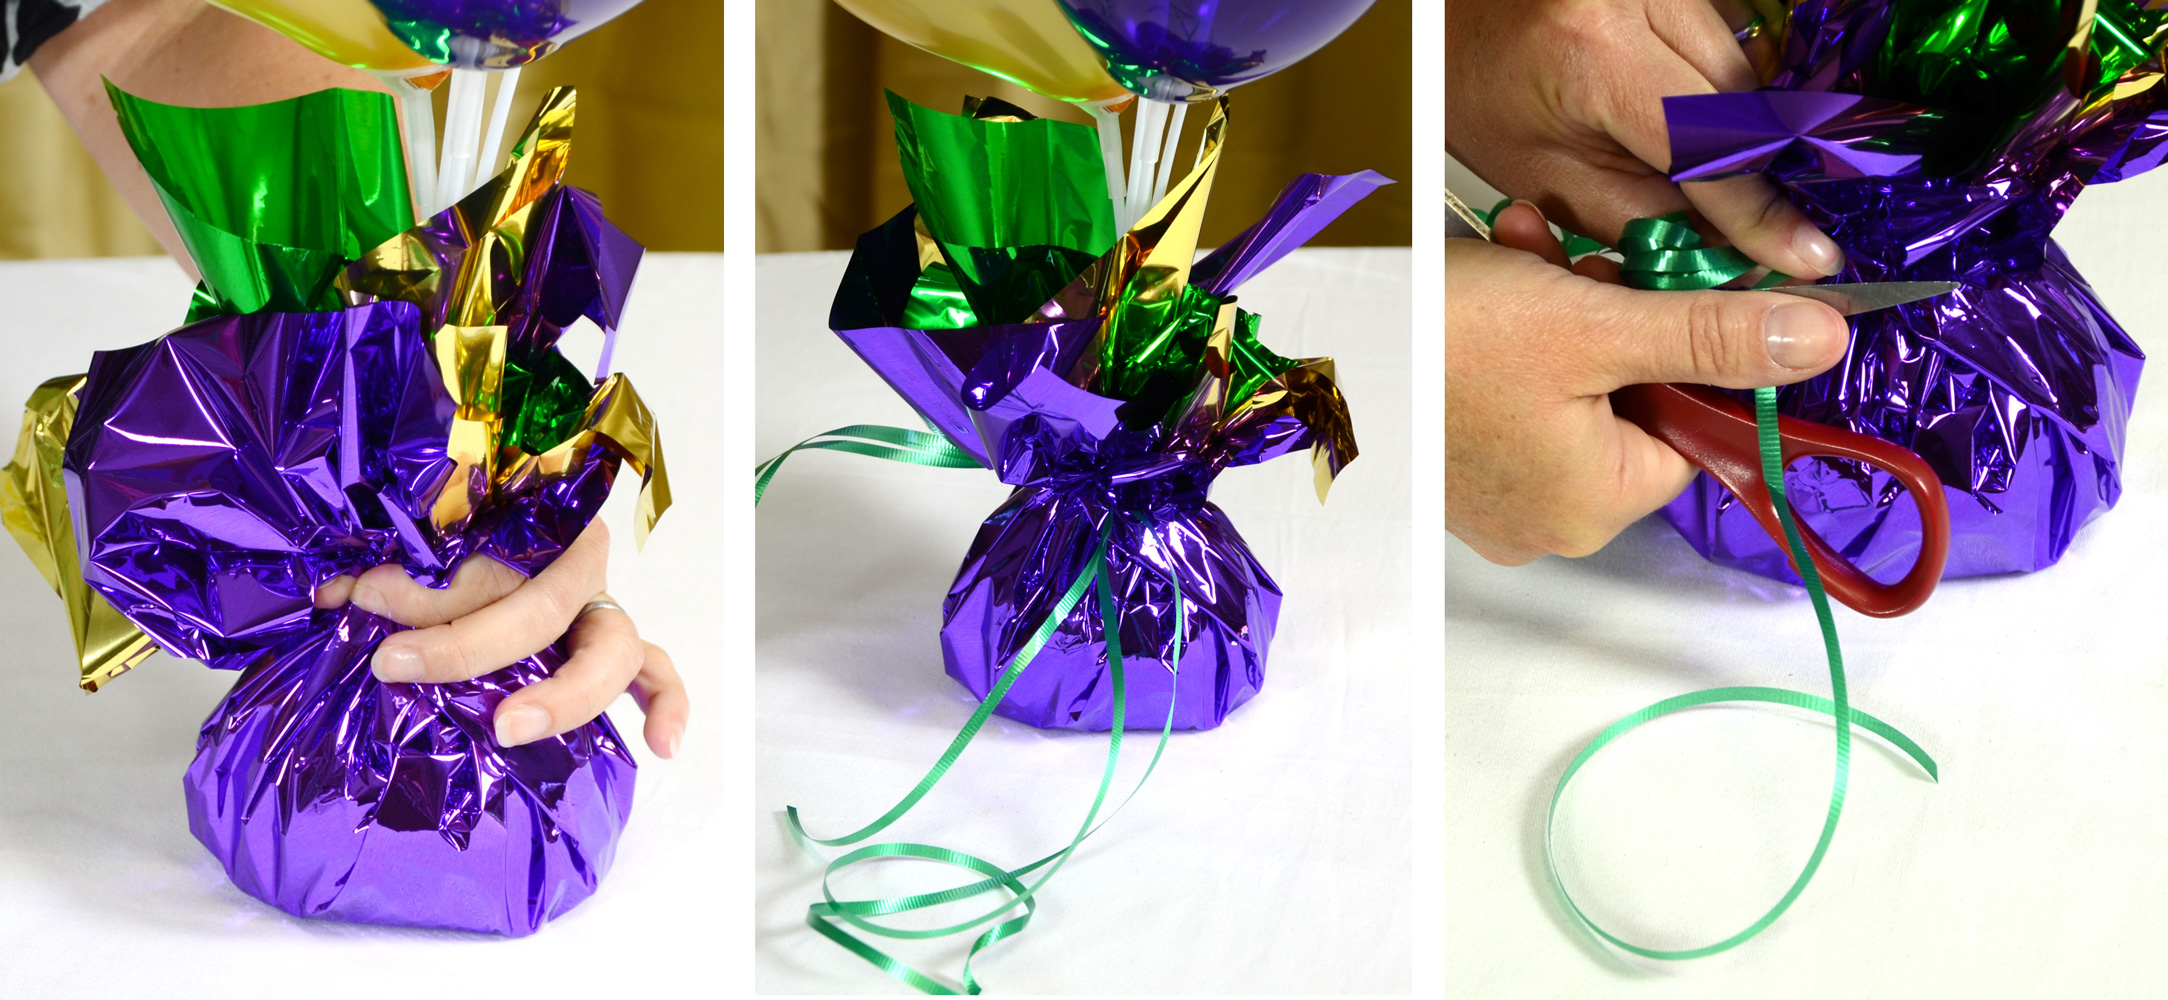
Secure the sticks into the bag, sealing in the sand, with clear plastic tape.


 Cover bag with tissue
Gather the tissue up and around the balloon sticks. Secure the tissue in place with ribbon. Green curling ribbon is used here. Curl the ends of the ribbon.
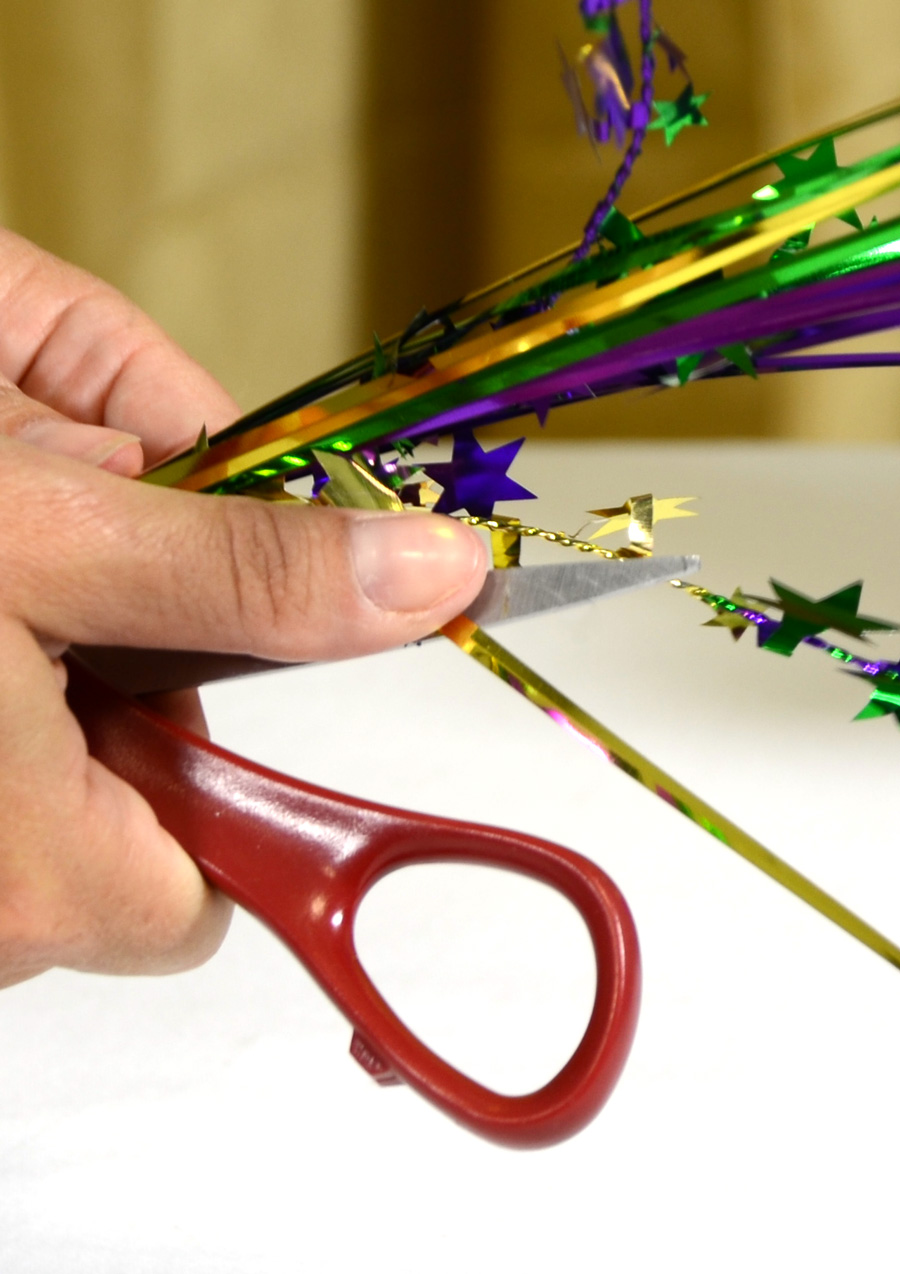
Additional sparkly star picks 
OPTIONAL: Add some more sparkle with floral sprays.  Three metallic star picks were added to the arrangement. This can be done now or in the beginning when you are arranging the balloons. Each star pick is inserted into a different part of the arrangement (and at different heights).

TIP: The (non-wired) mylar pieces in the pick can be curled just like curling ribbon. Run the blade of the scissors over them to create soft or tight curls.

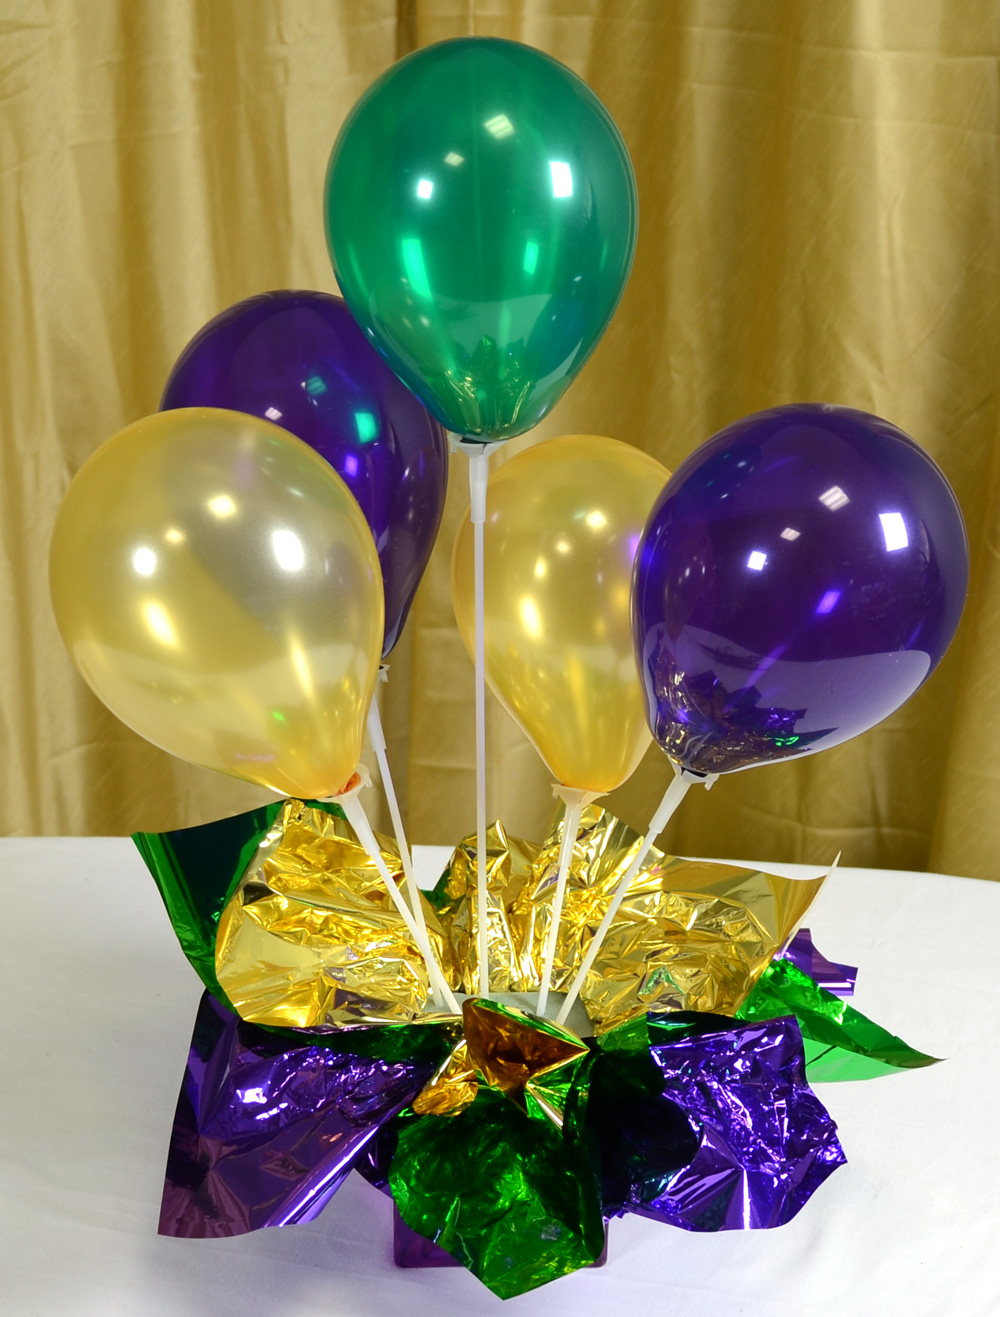
The complete Mardi Gras balloon centerpiece
Complete Balloon Centerpiece

Tutorial: 7 balloon centerpiece in vase
Inflate seven of the 5” balloons and place on the sticks and cups as instructed above.

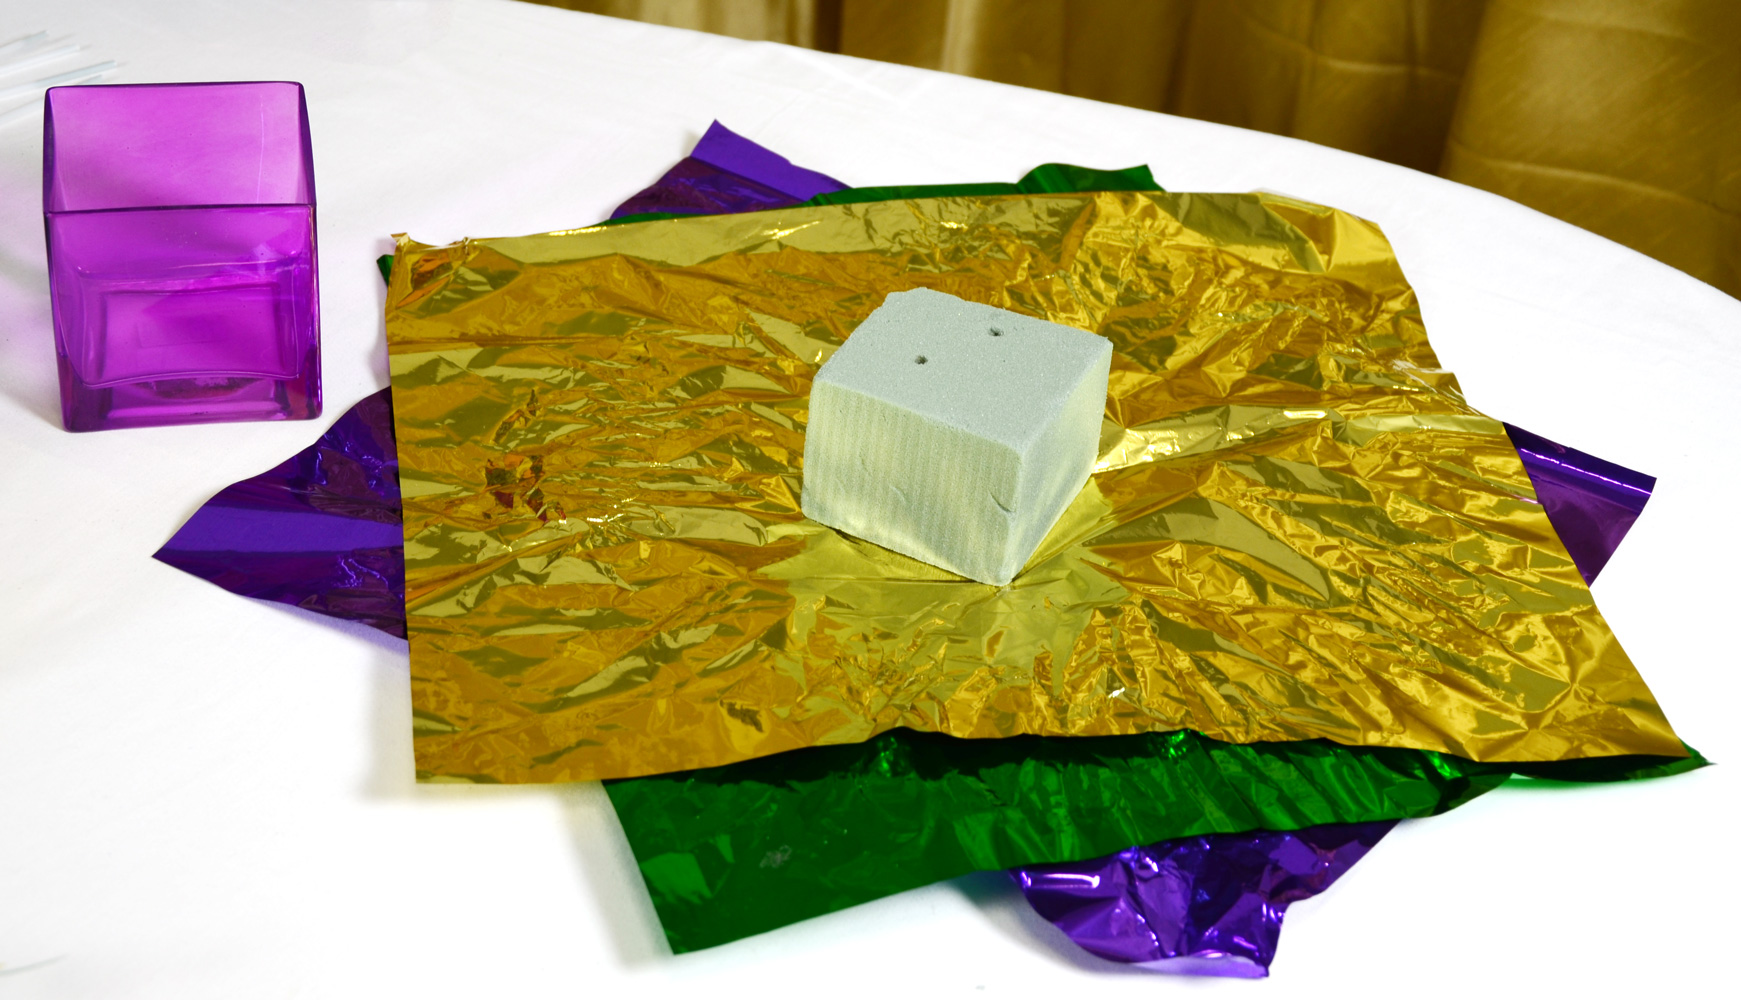
Cover floral foam with tissue
Use a piece of floral foam cut into the shape of your vase. If you are using a clear container like this one, use the mylar tissue to conceal the green floral foam.

Insert foam into vase
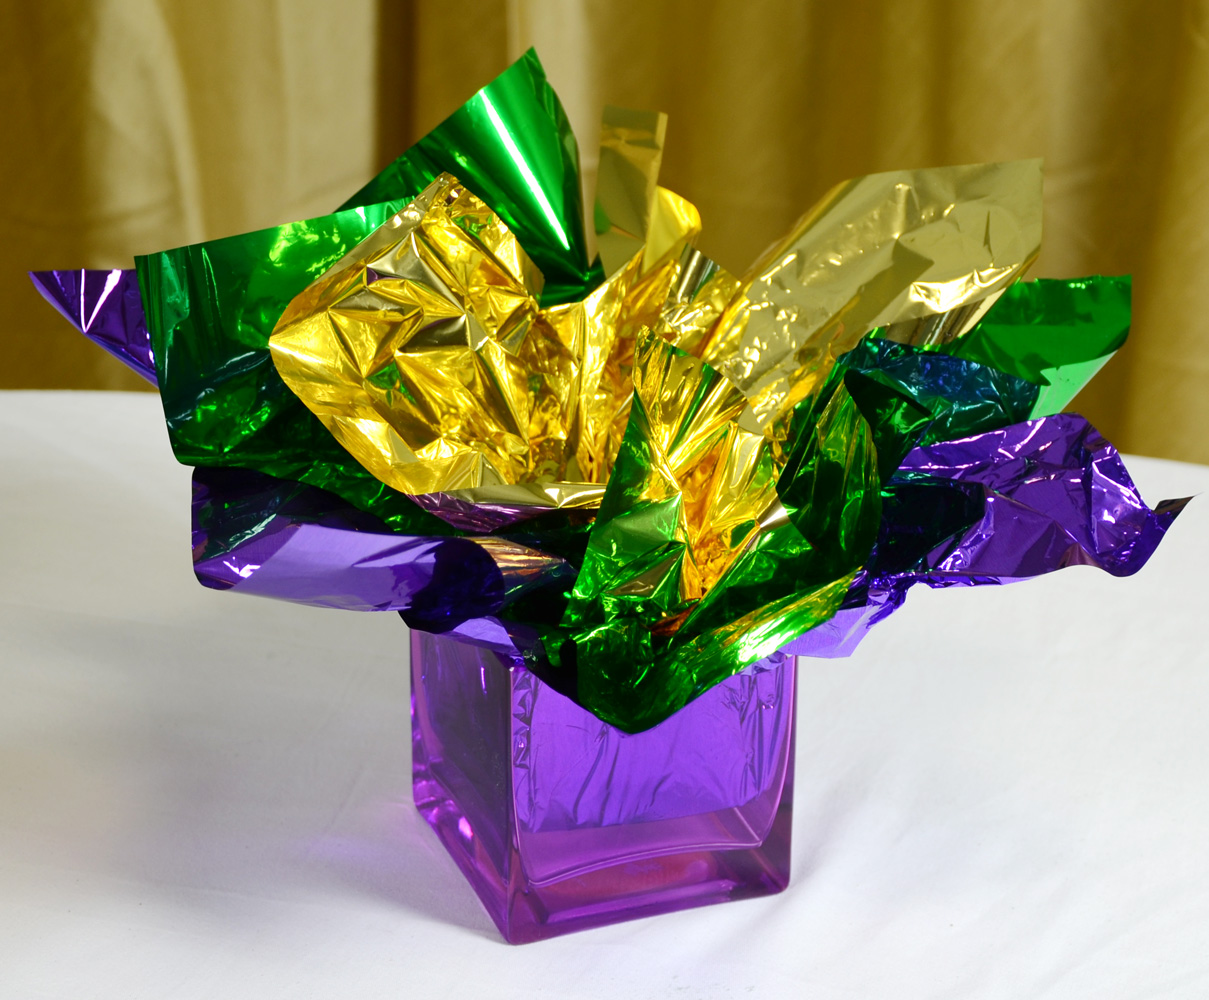
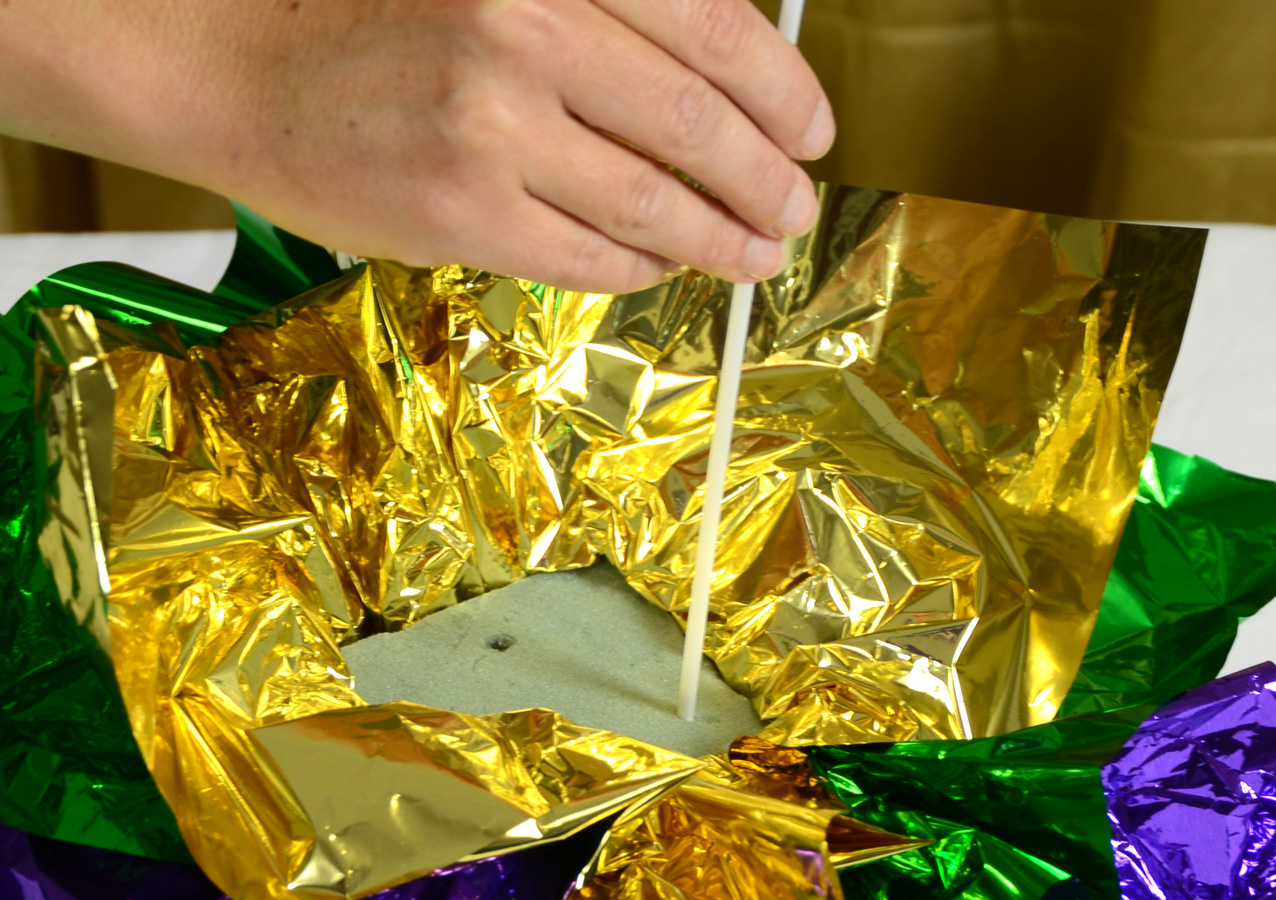
Layer three (3) half sheets of mylar tissue under the floral foam and push the floral foam into the container.

Balloons sticks in foam
Insert each of the balloon sticks into the floral foam.

Balance colors of balloons
Balance the three colors in the arrangement. Cut some of the sticks down to shorter heights so you can vary the levels of the balloons.

Star picks in finished balloon centerpiece
Add in the three metallic star picks around the arrangement. Fluff the tissue up and over the balloon sticks, hiding the green floral foam.

Optional sequin mask
OPTIONAL: Add in mask or other floral picks for added interest. This is a great way to bring in a theme for an event.


With simple supplies and inexpensive air filled balloons, these festive centerpieces can transform a large space on a small budget. By changing the color scheme and floral accents this style centerpiece will work for any themed event.

Be sure to SHARE your balloon centerpiece creations with us!

for the supplies shown in these tutorials!