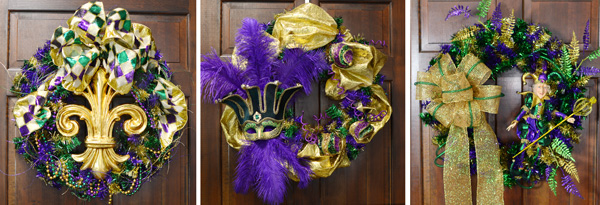
From this basic Mardi Gras wreath form, we created three distinctly different Mardi Gras wreaths. Choose the one you prefer and create your own Mardi Gras masterpiece. Here are the finished wreaths and the steps we took to create each one:
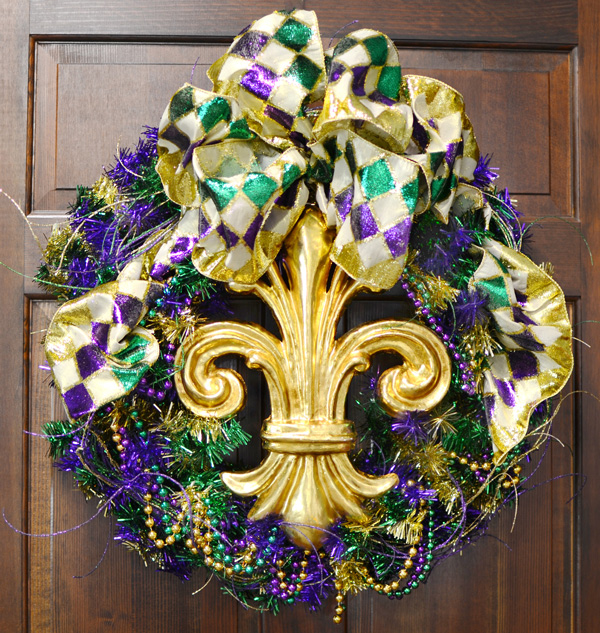
Fleur de Lis Mardi Gras Wreath- Option 1
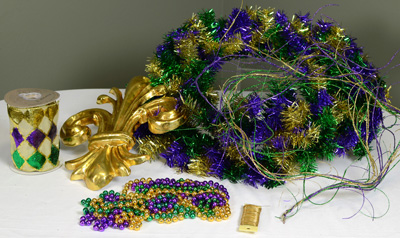
Mardi Gras Fleur de Lis Wreath Supplies
Pictured are the supplies used for this Fleur de Lis Gras Wreath. The basic Mardi Gras greenery wreath, a twig Mardi Gras garland, gold floral wire, Harlequin pattern ribbon, paper-mache Fleur de Lis decoration and Mardi Gras beads.

Step 1: Mardi Gras twig garland
For added texture, a glittered twig Mardi Gras garland is layered on the front of the wreath. The natural shape and texture of this twig garland contrast nicely with the wreath base. To add the twig garland, use two wired branches on the wreath. Twist the wired branches together, wrapping around the beginning point of the garland.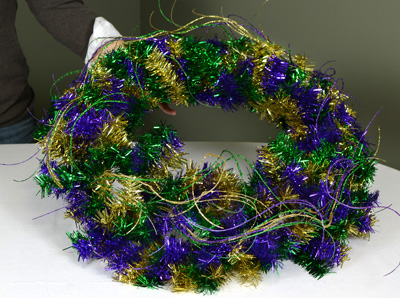
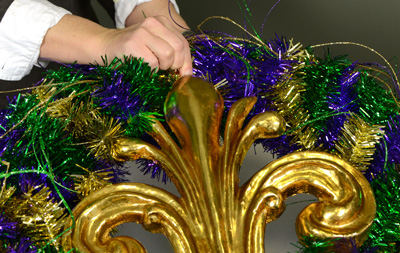
Step 2: Paper-mache Fleur de Lis decoration
Attach the paper-mache Fleur de Lis to the top of the wreath. There is a hook on the back of the Fleur de Lis that you can use to attach it with a wired branch. Thread one of the wired branched through the hook and twist to secure.

Step 3: Mardi Gras beads
Cut the strands of Mardi Gras beads in half to create a long, strand of each color. Traditional purple, green and gold Mardi Gras beads are used here.
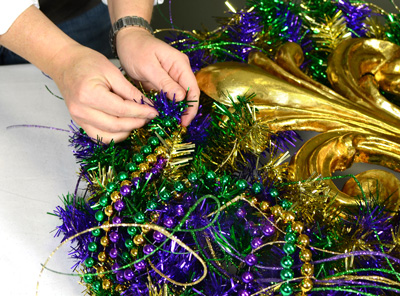
Add the Mardi gras beads to the top of the wreath by twisting the beginning section of beads between two wired branches.
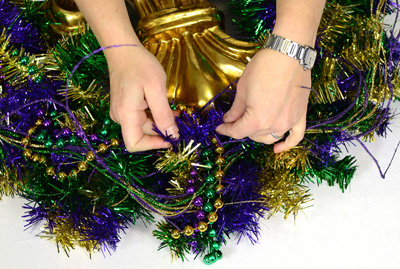
Continue around the wreath. Attach every 5-6" by twisting into two branches to secure the Mardi Gras beads in place until you get back up to the top of the wreath. We used two sets of beads to cover the perimeter of the wreath.
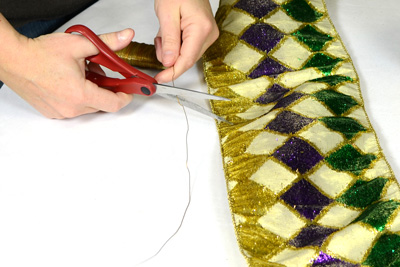
Step 4: Harlequin Ribbon Bow
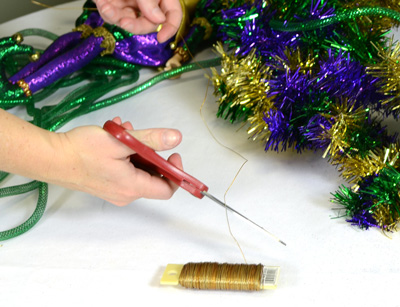
To create the bow, we used this beautiful textured Harlequin ribbon. Cut a small piece of floral/craft wire. The wire needs to be about 1 foot long.

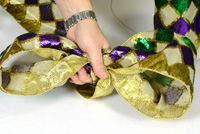
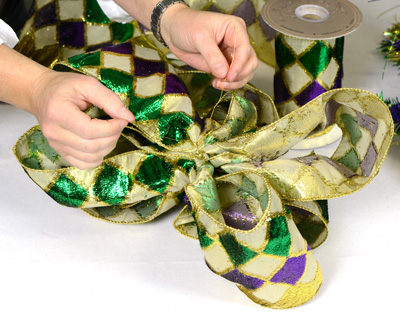
To make the bow form a loop about 5" long. Gather the ribbon in your hand as shown. Form a loop on the other side, matching the size. Keep forming loops and gathering the ribbon in your hand until you have created the size bow you desire. This bow has 8 loops. Using the piece of wire, wrap around the center of the bow. Twist to secure.
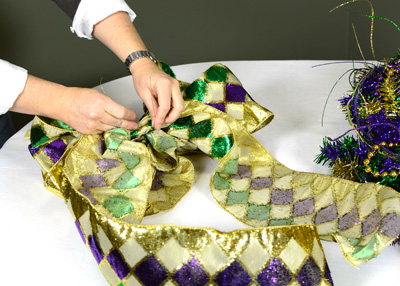
Cut a length of ribbon for the tail of the bow. Attach this to your bow with the wire. Trim the ends of the ribbon .

Step 5: Attach the bow to the wreath
With the end pieces of the wire attach the bow to the top of the wreath and fluff the bow. You're finished!
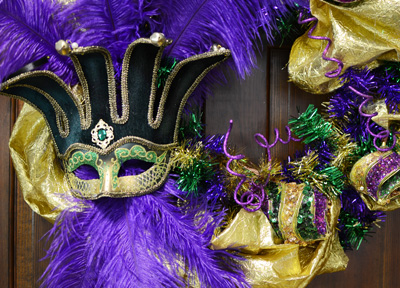
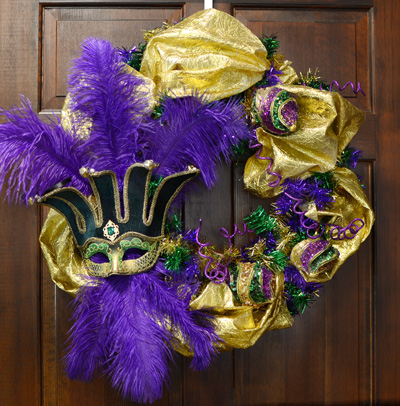
Venetian Mask Mardi Gras Wreath- Option 2
 This Mardi Gras wreath features a plush green velvet Venetian style Jester Mask. The mask features a wired top that resembles a jester hat. These wired points can be adjusted up or down to add height if needed.
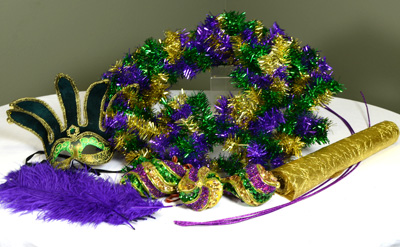
Venetian Mask Mardi Gras Wreath Supplies
Pictured are the supplies we used for this Venetian Mask Mardi Gras Wreath: the basic Mardi Gras greenery wreath, a green velvet Venetian jester mask, purple feathers, gold crushed lame fabric roll, Mardi Gras sequin ornaments and purple glitzy sticks.
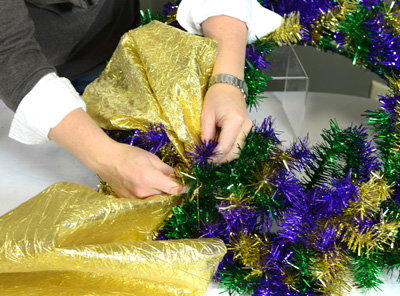
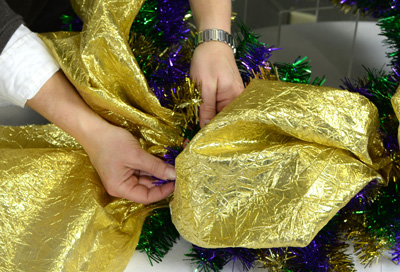
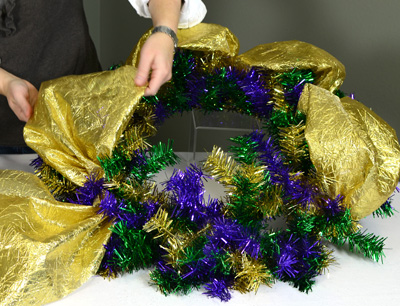
Step 1: Crushed Lame Fabric
Add the crushed lame fabric at the top of the wreath by gathering a section of fabric between two wire branches, twisting to secure.
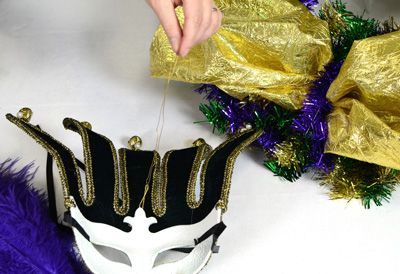
Add the jester mask to the side of the wreath. Use the loop on the back of the mask to hang it on the wreath.
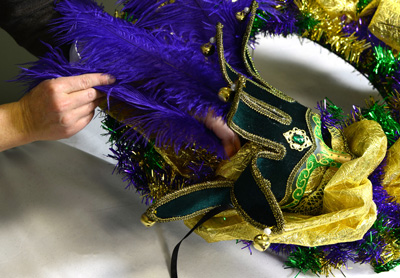
Accent the jester mask with a new texture, fluffy purple feathers. Attach these feathers to the wreath both above and below the mask.
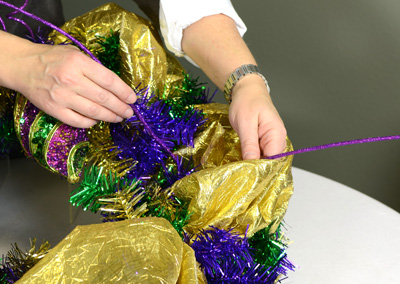
Glitzy sticks are flexible glittered wire sticks that can be bent and shaped into any form you desire. The glitzy sticks come in 36" long pieces. Attach the glitzy stick to the wreath form by threading the glitzy stick onto the wire form and twisting to secure.
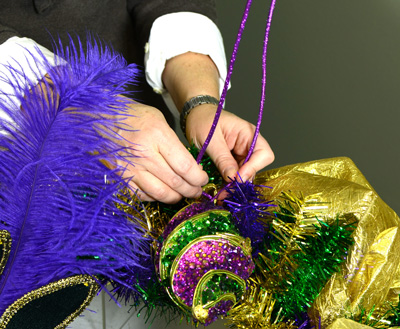
Step 5: Sequin Ornaments
Using the glitzy sticks, attach a sequin Mardi Gras ornaments in the area across from the Jester Mask. Twist the glitzy sticks to secure and curl ends as shown below.

Shape the ends of the glitzy stick into any form you like, zip-zag, loops, etc. We used 3 standard pencils to form uniform curls. Simply wrap the glitzy stick around the pencils to form circles. The wired glitzy stick will retain this curly shape once the pencils are removed.
Attach the other sequin ornaments with glitzy sticks around the wreath to balance out the Jester Mask on the other side of the Mardi Gras wreath. Now, this wreath is complete!
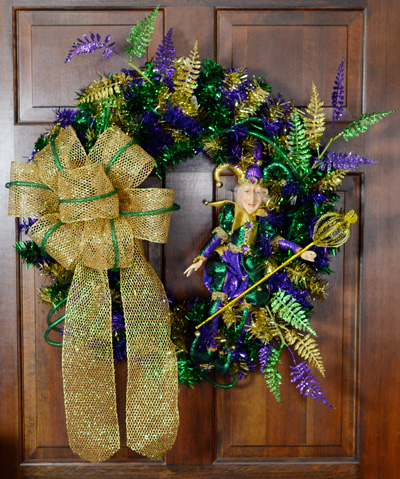
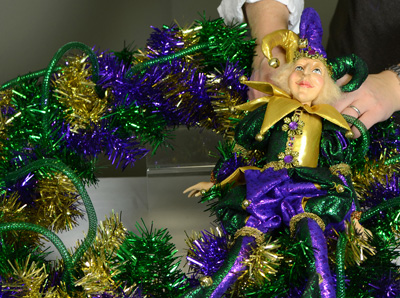
Mardi Gras Jester Doll Wreath- Option 3
This pretty large jester Mardi Gras doll was the inspiration for this wreath. Such a pretty doll deserves a place of honor. What better place than your front door?

Mardi Gras Jester Doll Wreath Supplies
Here are the supplies we used for this wreath: the basic Mardi Gras greenery wreath, large 18" Jester Mardi Gras Doll, gold sequin scepter, deco flex green tubing, gold glitter mesh ribbon, gold floral wire and three purple, green and gold glitter ferns sprays.
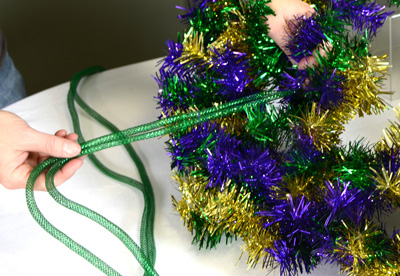
Step 1- Deco Flex Tubing
For a different texture, we added this fun flexible tubing around the wreath. This deco flex product is made of the same material as our popular poly deco mesh, but here it is formed into tubes that you can use as ribbon, garland or floral accents. We doubled the deco flex tubing and attached two at a time. Start at the top of the wreath and attach the deco flex tubing in between two wire branches, twist to secure.
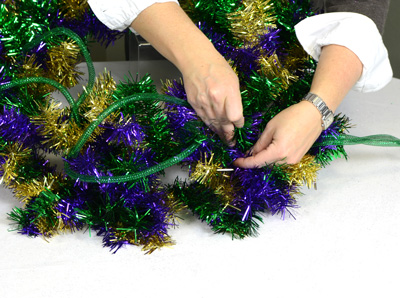
Continue securing the deco flex tubing around the wreath, about 6-8" apart. End at the top where you began.
Step 2: Mardi Gras Jester Doll.
Cut a 12" long piece of gold floral wire.
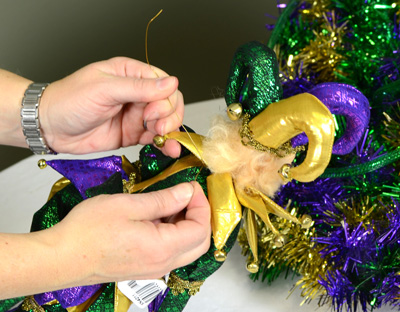
Wrap this wire around the body or neck of the jester doll and twist to tighten.
Use the wire to attach the doll to the frame of the wreath.
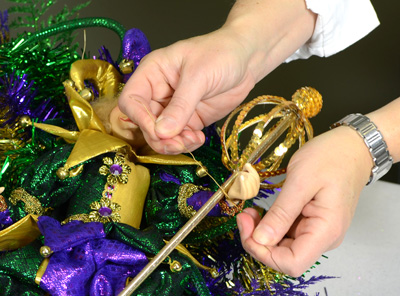
Step 3: Gold sequin scepter
Use another piece of wire to attach the gold scepter to the doll's hand.
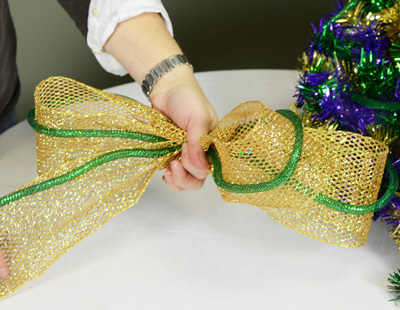
Step 4: Make the bow
Using both the green deco flex tubing and the gold glitter mesh ribbon, create a bow by making equal size loops. Gather the middle section in your hand as you go.
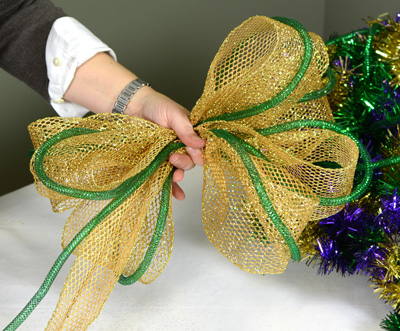
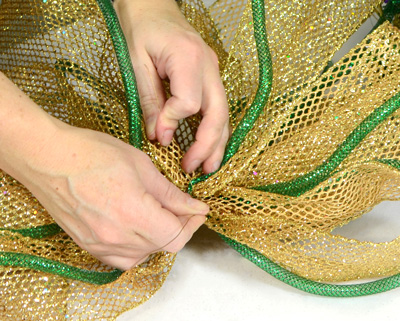
Continue making loops until you have created the size bow you desire. Secure the middle section with the gold craft wire. Attach the bow to the side of the wreath with the remaining wire pieces.

Step 4: Faux Glitter Mardi Gras Fern
Add the purple, green and gold faux fern floral sprays around the wreath as needed.
We used groups of 3 fern sprays together for more impact. With the fern attached, the wreath is now complete!
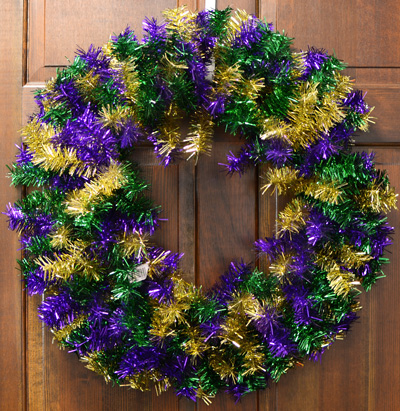
From the basic Mardi Gras greenery wreath form

to three creative Mardi Gras wreaths,

we hope you found something to inspire you!
If you are interested in making any of these wreaths, links to the products used are located through out the post. Simply click on the product name and it will bring you to the product page where you can purchase the item at Mardi Gras Outlet.